
Nutella Tiramisu Cake is proof that we often carry a heavy, unnecessary expectation that baking for our families has to involve hours of complex work to be truly meaningful.
Growing up in Sanremo, I watched my Nonna spend afternoons crafting traditional Italian baked goods, from delicate pizzelles to elaborate ricotta desserts. But I also remember her laughing as she wiped cookie crumbs off the counter, telling me that the magic wasn't in the labor, but in the love shared around the table.
This cake is exactly that kind of magic. No oven, no fuss, just cool cream, crushed cookies, and layer after layer of chocolate-hazelnut dreaminess that tastes like it took all day, when really, most of the work happens in your refrigerator while you go live your life.
You don't have to spend your entire Sunday in the kitchen to give your children a beautiful memory. Sometimes, the most profound joy comes from a simple, shared slice of cake, which is exactly why I will always keep gorgeous cakes at the very heart of the recipes we share.
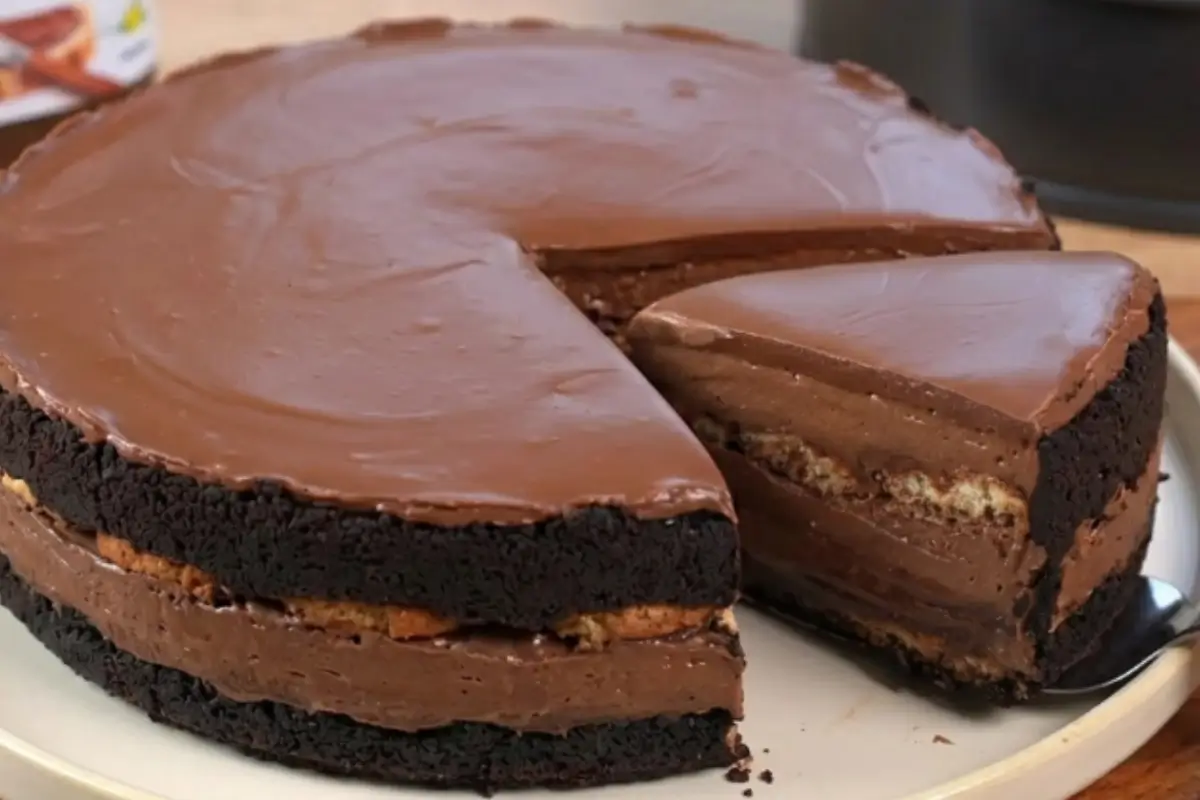
Dreamy Nutella Tiramisu Cake
Ingredients
Method
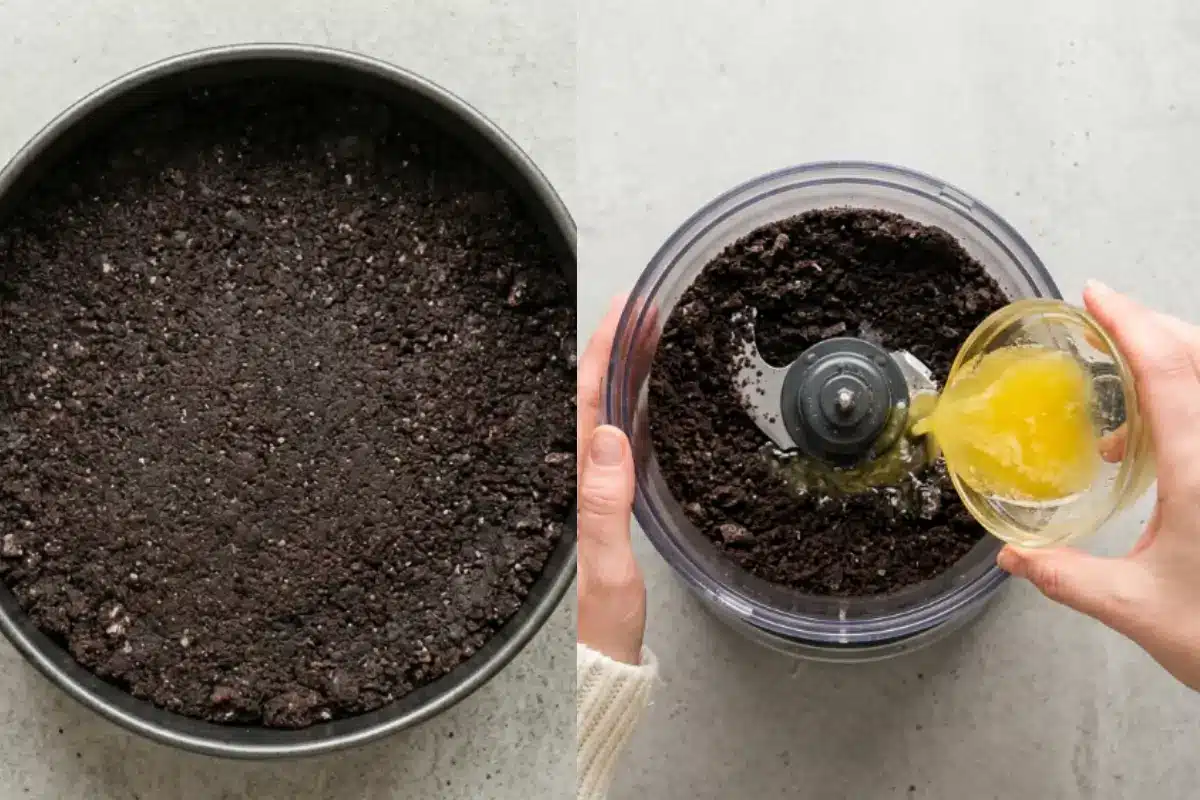
- In a food processor, blend 30 whole chocolate sandwich cookies until they form fine crumbs. Once crushed, mix them with the unsalted melted butter.
- Press the mixture firmly into an 8-inch (20 cm) springform pan. Bring the cookie mixture from the sides to the bottom of the pan to create a solid base. Refrigerate this while you prepare the rest of the recipe.
- Whip the heavy whipping cream with the powdered sugar on high speed until it reaches soft peaks.
- In a separate mixing bowl, combine the mascarpone cheese with the cream cheese and salt. Use a spatula to gently mix them. Add 1 cup of chocolate hazelnut spread and mix until smooth.
- Add the whipped cream into the bowl and fold it carefully using your spatula only until it is just incorporated.
- Prepare the chocolate milk to soak the ladyfingers. In a saucepan, warm up the milk until it starts simmering. Turn off the stove and add 5 tablespoons of chocolate hazelnut spread, stirring until it is completely melted and smooth.
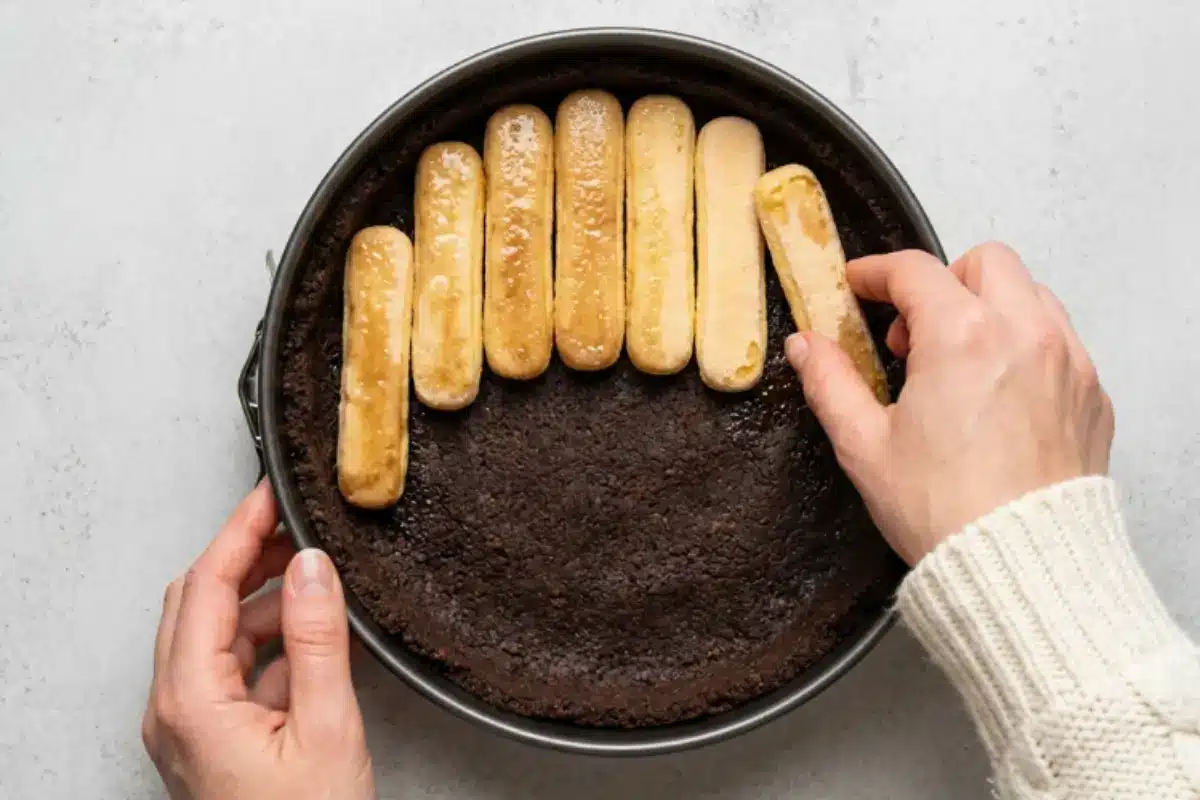
- Start assembling the cake. Soak 8 ladyfingers in the warm chocolate milk for the first layer, placing them directly on top of the chilled cookie crust.
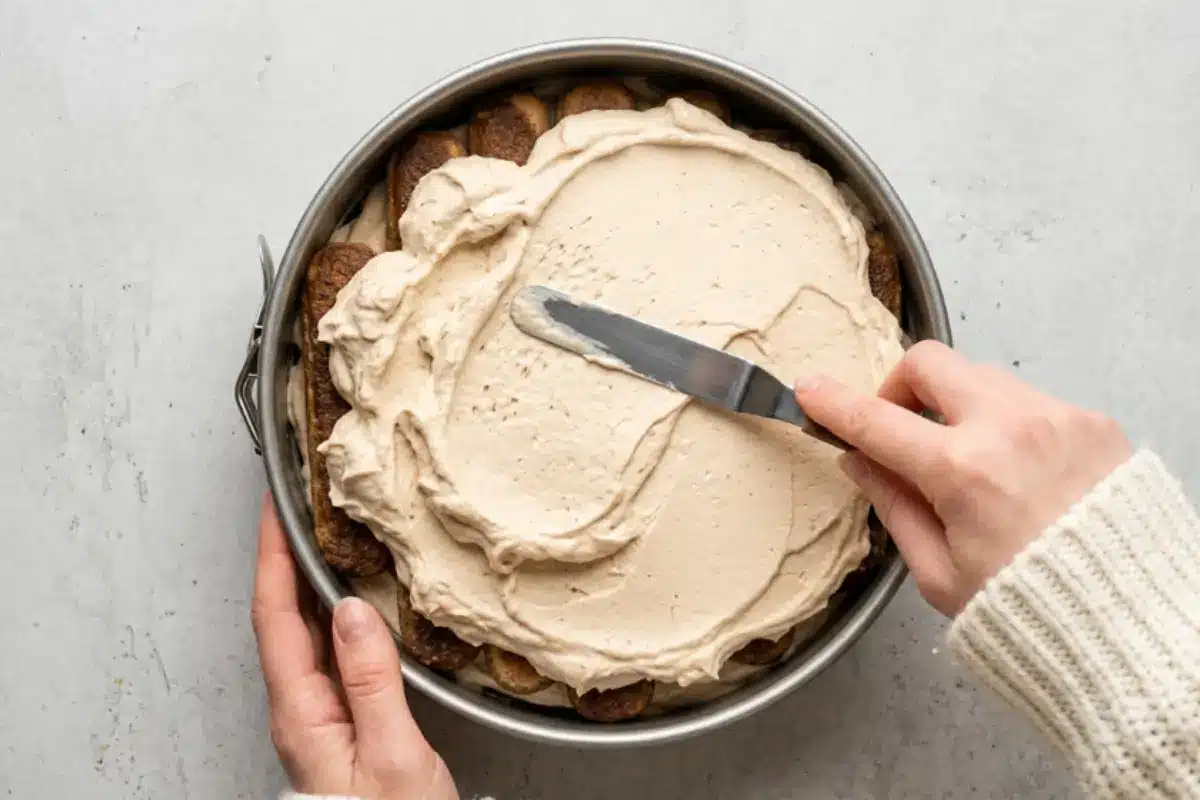
- Spread 3 tablespoons of chocolate hazelnut spread over the ladyfingers. Cover this evenly with half of your prepared filling.
- Add another layer of 7 soaked ladyfingers and cover with the remaining 3 tablespoons of chocolate hazelnut spread. Top it with the rest of the filling, smoothing it out beautifully. Refrigerate the entire pan for 8 hours.
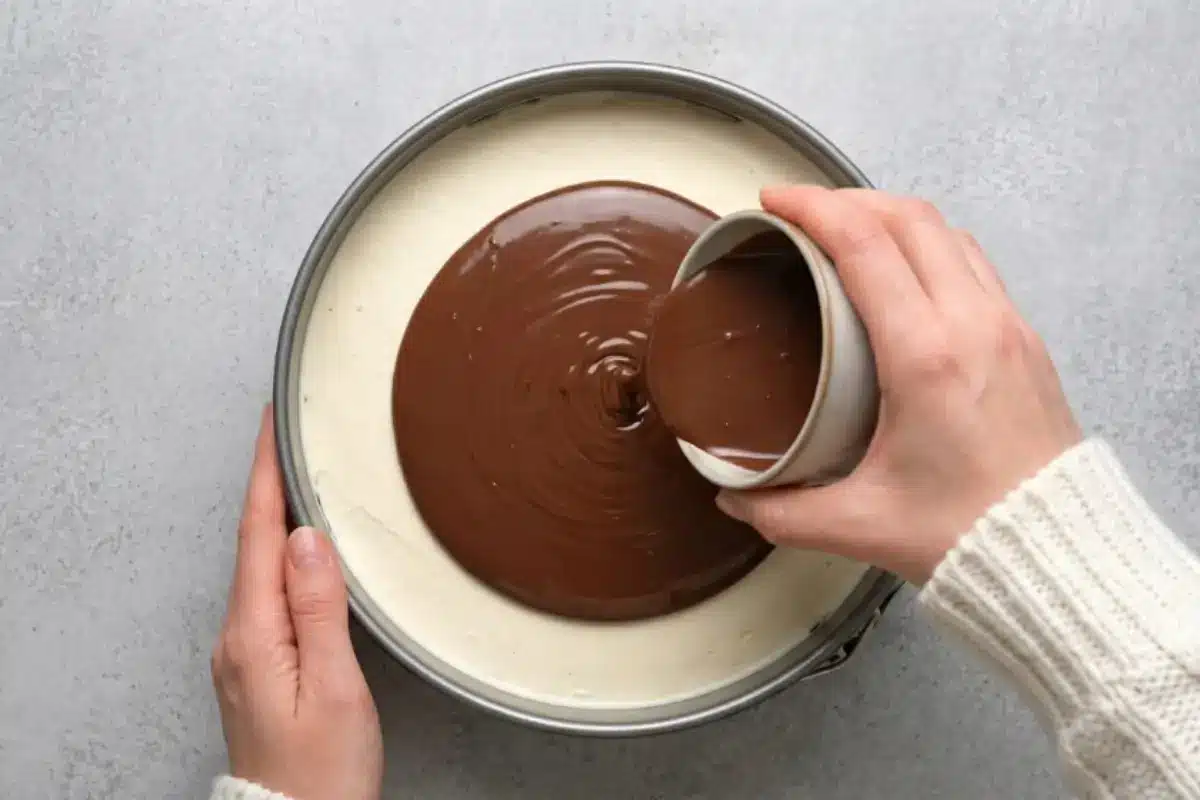
- To decorate, melt the final 1/2 cup of chocolate hazelnut spread and pour it over the chilled dessert. Tilt the pan around so the spread covers the top in an even, glossy layer. Let it sit for 3 minutes before you slice and serve!
Notes
From Nonna's Kitchen to Yours
Here's the part that always surprises people: a cake this cherished doesn't need a single egg cracked or a single oven mitt. It needs a cold bowl, a little patience while it chills, and a jar of chocolate hazelnut spread.
If you've ever felt your stomach drop watching a "simple" recipe turn into a three-hour ordeal, take a breath this one was built for the opposite of that. It's the kind of no-fail dessert you can start after the kids go down for a nap and pull out, glossy and gorgeous, in time for dessert tomorrow.
The Key Ingredients For Nutella Tiramisu Cake And Why They Matter
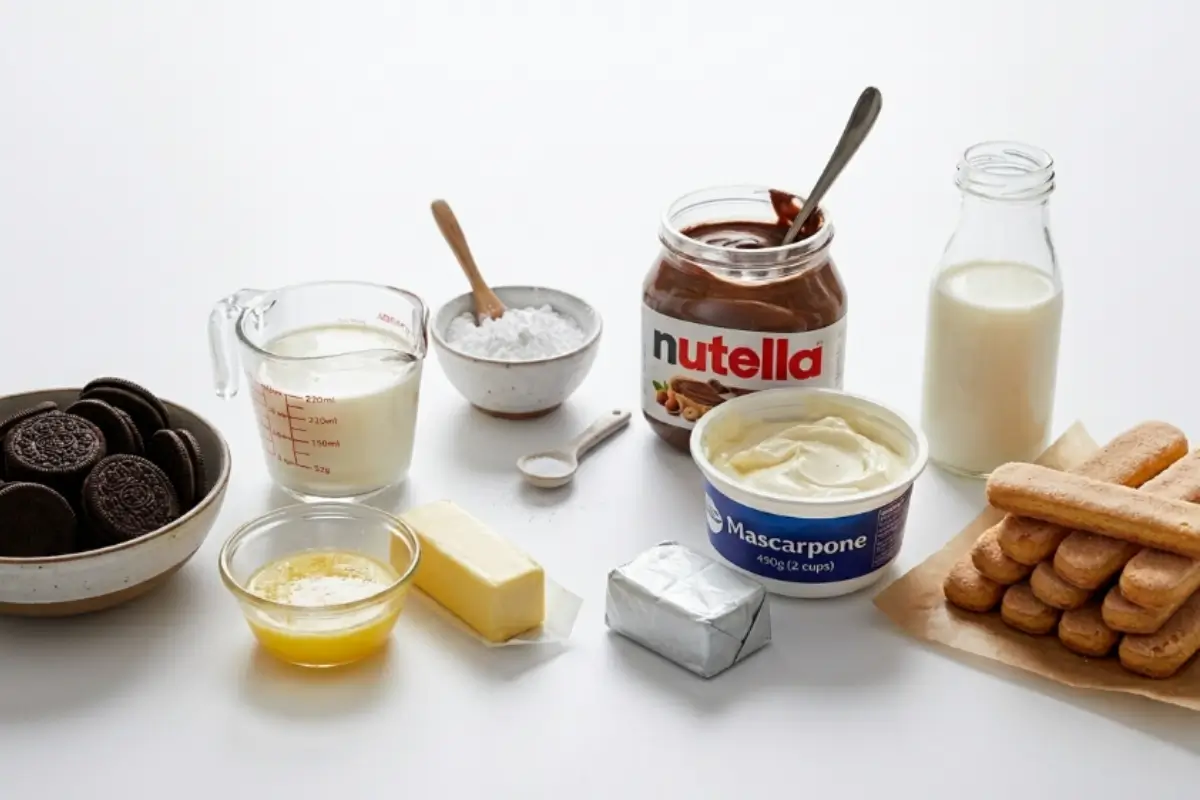
Let’s walk through this together every ingredient here is doing honest work.
Chocolate sandwich cookies (30 whole, about 300g): These become your crust. Blitz them fine and even, so your base holds together in a clean, sliceable layer rather than crumbling apart.
Melted unsalted butter: Just enough to bind the crumbs into something sturdy. Press it firmly, all the way up the sides, so every bite has that little bit of crunch.
Heavy whipping cream, whipped to soft peaks: This is what gives your filling its cloud-like lightness. A cold bowl is your best friend here more on that in a moment.
Mascarpone cheese and cream cheese: Mascarpone brings that soulful, silky richness tiramisu is known for, while the cream cheese helps the filling hold its shape beautifully once sliced, since we're not using eggs to set it.
If mascarpone is hard to find or pricey where you are, a well-drained, full-fat cream cheese can stand in for part of it, though you'll lose a little of that signature richness.
Chocolate hazelnut spread: The heart and soul of this whole dessert. It goes into the filling, into the soaking milk, between the layers, and over the top — so don't scrimp.
Ladyfingers: These soak up the warm chocolate milk and become soft, tender, almost cake-like once chilled the true bridge between the crunchy crust and the creamy filling.
A note for gluten-free households: gluten-free ladyfingers and gluten-free sandwich cookies exist and swap in beautifully here, cup for cup, nobody at the table will know the difference.
The Golden Rule Step-by-Step Instructions
You're doing great so far, and this next part is where the cake really starts to come together, so let's take it slow.
Build your crust. In a food processor, blend the 30 chocolate sandwich cookies until they're fine, even crumbs you're looking for the texture of wet sand, no big chunks left behind. Stir in the melted butter until every crumb looks glossy and moistened.
Press and chill. Press the mixture firmly into an 8-inch springform pan, working it up the sides as well as across the bottom, so you have a real, solid base to build on. Pop it in the fridge while you move on a cold crust holds together far better than a warm one.
Whip your cream. Whip the heavy cream with the powdered sugar on high speed until it holds soft peaks. This is where a cold, dry, spotless bowl makes all the difference. I learned the hard way that even a trace of grease or a lukewarm bowl will fight you every step of the way.
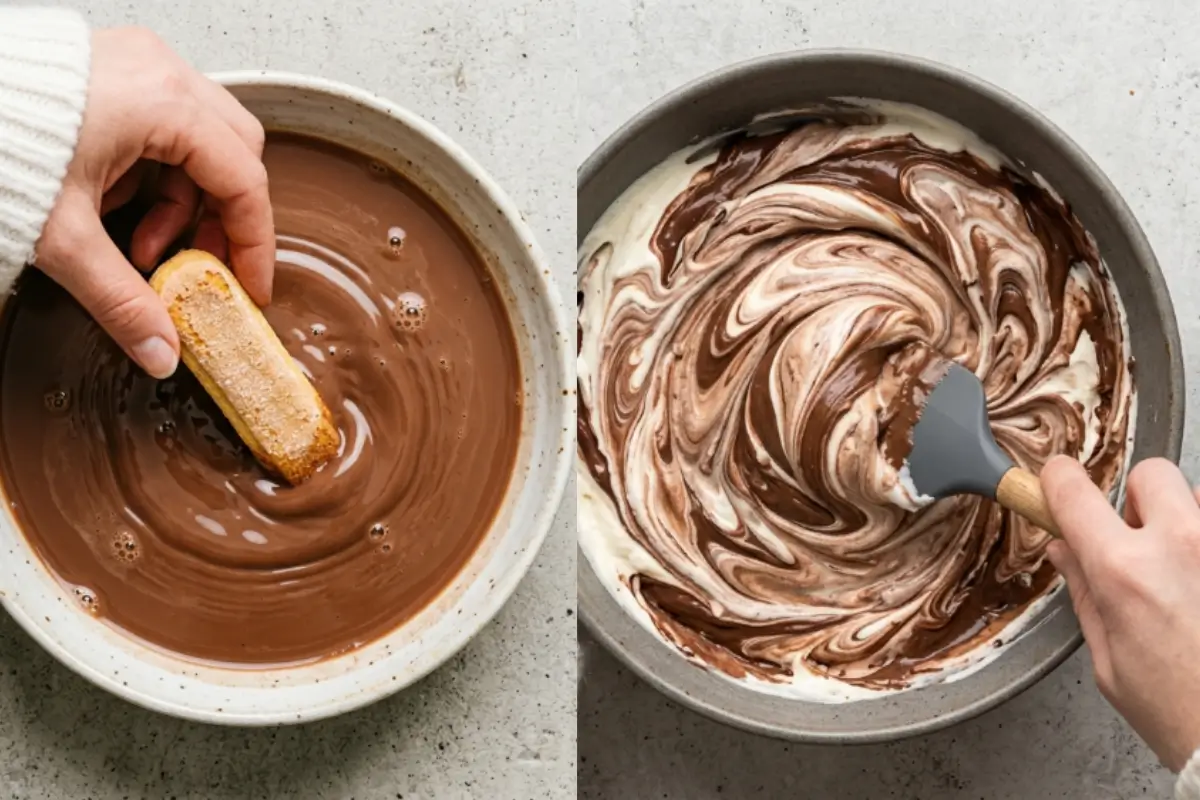
Build the filling base. In a separate bowl, gently combine the mascarpone, cream cheese, and salt with a spatula, not a mixer. Mascarpone is delicate, and overworking it is the number-one reason filling turns grainy instead of silky. Add the chocolate hazelnut spread and mix just until smooth.
Fold, don't stir. Add your whipped cream to the mascarpone mixture and fold it in gently, turning your spatula from the bottom up, just until no white streaks remain. If it looks a little loose at this stage, that's completely normal it firms up beautifully once chilled.
Make your soaking milk. Warm the milk in a saucepan until it just starts to simmer, then take it off the heat and stir in the chocolate hazelnut spread until it's completely smooth and glossy. Let it cool slightly so it's warm, not hot, before the next step.

Soak and layer. Dip 8 ladyfingers into the warm chocolate milk a quick dunk on each side is all you need not a long soak, and lay them over your chilled crust.
Spread and fill. Spread 3 tablespoons of chocolate hazelnut spread over that first layer of ladyfingers, then cover it evenly with half of your filling. Smooth it out with the back of your spoon; it doesn't need to be perfect, just even.
Repeat and refrigerate. Add a second layer of 7 soaked ladyfingers, the remaining 3 tablespoons of spread, and the rest of your filling, smoothing the top as best you can. Now comes the hardest part: walking away. Refrigerate for a full 8 hours, or overnight, so everything can set properly. You're closer than you think.
The glossy finish. Melt your last half cup of chocolate hazelnut spread and pour it over the chilled cake. Tilt the pan gently so it flows into an even, glossy layer, right to the edges. Let it sit for about 3 minutes before you unmold, slice, and serve.
You'll know it's ready when the top is set firm to a light touch and doesn't wobble in the center — that's your cue that this cake has had enough time to become sliceable, not soupy.
Why This Nutella Tiramisu Cake Works
This is where the magic starts to happen, and it isn't luck it's a few small choices working together.
No eggs, no oven, no anxiety. Because the filling is set by chilling rather than baking, there's no window of "did I bake it too long?" to worry over.
Cream cheese steadies the mascarpone. It's the quiet trick behind why this filling slices cleanly instead of oozing most versions online skip it and end up with a softer, harder-to-cut layer.
The cold crust matters more than people think. Chilling it before you build on top means your base won't soften and separate when you slice.
A full 8 hours isn't a suggestion. This is the number-one reason home bakers online end up with a cake that won't hold its shape when they rush the chill.
Folding, not stirring, protects the air you worked to whip into your cream, which is what gives every slice that light, cloud-like bite instead of a dense one.
Elena's No-Fail Tips
Here's the trick I learned the hard way, gathered up so you don't have to learn it the same way I did.
Why did my filling turn grainy or curdled?
This almost always comes down to overmixing the mascarpone, or mixing it while it's too warm. Mascarpone has a very high fat content, so it can split if you beat it hard or too long.
Stir it gently with a spatula, just until smooth, and keep your ingredients cool rather than fully at room temperature. If it does start to look grainy, stop immediately and fold in a spoonful of your whipped cream by hand it often brings things back together.
Can I prep this ahead, or freeze it?
Yes, and honestly, this cake is better for it. It needs its full chilling time anyway, so making it a day ahead is not just allowed, it's ideal for anyone entertaining. You'll find full freezer notes just below.
Why is my crust crumbling when I slice?
If your crust falls apart, it usually didn't chill long enough before you started layering, or the crumbs weren't blitzed fine and even. A cold, well-packed crust and a warm knife (more on that below) will give you clean, magazine-worthy slices.
Do I have to use a springform pan?
A springform pan makes unmolding this cake simple and clean, which matters for a layered, no-bake dessert like this one. If you only have a regular cake pan, line it well with plastic wrap, leaving long overhangs on the sides, so you can lift the whole cake out once it's fully set.
Saving a Little Joy for Tomorrow: Storage, Freezing & Make-Ahead Notes
This part is simpler than it looks, and it's genuinely good news for anyone planning ahead.
In the fridge: Once sliced, store this cake covered in the refrigerator for up to 4 days. The flavor actually deepens a little by day two, which makes it a lovely make-ahead choice for a dinner party or a holiday table.
In the freezer: This cake freezes beautifully. Wrap the whole cake, or individual slices, tightly in plastic wrap and then foil, and freeze for up to 2 months. Let it thaw in the refrigerator overnight before serving so the texture stays silky rather than watery.
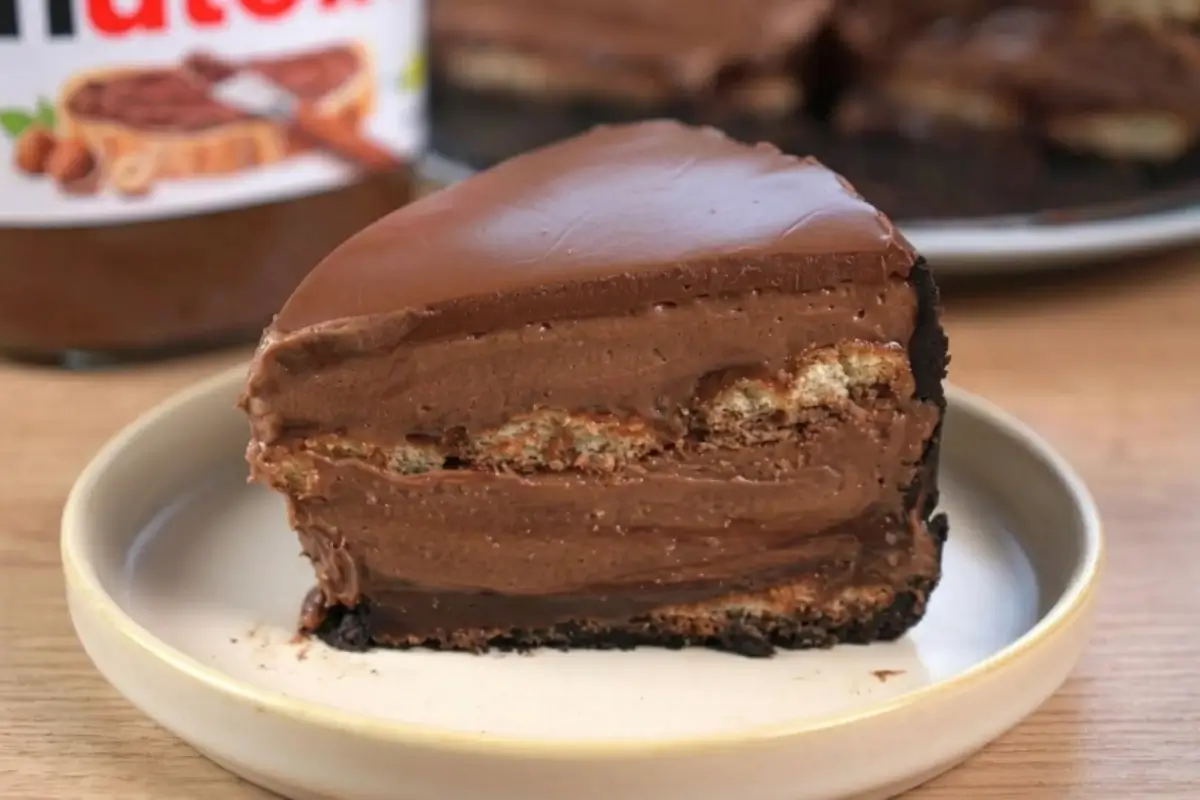
For clean slices: Run a sharp knife under warm water and wipe it dry between each cut. This one small habit is the difference between a messy slice and the kind of clean, glossy layer you see in the photos.
This is what I make when I want something that looks like I fussed over it, but really, I just let the fridge do the work.
Making Sweet Memories
Every time I slice into this cake, I'm back in Nonna's kitchen in Sanremo, watching her wipe crumbs off the counter and laugh about how none of it needed to be perfect to be loved.
This cake carries that same spirit: cool layers, a little patience, and a whole lot of heart, no oven required.
You don't have to be a pastry chef to give your family something cherished. You just need a cold bowl, a little chocolate hazelnut spread, and the willingness to let the fridge do the hard part while you do the important part being together.
That's the whole philosophy behind everything we bake here: joy, not perfection, memories, not masterpieces.
When you think back to the kitchens of your childhood, what is one sweet treat that always made you feel completely at home? I would love to read your cherished stories in the comments below.
[…] the cupcake so the meringue buttercream sits cleanly without soaking in. Nonna always said that the best desserts tell you a story, and the ganache is the sentence that connects the beginning to the […]
[…] It doesn't need to be pretty. Refrigerate for 20–30 minutes until firm to the touch. This is the step that separates a bakery cake from a home cake. […]
[…] ruined this exact batch before I figured this out. I was making a tiramisu-style cake on a hot afternoon and kept adding more powdered sugar, trying to fix the runny frosting, until it […]
[…] your first cake layer on a cake board or plate. Using your main batch of buttercream, pipe or spread a generous […]