
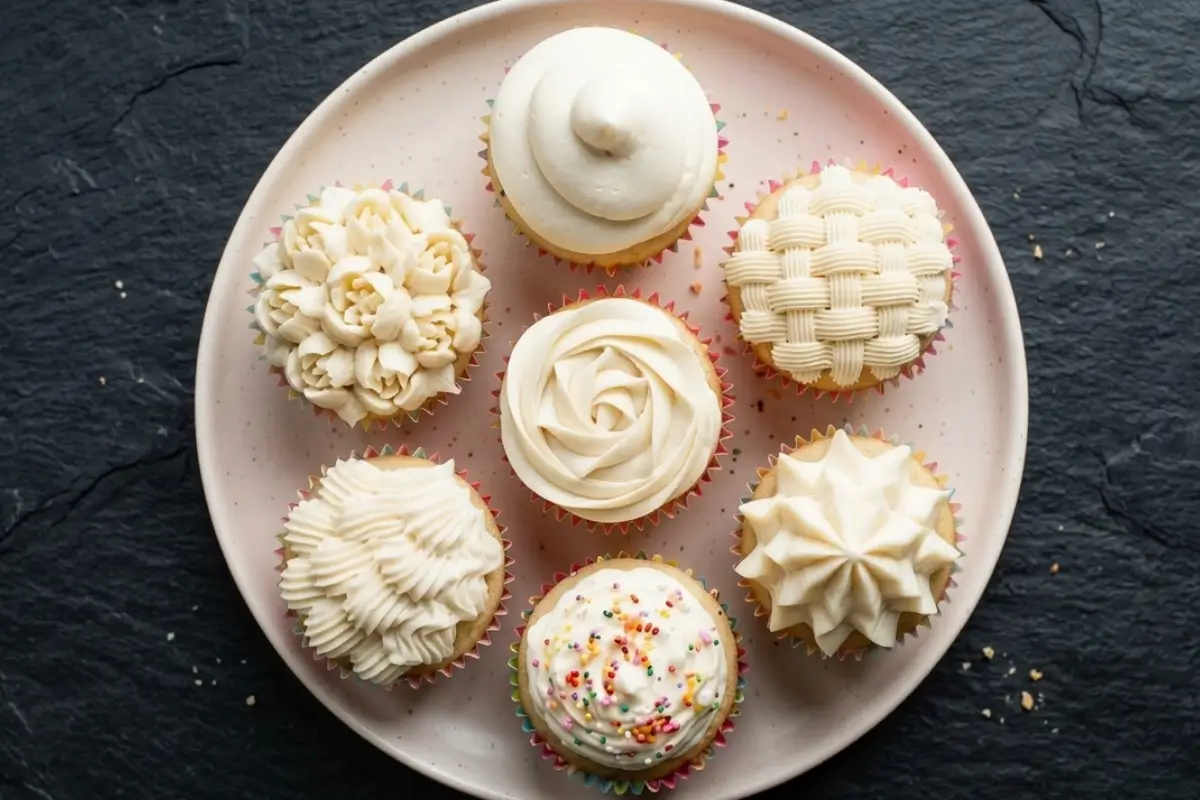
Cupcake Recipes and Piping Guides. I put those two things together on purpose, because in my kitchen, they have always belonged side by side.
I still remember the first time I tried to pipe a cupcake. I had a freshly baked tray of vanilla cupcakes cooling on the counter, a brand new piping bag, and what I thought was enough confidence to carry me through.
I squeezed. The frosting shot out sideways, hit the side of the cupcake, and landed somewhere it had absolutely no business being. I squeezed again. Same result, just bigger.
My Nonna walked in, looked at the tray, looked at me, and said calmly, warmly, with that little half-smile of hers, "Tesoro, nobody's first swirl is a rosette."
She was right. She was always right. And that one sentence was the beginning of everything I know about decorating cupcakes.
If you've ever stood over a tray of perfectly baked cupcakes and felt your confidence drain the moment you picked up the piping bag this is your place. If you've ever wondered which tip to buy, why your frosting keeps sliding off, or how to make a swirl that actually looks like the photos, I have you.
And if you've just been wanting a warm, trustworthy guide that covers both the baking and the decorating, without sending you to fourteen different websites? You've found it.
This guide brings together the cupcake recipes I make again and again, from easy vanilla cupcakes from scratch to molten chocolate lava cupcakes that make dinner guests gasp, and the piping techniques I learned the hard way so that you don't have to.
We'll cover the tools, the tips, the swirl techniques, the troubleshooting, the dietary variations, and a few tricks Nonna would have approved of.
Ready? Let's start from the beginning.
The Cupcake Recipes and Piping Guides
This part is simpler than it sounds. I promise. Think of this section as your cupcake menu. Browse it, save the ones that call to you, and know that every single recipe links to its own full, detailed guide when you're ready to bake.
Not every cupcake day looks the same, and that's exactly why I love them. Some days you want something simple and timeless.
Other days you want a surprise inside, something dramatic enough for a party table, or something everyone at the table, regardless of diet, can eat. Here are the recipes this kitchen keeps coming back to.
Easy Vanilla Cupcakes From Scratch
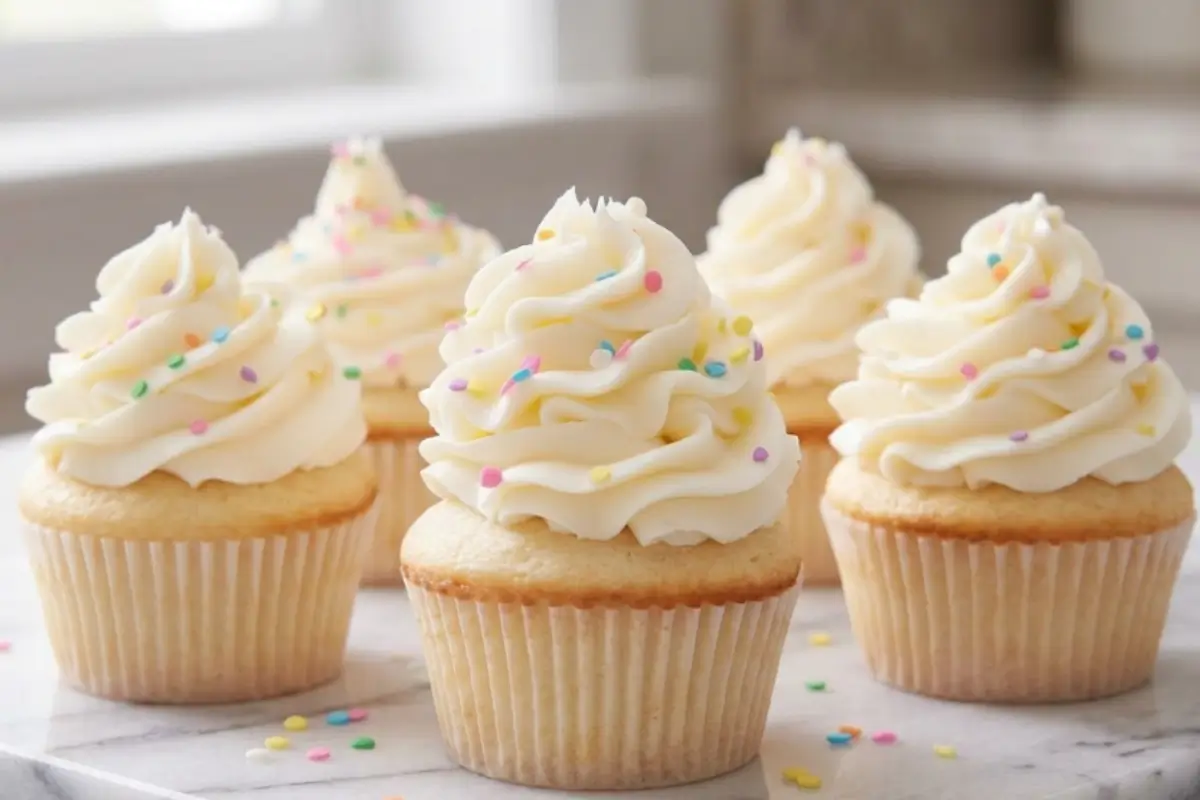
Some recipes are classics for a reason. My easy vanilla cupcakes from scratch have a fluffy, tender crumb that practically melts on your tongue, and they're the single best canvas for practising any piping style.
Whether you're trying the 1M swirl for the first time or building up to a two-tone rosette, I always start with a batch of these.
They're also the recipe I make when someone needs comfort, and I don't know what else to say. A dozen vanilla cupcakes on the doorstep carries something that words sometimes can't.
Keto Lemon Blueberry Cupcakes
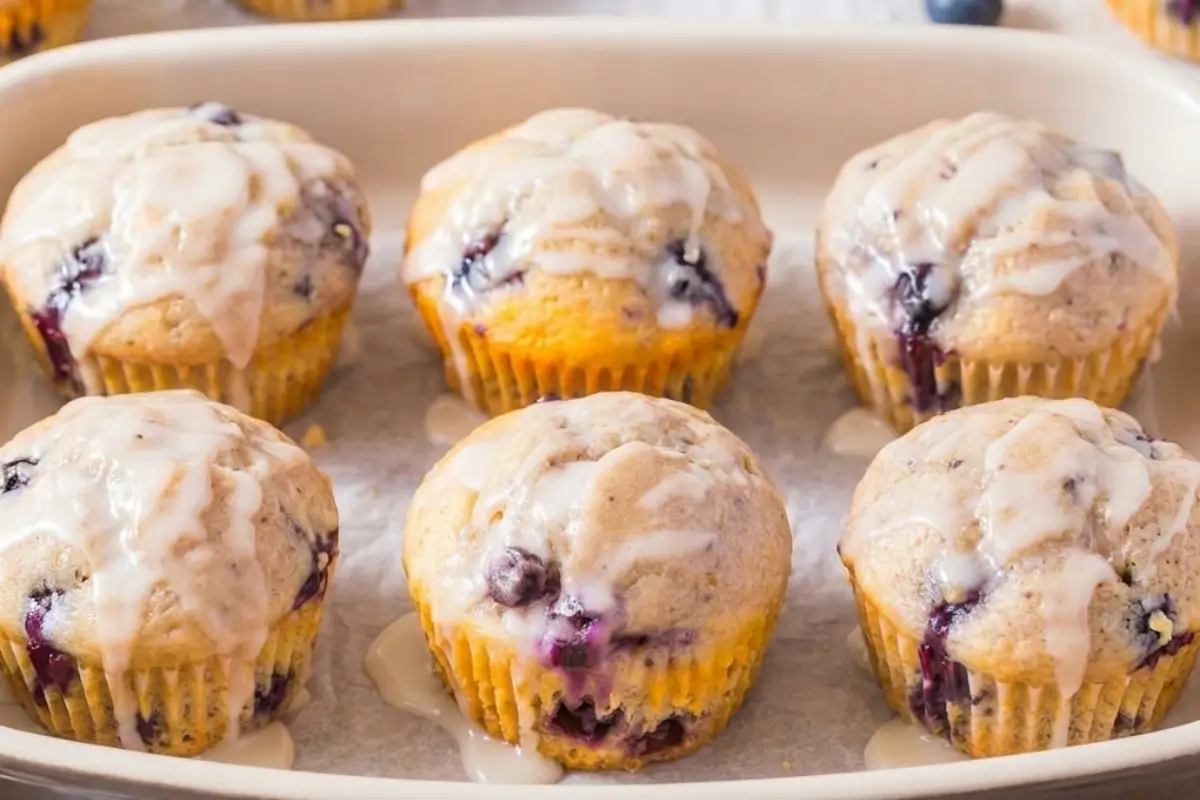
Bright, tangy, and bursting with real blueberry flavour in the frosting, these keto lemon blueberry cupcakes are the ones that surprised me the most. I made them for a friend who was watching her sugar, and her husband, who wasn't watching anything, ate three of them and asked for the recipe.
The almond flour base gives a lovely, slightly dense crumb, and the lemon zest makes the whole kitchen smell like early summer. Not a compromise. Not a substitution. A real crowd-pleaser that happens to be keto-friendly.
Molten Chocolate Lava Cupcakes
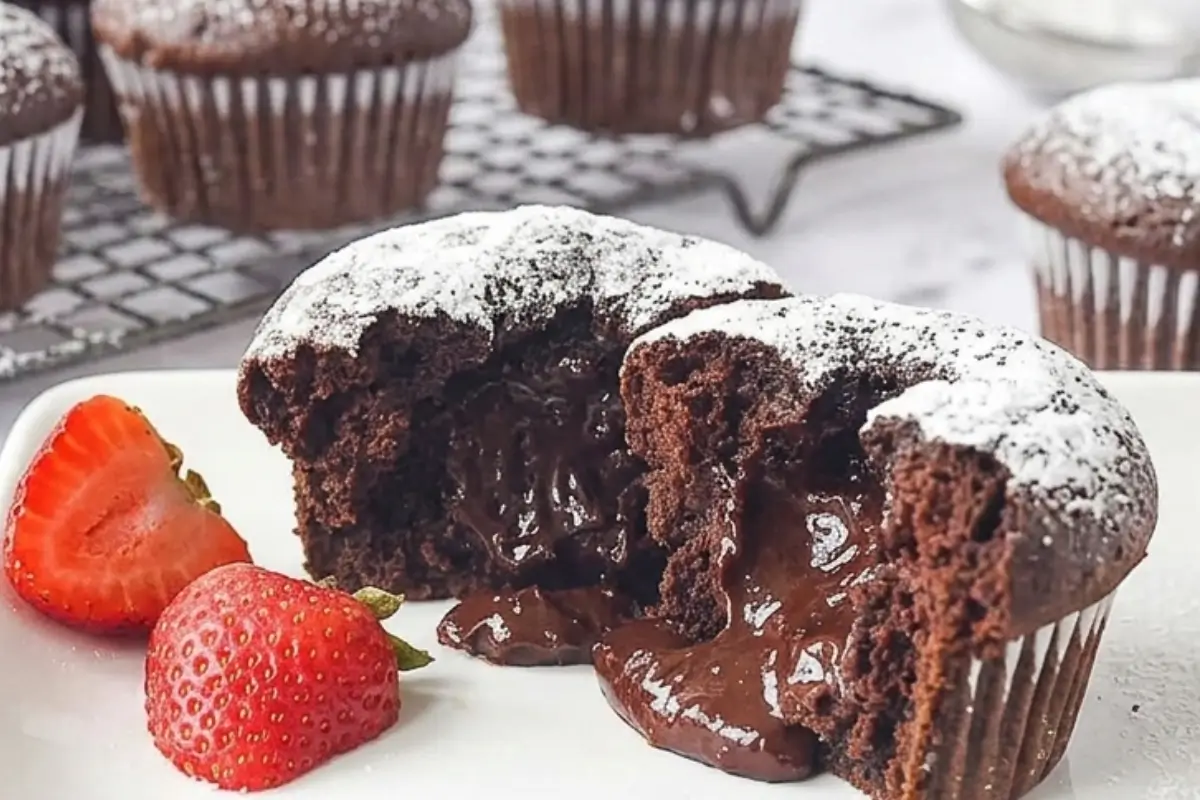
These are the showstoppers. Rich chocolate cake on the outside, a warm ganache centre that flows when you cut in. If you've never brought these to a dinner table, you're missing one of life's great small moments. The room goes quiet. Then everyone asks for another.
The trick is the ganache centre method, not the underbaked approach most recipes use. The difference is that the centre is intentionally placed, not accidentally underdone, and it makes all the difference.
Salted Caramel Filled Cupcakes
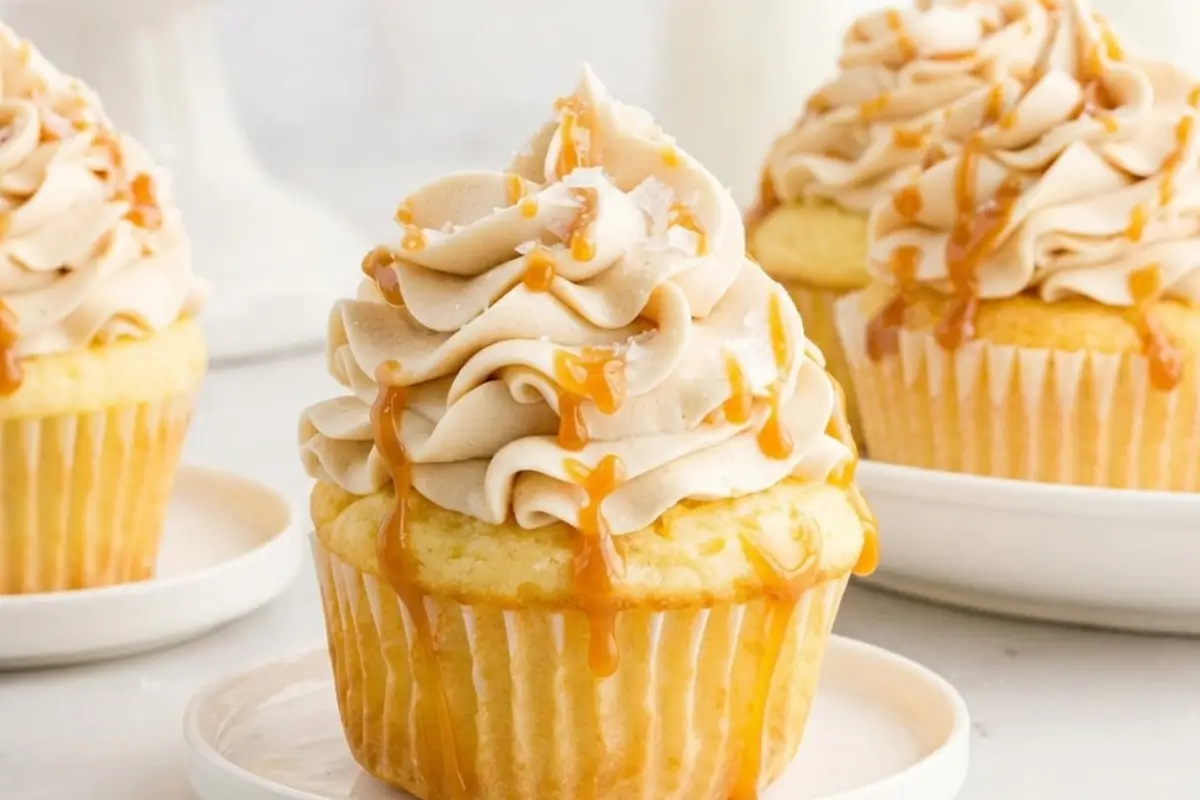
The salted caramel stays inside the cupcake. That's the whole joy of this one. You bite in, and there it is warm, golden, buttery caramel tucked inside the crumb, topped with vanilla buttercream or a swirl of salted caramel frosting.
The filling technique is easier than it sounds (I use a piping bag tip to core the centre cleanly), and once you do it once, you'll want to fill every cupcake you ever bake.
Vegan Vanilla Bean Cupcakes
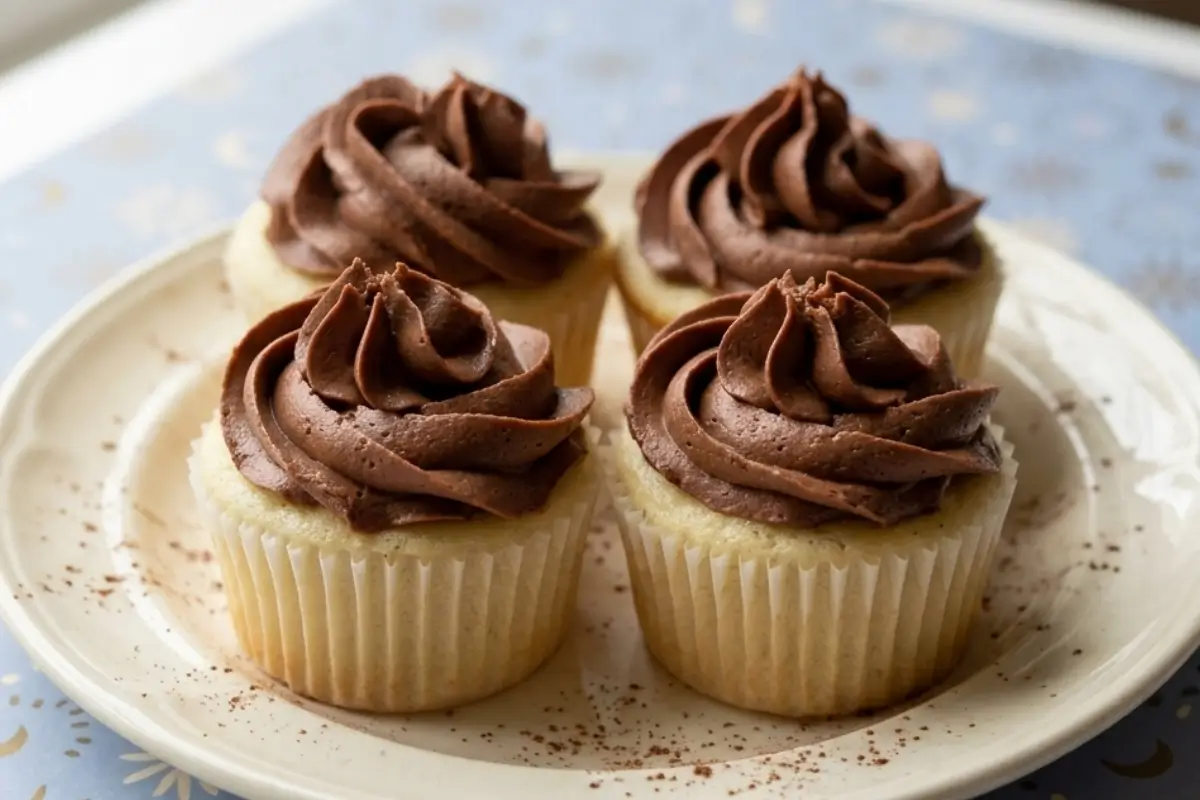
This one started because my friend brought her little girl to a birthday party, and that little girl dairy allergy and all sat at the table watching everyone else eat cake. I couldn't stop thinking about it.
These vegan vanilla bean cupcakes are light, fragrant, and made with ingredients that are easy to find in any grocery store. No one at the table will guess they're dairy-free.
They'll just know they're delicious. Because the best cupcake is the one everyone at the table can enjoy.
8 Spooky Halloween Cupcake Ideas
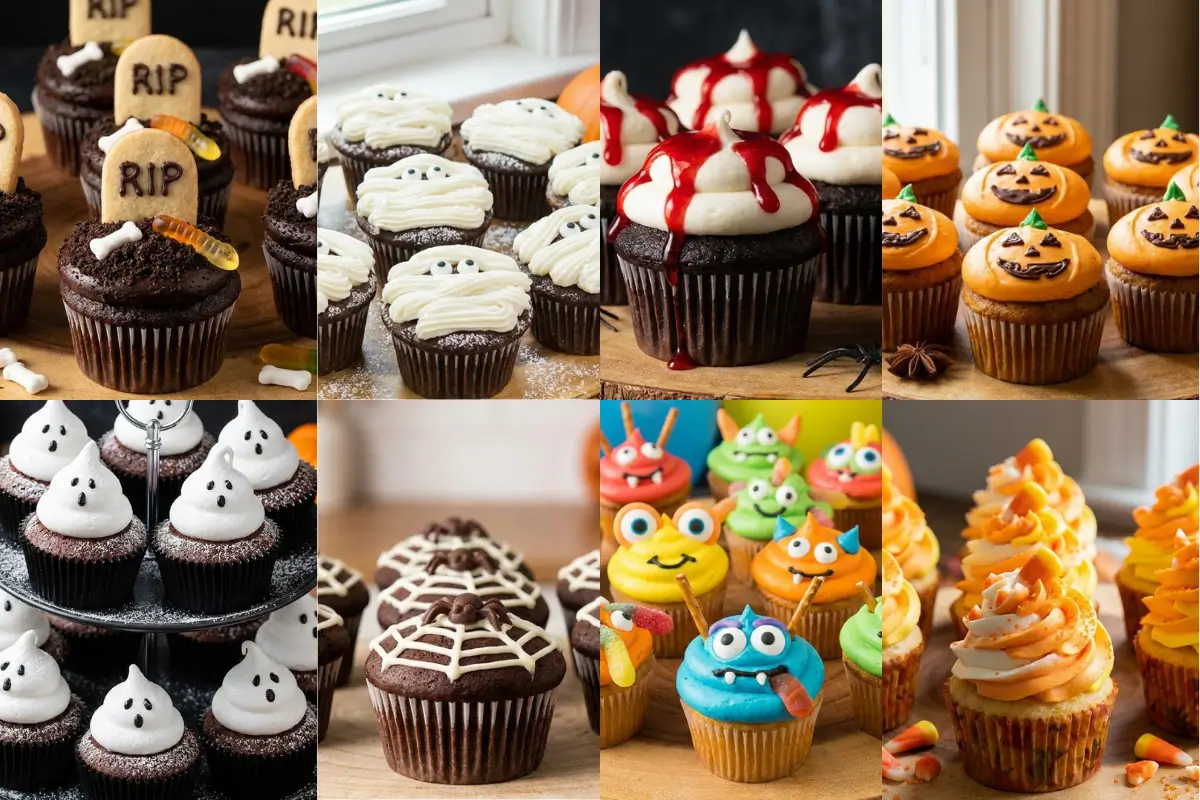
When the occasion calls for drama black buttercream, Mummy faces, cobweb piping, little candy eyes peeking up from the frosting these spooky Halloween cupcake ideas are my most-asked-for seasonal post. And the piping techniques? They are genuinely easier than they look.
Some of the spookiest effects (the classic spider web and the swirled ghost peek) use the same piping tips we'll cover in the very next section. So read on you're already getting ahead.
Your Complete Guide to Cupcake Piping Tips and Techniques
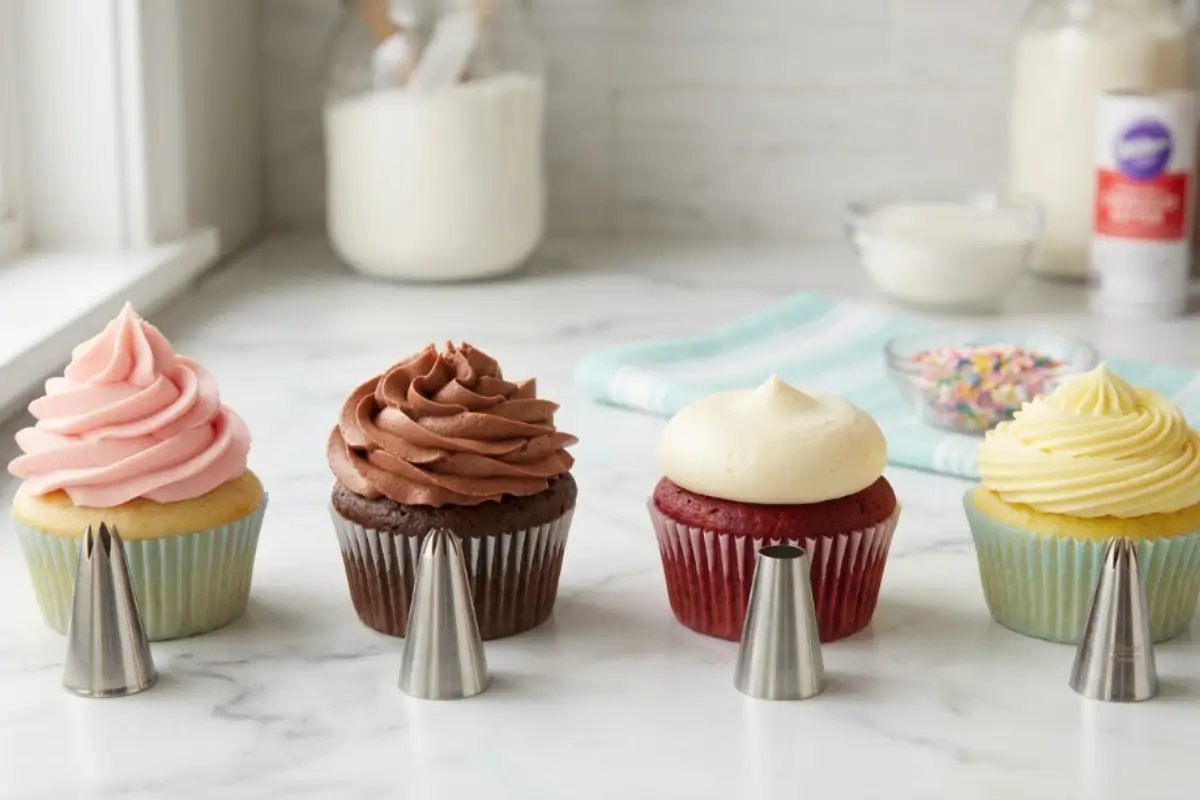
Here's the part everyone overthinks, but once you understand three things, it clicks. I promise you that.
In all my years of baking cupcakes, I've come to believe that beautiful piping comes down to what I call the Pressure-Position-Frosting Triangle. Get those three things right, and every other problem mostly solves itself.
Pressure: consistent, steady squeezing from the top of the bag, not the middle
Position: the right angle and height above the cupcake
Frosting: the right consistency (not too stiff, not too soft)
Everything I'm about to show you lives inside this triangle. Let's start with your tools.
The Tools You Actually Need (And What You Can Skip)
Take a breath you do not need a 30-tip set. I know those sets exist. I know they look appealing. I also know that most home bakers open them, feel completely overwhelmed, and reach for the spatula instead. You need four tips. Maybe five. That's it.
Here's what actually belongs in your piping kit:
Piping bags: Either reusable or disposable, they work beautifully. I use disposable when I'm doing multiple colours (faster cleanup) and reusable for everyday. For large tips, which is what we'll be using, you don't even need a coupler. Just drop the tip into the bag, snip the end, and go.
A rubber spatula for filling the bag without the mess.
A tall glass or mug to prop the bag while you fill it; this alone saves so much frustration.
That's genuinely it. The best piping tips for cupcake frosting don't require a professional kit, just the right few.
The 4 Tips That Do Everything (Elena's Starter Set)
You're doing beautifully so far now comes the fun part.
These four tips will cover virtually every cupcake occasion you'll ever face:
Wilton 1M: The Classic (Your First Purchase). This is the universally beloved first piping tip, and for good reason. The 1M creates the classic soft-serve swirl, a flat rosette, and even a buttercream rose with a slight technique adjustment.
Use it for your easy vanilla cupcakes from scratch, your vegan vanilla bean cupcakes, or any time you want a reliable, beautiful result.Occasion match: everyday cupcakes, birthday parties, any time you want a foolproof elegant result.
Wilton 2D: The Softer Rosette. Where the 1M gives you a defined, textured swirl, the 2D gives something a little softer and rounder, almost like a cabbage rose sitting on top of the cupcake. It's slightly more forgiving for beginners. Occasion match: spring gatherings, softer colour palettes, floral arrangements.
Ateco 4B The Open Star Texture. This one creates a dome of frosting with a beautiful open-star texture, gorgeous on Halloween cupcakes when done in black or orange, and equally lovely on a classic vanilla.
The four-petal design gives it a floral quality that photographs beautifully. Occasion match: spooky Halloween cupcake ideas, textured visual interest, vibrant colours.
Petal Tip 104: Ruffles and Carnations. Hold this one with the wider end down and the thinner end pointing outward. Pipe in small U-shaped motions around the cupcake in concentric circles, and you'll get soft, ruffled petals that look extraordinarily complicated for how little effort they take.
Occasion match: elegant, entertaining, Mother's Day, feminine celebration cupcakes.
A note on open vs closed star tips: Both approaches have passionate defenders online and for good reason. Closed star tips (like the 1M) create deeper grooves and more defined texture.
Open star tips (like the 4B) create a broader, softer finish. Neither is wrong. They just look different, so pick based on the look you want, not on which camp argues louder.
How to Fill a Piping Bag Without Making a Mess
This is the step nobody talks about clearly enough, and it's where most beginners give up before they even start.
Here's what I do every single time:
Place the piping tip into the bag and snip the bag end just enough for the tip to peek through too big and the tip falls out, too small and nothing comes through.
Set the bag tip-side down inside a tall glass or mug. Fold the top of the bag down over the outside of the glass like a cuff.
Use your rubber spatula to scoop frosting into the bag no more than halfway full. Overfilling makes the bag hard to control.
Unfold the cuff, twist the bag closed at the top, and hold that twist between your thumb and index finger.
Squeeze from the top only. Your non-dominant hand guides the tip; your dominant hand does all the squeezing from above.
You'll know you have the right amount of frosting when the bag feels full but not bulging, and when you squeeze gently, frosting moves towards the tip without resistance.
No piping bag at all? A zip-lock bag with one bottom corner snipped works perfectly for practice.
Pipe a few practice swirls on a sheet of parchment paper, scrape the frosting back into the bowl, and try again. Not one cupcake wasted. This is the most important beginner tip I know.
How to Pipe the Perfect Cupcake Swirl (Centre vs Outer Edge Settled)
Here's the part everyone argues about online. I'm going to settle it for you.
You've probably seen two approaches recommended: start the swirl at the centre of the cupcake or start at the outer edge. Both camps are vocal. Both camps are right they just produce different results:
Starting from the outer edge, it builds height outward and creates a taller, more dramatic soft-serve cone shape. This is the look on most viral TikTok cupcakes. Hold the tip about ¼ inch above the cupcake surface, apply steady pressure, and move in a circular motion inward and upward.
Starting from the centre → creates a flat rosette that sits low and wide on the cupcake, like a garden rose. Elegant, classic, and slightly more forgiving for first attempts.
My personal preference? I start from the outer edge when I want drama and from the centre when I want elegance. Now you know both, and you can choose.
The finishing move: As you reach the top of your swirl, gradually reduce pressure and lift the tip straight up in one smooth motion. That little peak that pull-away is the moment it starts looking like a bakery cupcake.
You'll know the pressure is right when the frosting comes out in a steady, unbroken ribbon with no air gaps.
And please, practise on parchment paper first. Pipe a swirl. Scrape it back into the bowl. Pipe again. No wasted cupcakes, and after ten practice swirls, your hands will remember what to do.
Why Is My Frosting Sliding Off? (And How to Fix It)
If your frosting keeps sliding, it is not your fault. It's a fixable problem, and it almost always comes down to one of three things.
1. Your butter was too warm:
Buttercream needs slightly cool, not melted, butter. If your kitchen is warm or your butter softened too quickly, the frosting will be too loose to hold a swirl. Fix: refrigerate the frosting for 15-20 minutes, then re-whip briefly.
2. Your cupcakes weren't fully cooled:
I know. I know. Waiting is hard. But even slightly warm cupcakes will melt the base of the frosting immediately, and the whole swirl slides. Wait until the cupcakes are completely cool not warm, not room temperature warm, cool, cool.
3. Your frosting is too thin:
It should hold a stiff peak when you lift the spatula, not flow or droop. If it drips, add powdered sugar one tablespoon at a time until it holds its shape.
If yours looks a little soft right now, that's completely normal in a warm kitchen. Pop it in the fridge for a bit, and come back to it.
How to Prevent Cupcake Wrappers From Peeling (Before You Even Start)
![A batch of freshly baked chocolate cupcakes in white liners cooling on a wire rack[cite: 1], demonstrating how to prevent cupcake wrappers from peeling.](https://www.addcakes.com/wp-content/uploads/2026/09/How-to-Prevent-Cupcake-Wrappers-from-Peeling.webp "How to Prevent Cupcake Wrappers from Peeling")
This one comes up so often alongside piping questions that I had to give it its own space because there's nothing more disheartening than a perfectly frosted cupcake with a wrapper that peels halfway off.
Here's what causes it and how to prevent it:
Paper quality: Thin supermarket wrappers absorb moisture from the batter and lose their grip. Invest in slightly thicker, grease-proof liners that hold their shape through baking AND storage.
Overfilling: Batter that bakes up against the sides of the liner creates steam that loosens the paper. Fill liners exactly two-thirds full, no more.
Moisture from the frosting: Buttercream is relatively stable, but cream cheese frosting or whipped frostings introduce moisture over time. Store frosted cupcakes in a single layer, never stacked.
Storage: Don't seal frosted cupcakes in an airtight container while they're still slightly warm the trapped steam will soften the wrappers and cause peeling by morning.
For a deep dive into everything that causes wrapper peeling and every fix, I've written a full guide right here:
Why These Cupcake Recipes Work
This section is simpler than it sounds, and understanding the why will make you a better baker, every single time. I used to just follow steps without understanding them. Then I started asking why, and everything shifted.
Here's what I know now:
Why room-temperature butter matters: Cold butter doesn't cream properly with sugar it can't trap the air bubbles that make your cupcakes light and fluffy. Room-temperature butter creams into a cloud. That cloud is your tender crumb.
Why you must not overmix: Once you add flour, overmixing develops gluten, the same thing that makes bread chewy. Chewy is wonderful in bread. In a cupcake, it creates a tough, dense crumb. Mix just until the flour disappears, and then stop.
Why filling liners two-thirds full is non-negotiable: More batter = more steam = the batter climbs up and over the liner during baking. You end up with a mushroom-top cupcake that's impossible to frost neatly. Two-thirds full gives you a gently domed top that's perfect for piping.
Why completely cooled cupcakes are the rule, not a suggestion: I ruined more batches than I care to count by rushing this step. Even slightly warm cupcakes melt the base of your frosting in seconds.
I now wait a full hour after they come out of the oven before I even pick up the piping bag.
Why buttercream consistency is everything: A frosting that's too thin drips and slides. Too stiff, and it tears the surface of the cupcake as you pipe. The right consistency smooth, holds a peak, and releases from the tip cleanly is what separates a beautiful swirl from a disaster.
The test: lift your spatula out of the bowl. The frosting should hold a soft-stiff peak for about 3 seconds before it begins to fall.
See? You were already doing most of this right. You're closer than you think.
Elena's No-Fail Cupcake Tips
Take a breath this is the section where everything clicks into place.
What Is the Best Piping Tip for Cupcakes?
For most people, most of the time, the answer is Wilton 1M. It's the tip that appears in virtually every beginner guide because it is genuinely forgiving, versatile, and produces a result that looks professional from the very first attempt. Start here. Master the swirl. Then explore.
If you want something softer: Wilton 2D. If you want texture and drama: Ateco 4B. But if you can only buy one tip today 1M, without question.
Can I Make Cupcakes Ahead of Time?
Yes, with one important rule: bake ahead, frost the day of.
Unfrosted cupcakes keep beautifully at room temperature for up to two days, wrapped loosely or stored in a single layer in a container.
Frosted cupcakes can be refrigerated for 3-4 days, but bring them fully to room temperature before serving cold buttercream is dense and a little sad. Let them sit out for 30-45 minutes, and they'll soften back into something wonderful.
How Do I Get All My Swirls to Look the Same?
Consistency comes from three things: the same starting point on each cupcake, the same amount of pressure, and the same amount of frosting.
I weigh my frosting portions when I want a truly uniform look about 40-50 g per cupcake gives a generous swirl without excess.
And practice on parchment. Seriously. Ten practice swirls before you touch a cupcake, and your hands will find their rhythm.
Why Do My Cupcake Wrappers Keep Peeling?
This usually comes down to wrapper quality, overfilling, or moisture from storage. I've covered this in detail in the full guide above, and there's a complete deep dive in the dedicated article
[link to how to prevent cupcake wrappers from peeling].
Can I Freeze Cupcakes With Frosting On Them?
Yes, but unfrosted cupcakes freeze better. Wrap each unfrosted cupcake individually in plastic wrap, place in a Ziploc bag, and freeze for up to three months. Thaw at room temperature, then frost once they're fully back to room temperature.
If you must freeze frosted cupcakes, buttercream (American-style) holds up best. Avoid freezing cupcakes topped with whipped cream the texture suffers on thawing.
Cupcakes for Every Diet: Keto, Vegan, and Everyone in Between
This is the section I wish existed when I started baking for friends with different needs. Because nobody should have to sit at the table and watch everyone else eat cake.
For keto: The almond flour base in my keto lemon blueberry cupcakes is the blueprint. Swap all-purpose flour for superfine almond flour (not almond meal texture matters), use a powdered keto sweetener like erythritol or allulose, and your frosting goes with a powdered sweetener too. The result is bright, moist, and a real crowd-pleaser.
For vegan: My vegan vanilla bean cupcakes use a flax egg (1 tablespoon ground flax + 3 tablespoons water, rested 5 minutes), plant-based butter (I love a good quality coconut oil-based stick), and oat milk or almond milk.
The springs-back test: press the centre gently with your fingertip; it should spring back rather than leaving an indent is your doneness cue, more reliable than a toothpick for vegan batters.
For gluten-free: A 1:1 gluten-free flour blend with xanthan gum already included works in most vanilla cupcake recipes without any other changes. The texture is slightly denser than all-purpose flour, but the flavour is every bit as good.
For nut-free (school events): Skip all almond flour variations and stick with the classic all-purpose flour or a certified nut-free gluten-free blend. Always check your vanilla extract label too some contain unexpected ingredients.
Saving a Little Joy for Tomorrow
This part is one of my favourites because a well-stored cupcake is a little act of future kindness to yourself.
Room temperature (unfrosted): up to 2 days, loosely covered. Any longer and they begin to dry out.
Refrigerator (frosted): Up to 3-4 days in a single layer. Buttercream can absorb fridge smells, so cover lightly, not airtight. Bring to room temperature for 30-45 minutes before serving.
Freezer (unfrosted): Wrap each cupcake individually in plastic wrap, then place in a freezer bag. Up to 3 months. Thaw at room temperature never in the microwave.
Make-ahead strategy: Bake and cool the cupcakes up to 2 days ahead. Make the frosting and store it covered in the refrigerator. On the day of serving, bring the frosting to room temperature, re-whip briefly, and pipe fresh. This is the method I use for parties it means the morning of the event is smooth, not stressful.
One last wrapper note: Don't seal warm cupcakes in an airtight container. The trapped steam softens the liners and causes that dreaded peeling by morning. Cool completely before storing.
Making Sweet Memories
My Nonna was right. Nobody's first swirl is a rosette.
But here's what she also knew and what I've carried with me through every cupcake I've ever baked, every swirly, messy, imperfect, eventually beautiful swirl: the people waiting for those cupcakes don't see the wobble in the frosting. They see that you made something.
That you showed up at the kitchen counter and tried and came out the other side with something warm and sweet to share.
Every recipe in this guide the easy vanilla cupcakes from scratch, the salted caramel surprise, the vegan ones for the little girl at the table who deserves a cupcake too, and the spooky Halloween set that will make the whole table laugh every single one is worth making. Not because it's perfect. Because it's made.
At AddCakes, we believe in memories, not masterpieces. Simply add cake and let the joy take care of itself.
Now tell me in the comments: which cupcake are you making first? The classic vanilla, the caramel surprise, or are you going straight to Halloween drama? I want to know, and I'm cheering for you either way.