
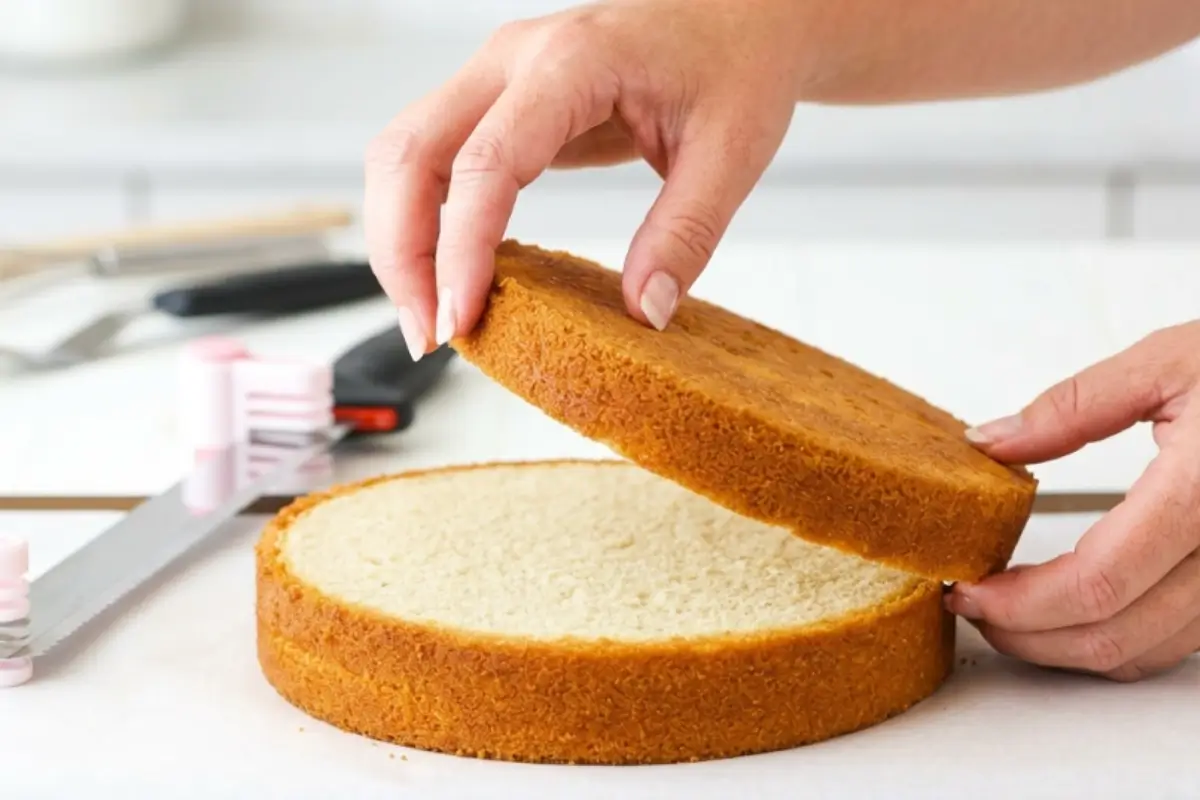
How to level cake layers and finally understand why your beautiful cakes keep doing that one frustrating thing is what I want to talk about today.
I still remember the birthday cake that changed everything for me. It was for my daughter's fifth birthday, a three-layer vanilla cake with the kind of pink frosting she'd been asking about for weeks.
I'd baked the layers the night before, stacked them while they were still faintly warm (a mistake I'll come back to), and stood back feeling proud of myself.
By the time her party guests arrived, the cake had developed its own opinion about which direction it wanted to face. It was leaning. Not dramatically, not "call the fire department" leaning, but enough.
Enough that I could see it. Enough that I spent the next hour rearranging the table decorations around it to hide it.
That afternoon, after the candles and the singing and the little girl who didn't notice or care because the cake tasted wonderful, I sat down and figured out what had gone wrong. And the answer was almost embarrassingly simple: I hadn't levelled my layers.
If you've ever watched your carefully frosted cake tilt or felt that quiet sinking feeling when a slice comes out looking like a series of little hills, this is the post for you.
Today I'm walking you through the whole thing, not just how to trim a dome, but how to prevent one in the first place. Because learning how to level cake layers is actually two skills in one, and once you understand both, your cakes will never lean on you again.
What Does It Mean to Level Cake Layers, and Why Does It Matter?
This part is simpler than it sounds, I promise.
When a cake bakes, the centre of the batter is the last part to cook through. By the time the heat reaches the middle, it has nowhere to go but up, which creates that familiar rounded dome on top.
A small dome might look charmingly homespun on a single-layer snacking cake, and that's perfectly lovely. But the moment you start stacking layers, small domes become a real problem.
Here's what happens: a dome on layer one tilts layer two slightly. A dome on layer two tilts layer three a little more. By the time you've applied your frosting, you're working on a surface that has a gentle lean built into its very bones, and no amount of careful frosting will fully fix what's happening underneath.
I hear from so many home bakers, "My cake always leans no matter what I do." Most of them have been troubleshooting the frosting. The real answer is almost always the layers.
Levelling is simply the act of removing that dome so each layer sits flat. It also does something delicious that nobody talks about enough: it removes the slightly tougher, drier crust that forms on top during baking, revealing the soft, tender crumb beneath.
That crumb soaks up your filling more beautifully. Your cake will taste better, stack more sturdily, and look like it came from somewhere that charges too much for cake.
You'll know you need this step when your finished cake leans even though you followed the recipe, your frosting slides toward one side no matter how carefully you apply it, or your sliced layers look like a series of gently rolling hills.
The Tools You Need to Level Cake Layers (And What You Can Skip)
Here's the part everyone overthinks, but you don't need to.
You have three good options, and which one you choose depends entirely on what you already have in your kitchen.
Option 1: A cake leveller.
This little tool has adjustable legs and a thin wire that slices through the cake at a set height. For beginners, it's wonderfully reassuring that the wire stays perfectly parallel to the table, which takes the guesswork out completely.
If you make layer cakes a few times a year, it earns its spot in the drawer very quickly.
Option 2: A long serrated knife.
Most home bakers already have one. A serrated knife gives you more control and flexibility; you can adjust the angle mid-cut, which a leveller can't do.
The one thing to know: a serrated blade creates more crumbs as it moves, and those crumbs can get caught in your frosting later. To minimise this, chill your cake in the fridge for about 20 minutes before cutting. A cold cake holds together beautifully.
Here's the trick I learned the hard way: the knife should be longer than the diameter of your cake so your hand never enters the cutting path, and you get a cleaner, more even slice.
Option 3: The upside-down flip
This is my secret backup method, and most people have never heard of it. The bottom of your cake, the side that sat against the pan, is naturally flat. If your dome is small, simply flip the layer upside down before stacking. The flat bottom becomes your new top. No cutting required.
You'll also find a turntable incredibly helpful, even though it's not strictly required. Set your cake on it, get down to eye level, and give it a slow spin; you can see the dome from across the room. If you don't have one, a lazy Susan from the kitchen cupboard works beautifully.
How to Prevent Doming Before Your Cake Even Goes in the Oven (The Step Nobody Mentions)
Take a breath; this section is where things get really good.
Most cake-levelling articles start after the cake comes out of the oven. I want to start earlier, because the most effortless flat layer is one that didn't dome much in the first place.
Here's the science in plain language: doming happens because the edges of your pan get hot faster than the centre. The edges set quickly, the centre keeps rising, and up goes the dome. If you can slow the edges down, the whole cake rises more evenly.
Cake strips (store-bought or DIY): These fabric strips wrap around the outside of your pan before baking. Soaked in cold water, they keep the pan edges cooler during baking so the whole cake rises at the same rate. Store-bought strips (brands like Wilton make them) are simple to use.
But here's a tip I love for its thriftiness: cut an old kitchen towel or cotton T-shirt into strips, soak them in cold water, wring them out, and safety-pin them around your pan. Free, effective, and very Nonna-approved.
The batter dip method: Before your pan goes in the oven, use an offset spatula to gently push the batter slightly away from the centre, creating a very subtle dip in the middle. As the cake bakes, the centre rises to meet the edges, and the top levels out naturally. It feels counterintuitive the first time you do it, but it works.
The slow and low approach: Reducing your oven temperature by about 25°F and extending the bake time encourages even heat distribution throughout the batter. Your layers will be flatter and bonus, more moist, because they're not rushing to cook through.
Weigh your batter: For equal layer heights, use a kitchen scale to divide your batter precisely between pans. This alone eliminates the most common cause of uneven layers: one pan simply getting more batter than the other.
Even if you do all of this, you may still get a small dome, and that's fully normal. That's what the next section is for.
How to level cake layers Step by Step
This is where we get into it. And I promise, by the end of these steps, you'll feel like you've been doing this your whole life.
Step 1: Wait until the cake is fully cold.
This is the single most important step, and the one most often skipped when we're in a hurry. A warm cake is fragile. Its structure hasn't fully set. When you cut into it warm, it crumbles, drags, and compresses unevenly.
And if you try to stack warm layers with frosting between them? The frosting melts, and the layers slide sometimes halfway across the plate. Wait at least one hour at room temperature, or pop your layers in the fridge for 30 minutes to firm them up. Cold cake cuts like a dream.
Step 2: Set up your workspace.
Place your cake on a turntable if you have one, or on a stable flat surface. Have your knife or leveller, a ruler if needed, and a clean plate for the trimmed dome scraps (you will absolutely be snacking on these). Good light helps.
Step 3: Assess the dome.
Get down to eye level with the cake; literally crouch down if you need to. Slowly spin the turntable or rotate the cake by hand. You're looking for where the curve peaks. The highest point is where you'll align your cut. You'll know you've found it when the curve is clearly visible from the side.
Step 4: Mark your guideline (serrated knife method).
Press toothpicks around the circumference of the cake at the height of the lowest edge; this becomes your level cut line. Or use a ruler held against the side to mark with a light score. This guide means your knife always knows where it's going.
Step 5: Trim conservatively.
Start with less than you think you need. You can always take more off, but you can't put it back. Most domes only need a thin shave; the goal is flat, not short.
Step 6: The knife method.
Hold your knife parallel to the table, not angled up or down. Begin sawing gently, using the knife's full length in a slow back-and-forth motion. Here's the key: Move the cake towards you (or spin the turntable), not the knife. The knife stays still; the cake moves. This gives you a straighter, more consistent cut.
If your cut is angling down on one side, you're moving the knife instead of the cake. Stop, reset your position, and try again.
Step 7: The cake leveller method.
Set the wire to your desired height, and lock it in place. Place the leveller against the cake with the feet flat on the table at all times; never let the feet lift. Use a gentle sawing motion as you guide the wire through, keeping steady, even pressure. Remove the cut top.
Step 8: Eye-level inspection.
After every cut, get back down to eye level and check. Spin the cake. Is the surface flat? Tilt your head so you're looking across the top. You'll feel the satisfaction of a perfectly flat surface almost immediately.
Step 9: The upside-down option.
If your dome is small and the bottom of your cake is naturally flat, flip the layer over. The bottom becomes your new top. No cutting needed, no crumbs, and the surface is already perfectly smooth.
Why Levelling Works: The Guided Success Section
Here's the part everyone skips, and it's the part that makes everything click.
Understanding why levelling works makes you a more confident baker because you stop following steps blindly and start seeing your cake the way a pastry chef does.
The dome consequence chain.A half-inch dome on a single layer is barely noticeable. But stack three layers with that same dome, and you have over an inch of accumulated height difference between the centre and edges of your cake. That inch creates a genuine tilt.
That tilt makes your frosting behave as if it's on a slope it wants to slide downhill. This is why so many home bakers feel like their frosting is fighting them. It is. The slope is real.
Level layers mean level frosting. When each layer is flat, they stack flush against each other. The filling sits in an even band between them. The whole structure is more stable, and your frosting has a true vertical surface to grip.
The cut surface absorbs filling. The dome top has a slight crust from baking; it's drier and less porous than the interior crumb. When you trim it away, you expose the tender, open crumb that soaks up buttercream, jam, or custard. In my family, this is the moment I stop thinking of it as a baking project and start thinking of it as the actual cake.
You're doing less work, not more. It sounds like an extra step, but levelling actually makes every subsequent step – filling, crumb coating, and final frosting easier and faster. A level cake is a cooperative cake.
A quick test: after stacking your levelled layers with filling between them, look at the sides. They should be straight, like the sides of a cylinder. If they bow outward at any point, a layer may still have a slight curve. That's easy to correct by adjusting before the crumb coat sets.
Elena's No-Fail Tips for Perfect Cake Layers Every Time
You're doing great here. Here's where we tackle the questions I get asked the most.
What if I Trimmed Too Much?
Oh, this happens to everyone, including me, more times than I'll admit. If you've taken a little too much off and there's a small divot or hole in your layer, don't worry. A generous application of buttercream during your crumb coat will fill it fully. Under the final layer of frosting, nobody will ever know. Promise.
Does Levelling Change How the Cake Tastes?
Yes, and in a wonderful way. The dome top is the part of the cake that was most exposed to direct heat. It's slightly drier and has a tougher texture than the crumb beneath it.
When you remove it, you're exposing the soft, moist interior, the part that absorbs filling perfectly and creates that bakery-quality texture in every forkful. Levelling doesn't just improve how your cake looks. It genuinely makes it taste better.
Can I Level My Cake Layers Ahead of Time?
Absolutely. Levelled layers can be wrapped tightly in plastic wrap and refrigerated for up to two days before assembly. If you want to get even further ahead, wrap each layer first in plastic, then in aluminium foil, and freeze for up to a month.
Thaw in the refrigerator overnight with the wrapping still on; this prevents condensation from forming on the surface.
My Knife Keeps Dragging Crumbs Into the Cut. Help.
Two things will fix this immediately. First, make sure your cake is fully chilled; cold cake holds its structure and produces far fewer crumbs during cutting. Second, wipe your knife clean with a damp cloth between passes.
If crumbing continues to be an issue, consider a long hollow-edge slicing knife (the kind with small oval indentations along the blade) rather than a serrated bread knife. The smooth indentations reduce drag and create a much cleaner cut.
Saving a Little Joy for Tomorrow: Storing and Stacking Levelled Layers
Knowing you can get this done ahead of time is one of those small reliefs that makes a celebration feel manageable, so let's cover it quickly.
Storing levelled layers (unfilled): Wrap each layer individually in plastic wrap as soon as it's cool and levelled. Store at room temperature for up to one day, or refrigerate for up to two days. Bring to room temperature before assembling; a cold cake is harder to frost smoothly.
Freezing levelled layers: Wrap in plastic, then foil, label with the date, and freeze flat for up to one month. Thaw in the refrigerator overnight, still wrapped, then let it come to room temperature before assembling. This is one of my favourite make-ahead tricks. I often bake and level layers on a Thursday for a Saturday celebration.
Stacking your levelled layers: After levelling, use a small dab of buttercream on your cake board to anchor the first layer (this prevents it from sliding as you build). Add your filling in an even layer, then carefully lower the next levelled layer on top, flat side down if using the knife method, or flat side up if you flipped. Press very gently. Step back and check the sides for any visible lean before continuing.
After stacking, refrigerate the filled, unfrosted cake for 20–30 minutes before applying your crumb coat. This gives the filling time to set and the layers time to bond, so nothing shifts when you start frosting.
Making Sweet Memories
My daughter's sixth birthday cake stood perfectly straight. Three layers, level and even, stacked so flush that the filling showed in a clean, even stripe through every slice. She noticed because she said, "Mama, your cake looks like a real cake." I laughed for about a week.
The invisible work, the quiet trimming, the patient waiting for the layers to cool, and the careful eye-level check are what make a celebration cake feel like something worth celebrating. Nobody sees those steps. They just see the cake standing tall, the frosting smooth, the slices perfect. That's the magic.
How to level cake layers is one of those skills that feels technical until the moment it doesn't. Until the moment it's just something you do, like seasoning a pot of sauce or testing if pasta's ready. A small, confident ritual that makes everything taste a little more like love.
At AddCakes, we believe in memories, not masterpieces. But sometimes, just sometimes, a memory is all the more joyful when the cake doesn't lean.
[…] your cake layers have a dome (most do), gently level off the top with a serrated bread knife. Use a gentle sawing […]