
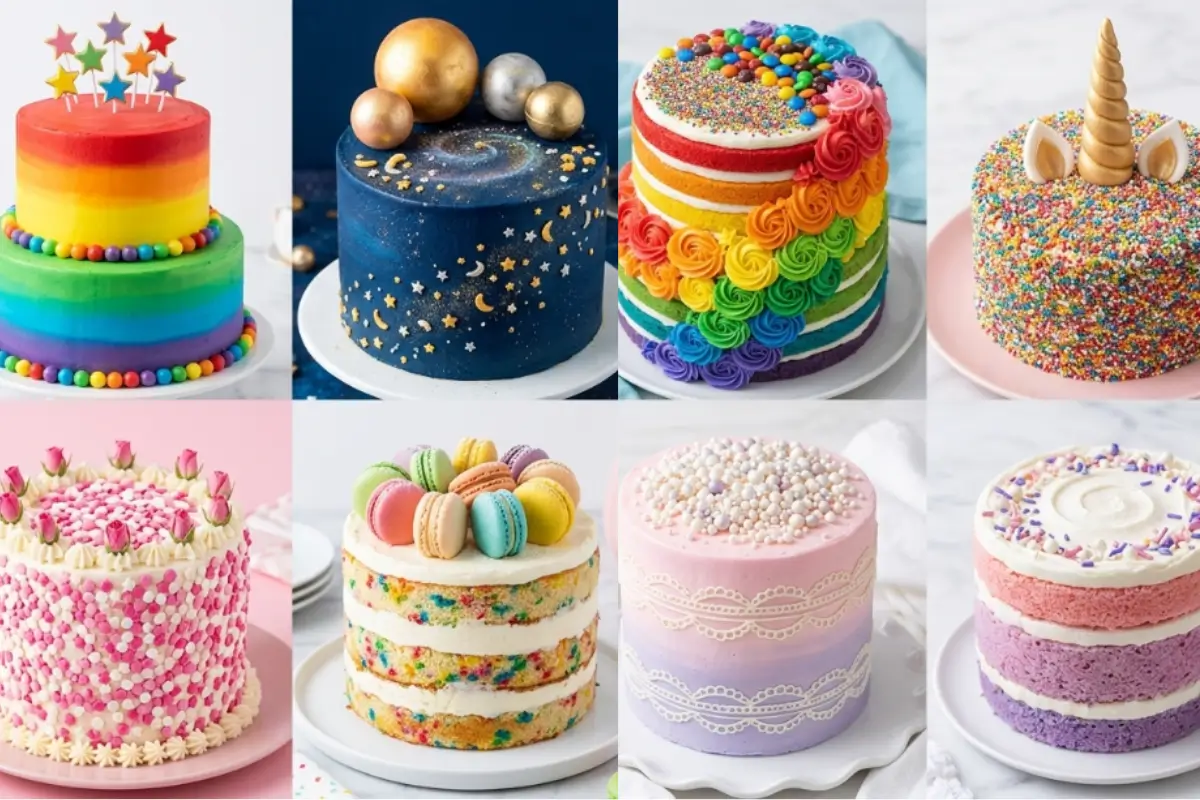
Cake Decorating for Beginners starts with one truth nobody tells you: your first decorated cake doesn't need to be perfect. It needs to be made.
I still remember watching my Nonna decorate a birthday cake with nothing but a butter knife and the back of a spoon. No turntable. No piping bags. No fancy star tips.
Just her steady hands, a thick cloud of buttercream, and a few swirls she'd make with the spoon before pressing a single candle into the center.
That cake, slightly lopsided, with frosting a little thick on one side, was the most beautiful thing I had ever seen, because I knew she'd made it for me.
Maybe you've been staring at decorated cakes on Pinterest or Instagram, thinking, "That could never be me." Maybe you've tried once, and the frosting pulled up crumbs, and the whole thing looked like a disaster, and you quietly put the piping bag away and told yourself you just weren't a decorator.
Here's what I want you to know: that wasn't a failure. That was your first lesson.
The real secret to cake decorating isn't talent. It's order. It's knowing what to do first, what to do second, and what not to skip. And that is exactly what I'm going to walk you through today step by step, with all the warmth of a friend sitting at your kitchen table.
From Nonna's Kitchen to Yours
The reason most first-decorated cakes disappoint isn't the baker. It's that nobody explained the foundation. The gorgeous cakes you see online all share one invisible thing: the bakers prepared their canvas before they ever touched a piping bag.
In the next few sections, I'm going to give you that foundation. And I promise by the time you reach the end of this guide, you'll feel not just ready but genuinely excited to start.
The Only Tools You Actually Need
Let's talk about tools first, because this part is simpler than it looks, I promise.
Every beginner cake decorating guide I've ever seen lists seventeen things before you've even started. I'm going to give you five. Because Nonna didn't need a KitchenAid mixer and a laser level to make a cake that made me cry happy tears, and you don't either.
The Short List: What You Truly Need
Offset spatula: This is the most important tool in beginner cake decorating. The angled blade lets you spread frosting smoothly without your knuckles dragging through the cake. A small one (around 4 inches) and a larger one (around 8 inches) between them cover everything you'll do. If you only buy one thing, buy this.
Bench scraper: A flat metal or plastic card that smooths and cleans your frosted sides, and once you use one, you'll wonder what you ever did without it.
Piping bag: Reusable silicone or disposable plastic either works beautifully. Fill it only two-thirds full; overfilling is one of the most common reasons beginners lose control of their piping.
One piping tip: I'll tell you which one in the tips section. Spoiler: it's the 1M open star. One tip, a dozen designs.
A turntable or a lazy Susan. Here's where I want to calm a very common worry. Yes, a proper cake turntable makes smooth frosting easier.
But a lazy Susan from your pantry? A plate you can spin with one finger? Those work for a first cake. Don't let the absence of perfect equipment stop you from starting.
What You Can Borrow, Skip, or Improvise
Fondant: You don't need it. Fondant is beautiful but notoriously difficult for beginners, and it doesn't taste as good as buttercream. Save it for later.
Elaborate tip sets: One star tip. That's all you need today.
A turntable: Lovely. Not mandatory. A steady hand and slow rotation work fine for your first attempt.
You're already doing beautifully, and you haven't even started frosting yet.
The Key Ingredients for a Beginner-Friendly Buttercream
Here's the part everyone overthinks, but you won't.
Getting your buttercream right is the actual skill that unlocks everything else. When your frosting is the right consistency smooth, spreadable, and firm enough to hold a shape decorating feels almost effortless. When it's wrong, everything fights you.
Here's my classic beginner buttercream:
Ingredients:
225 g (1 cup / 2 sticks) unsalted butter, at room temperature
480g (4 cups) powdered (icing) sugar, sifted
3–4 tablespoons whole milk or heavy cream
1 teaspoon pure vanilla extract
A small pinch of salt
Why each one matters:
Butter (room temperature, not melted): This is the foundation. Cold butter creates lumps. Melted butter creates soup. Room temperature when your finger leaves a clean indent is the sweet spot. The warmth of your hands as you work is your best thermometer.
Powdered sugar (sifted): Sifting removes lumps that would otherwise show up as bumps in your finished frosting. I know it feels like an extra step. It's worth it.
Milk or cream: This adjusts your consistency. For a thicker frosting that holds piping shapes, use 2 tablespoons less. For a softer spreading consistency, use 3 to 4. Add it one tablespoon at a time; you can always add more, but you can't take it away.
Vanilla: Flavor and warmth. Use a good, pure extract; the difference in taste is real.
Salt: Just a pinch. It cuts the sweetness and makes the whole thing taste more complex and less one-note.
A note on dairy-free: Swap the butter for a plant-based butter block (not spread) and the milk for oat milk or coconut cream. The results are lovely; just make sure your plant butter is cold-firm, not warm-soft, before you start.
A note on store-bought frosting: Can you use it? Yes, with one modification. Stir in 2–3 tablespoons of powdered sugar to stiffen it. Store-bought frosting right from the tub is usually too soft for piping or smooth-sided work. It's a perfectly good shortcut for casual decorating. No judgment here.
The Golden Rule Step-by-Step: Cake Decorating for Beginners
Take a breath; this is where the magic starts. And it is simpler than it looks.
The reason I'm calling this the golden rule is because these steps have an order. Every time a beginner's first cake goes wrong, it's almost always because one of these steps was skipped or rushed. Follow this sequence and your cake will turn out beautifully.
Step 1: Practice the parchment paper ritual first.
Before you touch your cake, grab a sheet of parchment paper and your filled piping bag. Pipe stars. Pipe rosettes. Pipe swirls. Pipe them badly.
Pipe them again. This is how every professional decorator warms up, not because they can't pipe, but because they know that the first 30 seconds of any piping session are always the scratchiest. Do your scratchy 30 seconds on paper, not on your cake.
Here's the trick I learned the hard way: the pressure you apply changes everything. Pipe slowly, with steady, even pressure. You'll feel the difference immediately.
Step 2: Cool your cake completely.
I mean this more seriously than it sounds. Not "I left it on the counter for 20 minutes." Not "it feels okay to touch." Completely cool, ideally straight from the fridge.
A warm cake melts frosting on contact and causes layers to slide. The beautiful finished look you're going for lives and dies by this step.
You'll know it's ready when the top of the cake feels cool to the back of your hand, and the sides don't feel warm at all.
Step 3: Level your layers.
Use a serrated knife or a cake leveler to slice off the domed top of each cake layer. Place the flat side down.
This is the step beginners most often skip, and it's the reason leaning, lopsided cakes happen. A level cake doesn't require any extra work to keep straight; it just sits right, naturally.
If your knife goes a little crooked, that's completely normal. The goal is reasonably flat, not surgeon-precise.
Step 4: Fill your layers.
Pipe or spread a generous layer of buttercream between each cake layer. Press the next layer down gently; you're looking for the filling to reach right to the edges without overflowing. If it overflows slightly, that's fine; you'll cover it.
Step 5: Apply the crumb coat.
This is the single most game-changing step in beginner cake decorating and the one most overlooked. A crumb coat is a thin, almost translucent layer of frosting applied all over the outside of the cake. Its only job is to trap loose crumbs so they don't contaminate your final layer.
Spread it on with your offset spatula. It will look messy. It will look like it has crumbs in it. That is exactly what it's supposed to look like. This coat is not the one anyone will see.
Step 6: Chill for 15–30 minutes.
Put your crumb-coated cake in the fridge. Don't skip this. The crumb coat needs to set firm before you apply the final layer; otherwise, you'll drag the crumb coat into your final frosting and get messy crumbs.
You'll know it's ready when the surface feels firm and dry to the touch, like chilled wax.
Step 7: Apply the final frosting coat.
Now you're decorating. Apply a generous layer of buttercream to the top and sides using your offset spatula. Then hold your bench scraper flat against the side of the cake and spin the turntable slowly; the scraper smooths as the cake rotates.
If yours looks a little rough at first, you're still on the right track. One or two passes smooth out almost everything. The key is keeping the scraper still and letting the rotation do the work.
Step 8: Your first decoration: choose your path.
Path A: Rosettes: Fit your piping bag with the 1M star tip. Hold the bag at a 90-degree angle (straight down) about half an inch above the surface.
Apply steady pressure, start in the center of your rosette, and pipe outward in a tight spiral. Stop pressure, lift cleanly. Practice the motion once on parchment first. Then cover your whole cake top in these; it's forgiving, beautiful, and looks professional every single time.
Path B: Spatula swipe texture: Press the flat side of your offset spatula against the frosted cake and drag in soft, overlapping arcs. This painterly texture hides any unevenness, looks stunning, and takes about three minutes. It also photographs beautifully. This is the "cheat code" finish.
See? You made a beautiful cake. I knew you would.
Why This Works: The Foundation Nobody Talks About
Here's something I've noticed about almost every beginner cake decorating guide online: they skip straight to the decoration without ever explaining why the preparation matters. And then people wonder why their results don't match the photos.
So let me give you the why behind everything you just did.
Cold cakes are a decorator's best friend. Buttercream needs a firm, cold surface to grip. A warm cake creates friction and resistance; the frosting drags instead of gliding. Every extra minute in the fridge is a minute of easier decorating.
The crumb coat changes everything. Think of it like priming a wall before painting. Without it, every crumb your spatula catches on its way across becomes a visible imperfection in your final coat. With it, the final coat glides on clean and smooth.
Level layers matter more than perfect piping. An uneven base creates a tilting cake that no amount of decoration can fully disguise. Level it early and everything else falls literally into place.
Buttercream consistency is the real skill. The difference between frosting that fights you and frosting that cooperates is almost always the milk. Too little, and it's stiff and tears. Too much, and it slides. The sweet spot is a frosting that holds a soft peak, not stiff, not runny like very thick whipped cream.
Your first attempt will already be more beautiful than you think. Most people who try this look at their finished cake and feel a little shocked. Because once you follow the order, it comes together. That shock of pride? That's the whole point.
Elena's No-Fail Tips: Answers to Every Question You're Afraid to Ask
I've been answering cake decorating questions for years, and the same beautiful, worried questions come up over and over. Let me answer them all, right here.
Why does my frosting keep picking up crumbs?
This is the most common beginner frustration, and the fix is almost always one of two things: the crumb coat was too thin (it needs to fully cover the cake, even if imperfectly), or the cake wasn't cold enough when you applied it.
Both are easy to fix next time. And here's something important: a few crumbs in the final coat are invisible once the cake is sliced. A crumby cake still tastes magnificent.
Do I really need a turntable?
In an ideal world, yes, a turntable makes smooth sides dramatically easier. In the real world, beginners have made gorgeous cakes on a flat plate since long before turntables were invented.
A lazy Susan, a plate you can rotate with one hand, or even a cutting board you spin all of these work gently for a first attempt. Start with what you have. Upgrade later if you fall in love with decorating (and you will).
Can I use store-bought frosting?
Yes, with one honest caveat. Store-bought frosting right from the tub is usually too soft for piping or creating smooth-sided finishes. The fix is simple: stir in 2 to 3 tablespoons of powdered sugar until the frosting holds a soft peak.
This stiffens it just enough for beginner rosettes or border work. For smooth, sharp-edged cakes, homemade buttercream will serve you much better.
What is the easiest piping tip for a beginner?
The Wilton 1M open star tip. Without exaggeration, this single tip can make rosettes, swirls, shells, borders, and drop stars. It's forgiving of slightly uneven pressure. It makes everything look intentionally pretty. If you only ever own one piping tip, make it the 1M.
Why does my piping look lumpy or uneven?
Almost always one of two things: the bag was overfilled (keep it two-thirds full at most so you maintain control), or the pressure was inconsistent. The fix is entirely the parchment practice ritual from Step 1.
Most people pipe their warm-up on the cake itself. Don't. Warm up on paper, find your pressure, then move to the cake. After three to five practice rosettes on parchment, your hand settles into a natural rhythm, and the results change completely.
Saving a Little Joy for Tomorrow: Storage, Make-Ahead, and Gifting Notes
One of the loveliest things about a decorated cake is that you don't have to do everything in one afternoon.
The crumb coat can be applied up to 24 hours ahead. Wrap the crumb-coated cake loosely in plastic wrap and refrigerate. When you're ready to decorate, take it out, let it sit for five minutes, then apply the final coat. This is especially useful the night before a birthday.
A fully decorated cake keeps beautifully at room temperature for up to 2 days, covered loosely, away from direct sunlight or heat. Buttercream creates a natural seal that keeps the cake moist.
For longer storage, refrigerate for up to 5 days. Cold cake tastes drier than it really is; the chill mutes all the flavor. Give it an hour on the counter before slicing, and it'll taste exactly as good as the day you made it.
Transporting a decorated cake: Refrigerate until the frosting is firm, then transport cold. A slightly chilled cake travels infinitely better than a room-temperature one. If you're driving more than twenty minutes, chill it for at least an hour first.
Elena's Classic Beginner Buttercream
Makes enough to fill, crumb coat, and fully frost one 8-inch layer cake.
Ingredients:
225 g (1 cup) unsalted butter, room temperature
480 g (4 cups) powdered sugar, sifted
3–4 tablespoons whole milk or heavy cream
1 teaspoon pure vanilla extract
Pinch of salt
Method:
Beat the butter with a hand mixer or stand mixer on medium speed for 3–4 minutes until pale and fluffy.
Add the powdered sugar one cup at a time on low speed. Scrape down the sides after each addition.
Add vanilla and a pinch of salt. Beat on medium for 1 minute.
Add milk one tablespoon at a time until you reach a smooth, spreadable consistency that holds a soft peak.
Beat on low for 2 minutes to remove air bubbles; this gives you a smoother finish.
Yield: approximately 3 cups | Prep time: 10 minutes
Making Sweet Memories
My Nonna never knew what a bench scraper was. She didn't own a piping bag. What she had was a cake, a warm kitchen, and someone she loved waiting for it at the table.
And that cake, imperfect but generous, made with complete care, is still the standard I hold every decorated cake to.
Your first decorated cake might have one edge that's a little rough and one rosette that didn't quite close the way you hoped. And it will still be the most beautiful thing on the table. Because you made it. Because it means something.
At AddCakes.com, we believe in joy, not perfection. In memories, not masterpieces. Simply add cake and add love, and everything else follows.
Tell me in the comments: who are you making your first decorated cake for? I'd love to know. And if you try this, please share it with me. The beautiful ones and the messy ones. I want to celebrate all of them.
[…] is what I recommend if you're decorating a cake for the first time it won't surprise you or slide around. You'll know it's right when it looks pale […]