
Creamy Basque burnt cheesecake was the first dessert that ever made me question everything Nonna taught me about baking.
I met it on a warm Tuesday evening in a shared building courtyard, carried down three flights of stairs by my neighbour Pilar, a warm, round-cheeked woman from San Sebastián who always smelt faintly of smoked paprika and butter.
She set the cheesecake on the table without ceremony; its top was the colour of dark mahogany, its parchment edges rising up around it like a little paper crown. I thought, quietly, that something had gone wrong.
Then she sliced it. The knife went through like silk. The inside was pale and trembling almost custard-soft and the smell that rose from it was warm caramel with the softest hint of something toasty. I took one bite and set down my fork.
It was unlike anything Nonna had ever made. It broke every rule I thought I knew about cheesecake the careful water bath, the low-and-slow oven, the pale cream surface that meant success. And yet somehow, it was perfect because of it.
No crust. No water bath. No perfection required.
The Key Ingredients for Creamy Basque Burnt Cheesecake and Why They Matter
![An overhead view of the simple ingredients needed for a creamy Basque burnt cheesecake, including three blocks of Philadelphia cream cheese, a measuring cup of white sugar, a pitcher of heavy cream, whisked eggs in a glass bowl, a small scoop of flour, vanilla paste, a whisk, and a spatula arranged on a white surface[cite: 2].](https://www.addcakes.com/wp-content/uploads/2026/09/Key-Ingredients-for-Creamy-Basque-Burnt-Cheesecake-.webp "Key Ingredients for Creamy Basque Burnt Cheesecake")
This part is simpler than it looks. You only need a handful of ingredients, but each one has a job, and understanding that job is what keeps your cheesecake creamy.
Full-fat cream cheese (room temperature): This is the heart of the cheesecake. Always, always use full-fat the higher fat content is what gives you that custardy, rich interior. Low-fat versions make a thinner, wetter batter that doesn't set the same way. And room temperature is non-negotiable.
Cold cream cheese won't blend smoothly with eggs and cream it creates lumps that no amount of mixing will fully resolve, and those lumps bake into a grainy texture nobody wants.
I learned this the hard way on my third attempt. Press a finger into your cream cheese block before you start: it should give gently, like a firm pillow. If it resists, give it another 30 minutes on the counter.
Heavy cream: This is where the custardy magic lives. The ratio of cream to cream cheese is what separates Basque cheesecake from the dense, compact New York style.
More cream means a softer, more flowing centre, something closer to baked custard than a firm slice. Don't substitute with half-and-half; the fat content matters.
Eggs: More eggs give you more structure; fewer give you a more liquid, wobbly centre. My recipe uses enough eggs for a centre that's set at the edges and still gently trembling in the middle, exactly where you want it.
Sugar: Sugar does double duty here. It sweetens the batter, yes, but it also caramelises at high heat to create that dark, burnished top. The "burn" isn't an accident it's the sugar doing exactly what it's supposed to do.
Flour or cornflour: This is where the internet argues. Some recipes use flour, some use cornflour, and some use nothing at all.
Here's my honest answer after baking this cake more times than I can count: flour gives very slightly more structure; cornflour gives a silkier, more tender interior and is naturally gluten-free.
I use cornflour in my version, and I haven't looked back. If you need this to be gluten-free, use cornflour instead of flour, same amount, same results, no adjustment needed.
Salt and vanilla: A pinch of salt lifts the sweetness; vanilla adds warmth without competing with the caramel notes of the top. Together they round everything out.
You're already doing beautifully that's the whole ingredient list.
The Golden Rule Step-by-Step Instructions
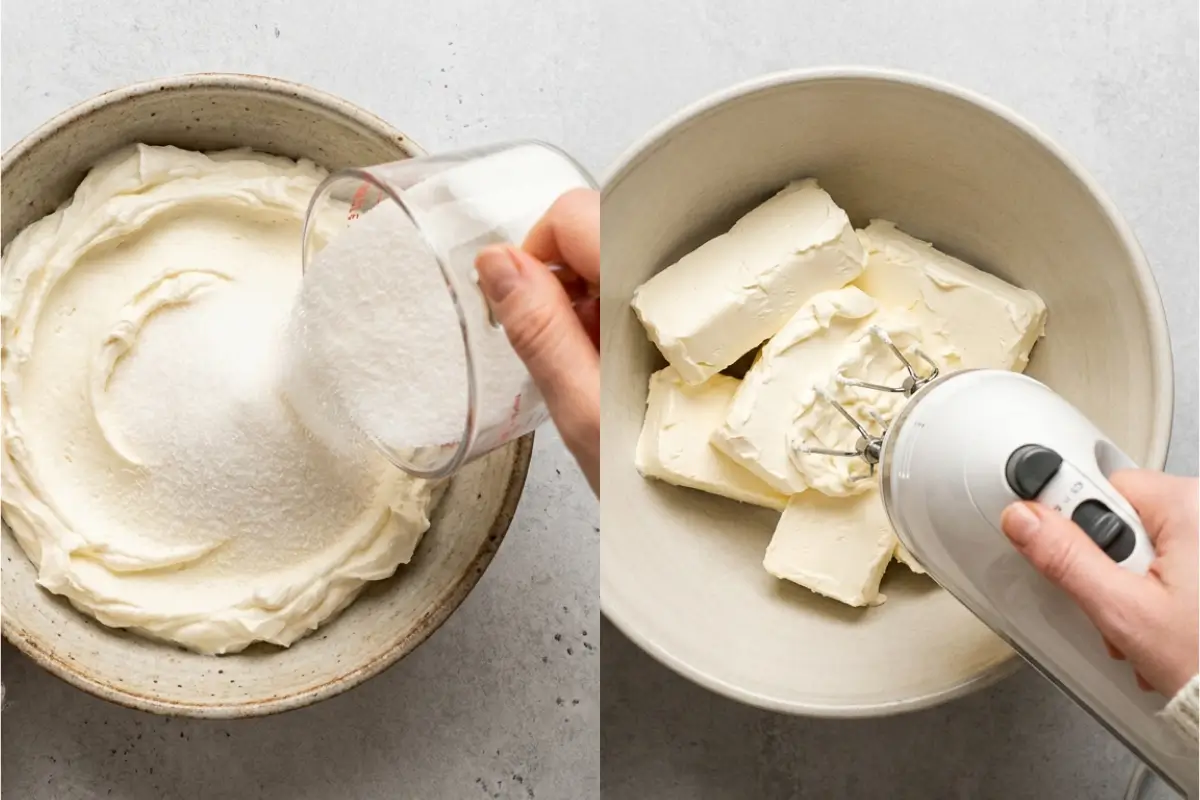
Here's the part everyone overthinks, but you won't. There are no complicated techniques here, just a handful of steps that build on each other. Read through once before you start.
1. Prep your pan
Line a 9-inch springform pan with parchment paper just crumple it, press it in, and let the edges rise above the rim. Those crinkled edges are traditional, not sloppy.
They're what give Basque cheesecake its unmistakable rustic charm. Preheat your oven to 425°F (220°C).
2. Make sure your cream cheese is truly room temperature.
I know I've already said this, but it bears repeating: this step is the difference between a silky, smooth batter and a lumpy one. If you're in a hurry, cut the cream cheese into cubes and let it sit for 20 minutes it softens faster in smaller pieces.
3. Beat cream cheese and sugar until silky.
Use a hand mixer or stand mixer on medium speed. Beat until the mixture is completely smooth and slightly fluffy, about 2 minutes. This is where lumps are either created or avoided. Don't rush past this step.
4. Add eggs one at a time.
Add each egg and beat just until incorporated before adding the next. Rushing this by adding all the eggs at once incorporates too much air into the batter, which can give you a texture closer to soufflé than custard.
Slow and steady here. You'll know the batter is right when it's smooth and slightly thickened between each egg.
5. Stream in the heavy cream.
Pour it in slowly while the mixer runs on low. Watch the batter change it goes from thick and dense to something flowing and silky. That's exactly right. The smell at this point is already something sweet, creamy, faintly eggy in the best possible way.
6. Add the cornflour, salt, and vanilla.
Fold these in gently. Once the flour or cornflour goes in, switch from the mixer to a spatula, as overmixing at this stage overdevelops structure and can make the texture tighter than you want. A few gentle folds until you see no white streaks. Done.
7. Pour and tap.
Pour the batter into your prepared pan and tap it firmly on the counter five or six times to release any air bubbles hiding in the batter.
8. Bake and trust the heat.
Slide the pan onto the centre rack of your preheated 425°F oven. Set a timer for 40 minutes. Do not open the oven for the first 30 minutes. The cheesecake will puff up dramatically it might even look like it's going to spill over the edges.
This is the soufflé effect of the eggs and heat. It's meant to happen. The top will go from pale to golden to dark mahogany. That's the plan, not a crisis.
If yours looks messy and dramatic at 35 minutes, that's completely normal.
9. The Wobble Test: the most important moment in this recipe.
At 40 minutes, open the oven and gently shake the pan. Here is what you're looking for:
The outer 2 inches of the cheesecake should be set and barely moving. The centre 3 inches should ripple in a slow, lazy wave not slosh like liquid, not stand completely firm. That wobble is the promise of a creamy centre. Trust it.
If the entire surface sloshes like water in a pan, it needs 5 more minutes. If the centre doesn't move at all, it's likely overbaked pull it immediately.
A toothpick tells you nothing useful here. The wobble is your only honest guide. Nonna always said the oven is just the beginning the resting is where the magic finishes. She was right about this one, too.
If your top is deeply golden but not quite dark enough by 40 minutes, switch your oven to broil for 2–3 minutes and watch it like a hawk. It goes from perfect to overdone in under a minute under the broiler.
10. Cool in the pan.
Leave the cheesecake in the pan on a wire rack. Walk away. It will deflate as it cools that sunken centre is not a failure; it's the cheesecake setting into its final, creamy shape.
Give it at least 2 hours at room temperature, then transfer to the fridge for at least 4 hours, ideally overnight.
11. Slice with a hot knife.
Dip your knife in very hot water, wipe it dry, and slice. The cut will be clean, and the inside will be a revelation pale, silky, trembling slightly at the centre, with that dark caramel crown on top.
See? You've done it beautifully.
Why This Creamy Basque Burnt Cheesecake Works
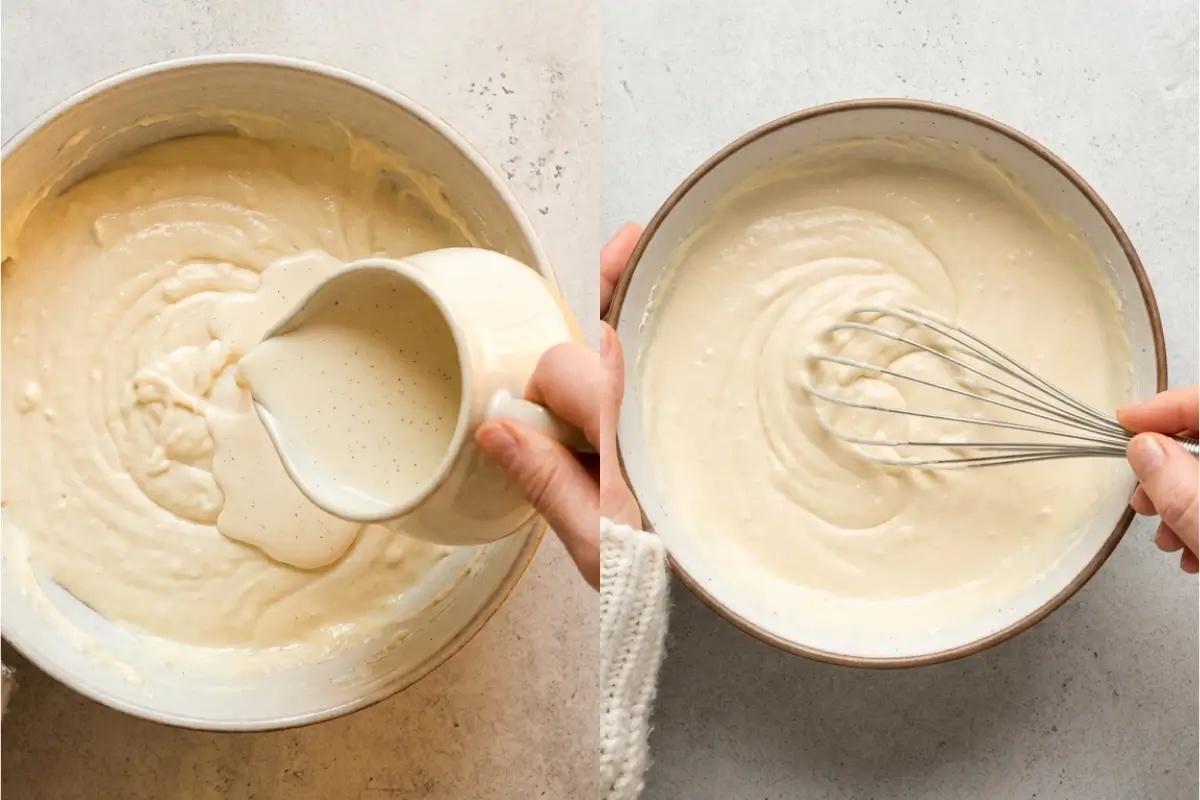
This is the section where I tell you why things happen the way they do, because understanding a recipe is what turns you from someone who followed instructions into someone who knows how to bake it.
The dark top is caramel, not char: At 425°F, the sugar in the batter hits the surface of the cheesecake and undergoes caramelisation. The result tastes like toffee and cream and warmth, not like something that went wrong.
The slight bitterness of the very dark parts actually balances the richness of the interior it's the dark top earning its place.
The high oven temperature replaces the water bath: Traditional baked cheesecake uses a water bath to provide gentle, even heat and prevent cracking.
Basque cheesecake takes the opposite approach: intense, direct heat sets the outside quickly and leaves the inside soft. The high egg-to-cream ratio in the batter helps it hold together without steam support.
The wobble means the centre is still cooking: After you pull the cheesecake from the oven, carryover cooking continues for 20–30 minutes as the pan holds heat. What looks underdone in the oven will finish setting as it cools.
Removing it at the wobble stage means it will land exactly right: creamy and soft, not grainy or curdled.
The deflation is the shape it's supposed to be: That dramatic puff during baking is the eggs acting like a soufflé. As the air cools and contracts, the cheesecake settles into its final form, slightly sunken in the centre, with creased parchment-paper sides and a beautifully imperfect top. This is the look. This is success.
Room-temperature cream cheese is the foundation of everything: Cream cheese is an emulsion of fat and water held together by proteins. When it's cold, those proteins are tight, and the fat is solid they don't blend smoothly with eggs and cream. At room temperature, everything flows together into the silky batter you're looking for.
This is where the magic starts to happen. You're closer than you think.
Elena's No-Fail Tips for Creamy Basque Burnt Cheesecake
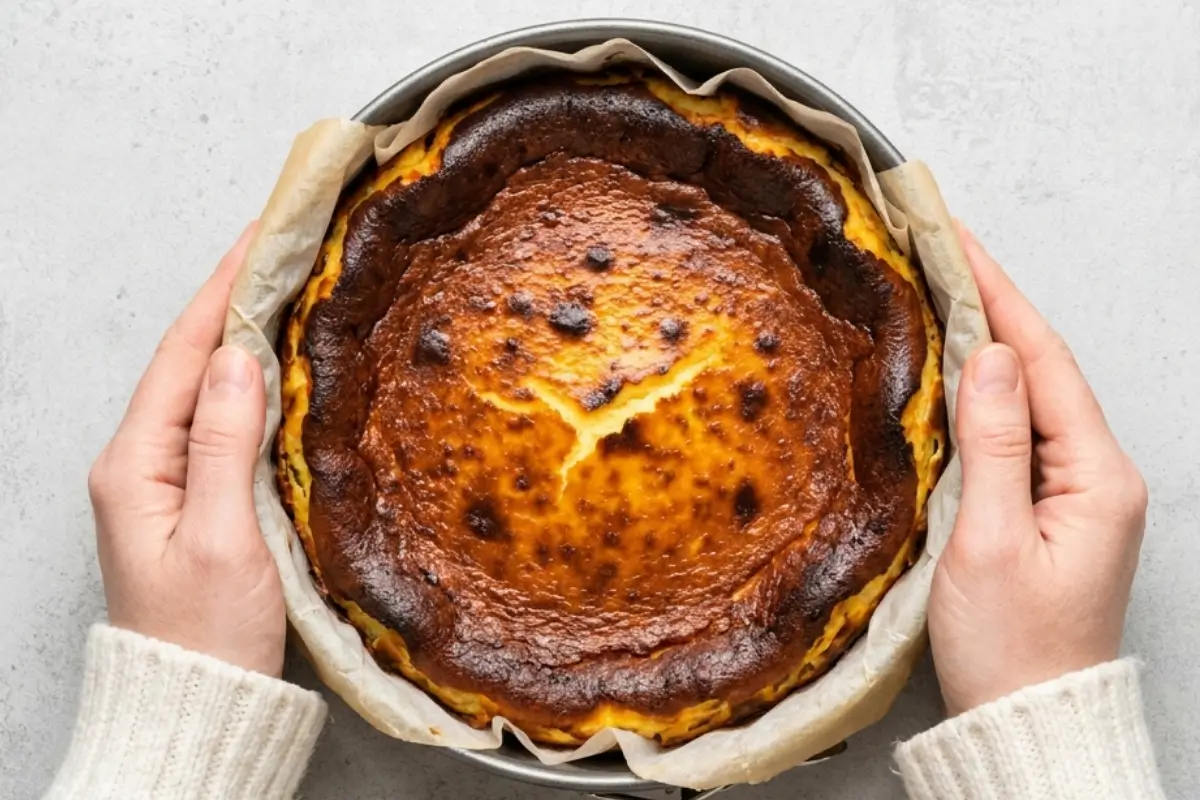
Why Is My Top Not Getting Dark Enough?
Oven temperatures vary more than most people realise. If your cheesecake top is golden but not reaching that deep mahogany colour by the 40–45 minute mark, don't worry switch your oven to broil and check every 60 seconds.
Place the pan on a rack closer to the top element. It will darken quickly, so don't walk away. Pull it the moment it reaches the colour you want, then proceed with the wobble test for doneness. The top colour and the internal wobble are two separate checkpoints; handle them together.
Is It Supposed to Be This Jiggly? (Yes, here's exactly how to know it's done.)
This is the question I get more than any other, and I understand why. After a lifetime of baking where jiggly = underdone, it's counterintuitive to pull a cheesecake that's still moving.
But here's the truth: a proper creamy Basque burnt cheesecake is intentionally underdone at the centre when it comes out of the oven.
Shake the pan gently. The outer ring, roughly 2 inches from the edge, should barely tremble. The centre, roughly 3 inches across, should ripple slowly, like a wave settling.
If the whole thing sloshes, it needs more time. If nothing moves at all, it's past its peak creaminess and will set firmer than ideal. The wobble is your guide, your signal, your friend. Trust it completely.
Can I Use Cornflour Instead of Flour?
Yes, and I actually prefer it. Cornflour creates a slightly silkier texture and is naturally gluten-free, so it's a simple swap if you're baking for someone with gluten sensitivity.
Use the same amount as the flour called for. The batter may look very slightly thinner, but it bakes up beautifully.
Can I Make This the Day Before?
Please do. An overnight chill is not just fine it genuinely improves the texture. As the cheesecake rests in the cold overnight, the custard centre sets more evenly, and the flavours deepen.
When you pull it out the next day and slice it, you'll get cleaner cuts and a more pronounced contrast between the dark caramelised top and the pale, trembling interior.
This is the ideal dinner party dessert: make it the night before, sleep well, and slice it the next evening confidently.
My Batter Has Lumps What Do I Do?
Cold cream cheese is almost always the cause. Prevention is the easiest fix: give your cream cheese a full hour at room temperature before you start. If you're already at this stage and the lumps are there, don't panic.
Pass the batter through a fine-mesh sieve before pouring it into the pan. It's an extra step, but it works. Press the batter gently through with a spatula, and you'll have a smooth, lump-free batter ready to bake.
Saving a Little Joy for Tomorrow
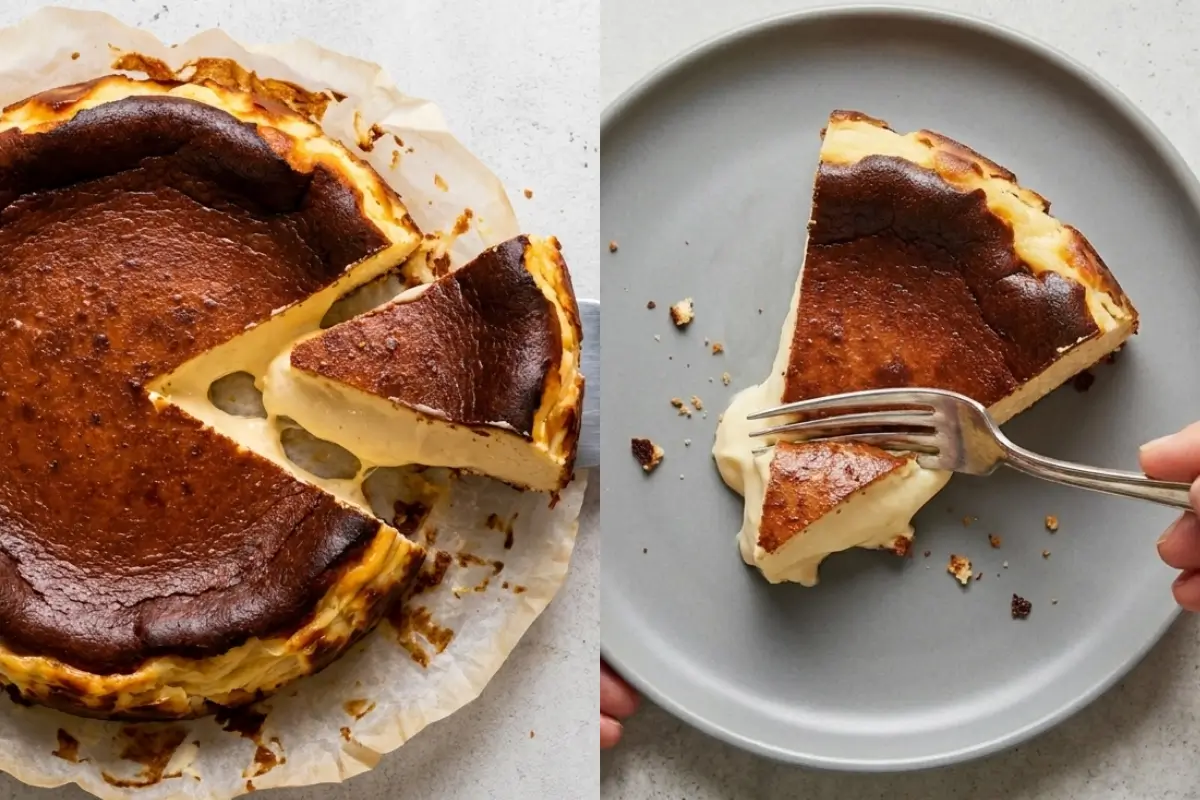
This recipe deserves an honest note about what comes after.
In the fridge: Creamy Basque burnt cheesecake keeps beautifully for up to 3–4 days, covered loosely with plastic wrap or in an airtight container.
The texture is at its best within the first 48 hours, still soft and custard-like. After that, it firms up slightly but remains delicious.
Freezing: I'll be honest with you, I don't recommend freezing this cheesecake. The creaminess that makes it so special is the first thing to go when it freezes.
The texture becomes granular and loses that silky quality that's the whole point. The good news is that it rarely lasts in our house long enough to need freezing.
Serving temperature: This is one of those gentle debates that doesn't have a wrong answer. The traditional approach is to serve it close to room temperature, softer, more custardy, and more yielding.
I like to take it out of the fridge. 15 minutes before slicing: cool enough to hold its shape, soft enough to melt properly. If you prefer it straight from the fridge, it's firmer and slices more cleanly. Both are right. Neither is a mistake.
Mini version: If you'd like individual Basque cheesecakes, a standard muffin pan lined with parchment strips works beautifully. Reduce your bake time to 15–20 minutes and use the same wobble test the centres should ripple gently when you shake the pan.
This is the dessert that looks like you spent your whole day in the kitchen and only took 15 minutes of actual hands-on time. That's a gift. Use it generously.
![A beautiful creamy Basque burnt cheesecake with a deeply browned, caramelized top and a pale, soft center[cite: 1]. A single slice is cut and pulled slightly away from the whole cake, which rests on crinkled parchment paper next to a serving knife](https://www.addcakes.com/wp-content/uploads/2026/09/Creamy-Basque-burnt-cheesecake.webp "Creamy Basque burnt cheesecake 3")
The Most Luscious Creamy Basque Burnt Cheesecake
Ingredients
Method
- Preheat your oven to 425F (200C fan) with the shelf right in the middle.
- Take two large sheets of baking paper and scrunch them up in your hands into a ball, then unfold them and press them into an 8-inch springform pan. The batter will weigh it down, so let those messy creases stay.
- In a large bowl, beat the cream cheese on medium speed for 2 minutes until it is smooth and free of lumps.
- Add the sugar and beat on low speed for 10 seconds.
- In a separate bowl, whisk the flour and about a quarter of your cream until it turns into a smooth paste.
- Slowly whisk in the rest of the cream and the vanilla.
- With your beater on low, slowly pour the cream mixture into your cream cheese.
- Once combined, slowly pour in the eggs. Stop beating as soon as they are mixed in so you do not add too much air.
- Pour the batter into your lined pan. Bang the pan lightly on the counter a few times and pop any big bubbles on the surface with a small knife.
- Bake for 45 minutes. You want the top to turn a deep, rich golden brown, almost looking burnt, but the center will still be wobbly like a warm memory.
- Let it cool on the counter for at least 2 hours, then pop it in the fridge uncovered for a minimum of 8 hours.
Notes
Making Sweet Memories
The weekend after Pilar introduced me to her cheesecake, I made it for my own family. I was nervous the wobble still felt wrong to me, and the dark top still looked alarming.
My daughter peered at it as it came out of the oven and said, exactly as I had once said to Pilar: "Mamma, you burnt it."
"I know," I said. "Taste it."
She did. She went quiet for a moment in the way that children do when something surprises them completely. Then she looked up and said simply, "Make this again."
That's what food does when it's made with joy instead of fear. It surprises you. It makes someone go quiet. It earns its place at the table not because it was perfect, but because it was good, and warm, and made with love.
At AddCakes, we believe in memories, not masterpieces. This creamy Basque burnt cheesecake is living proof that the most beautiful things in the kitchen are sometimes the ones that look like a mistake.
Simply add cake. And a little of yourself. That's where the joy lives.