
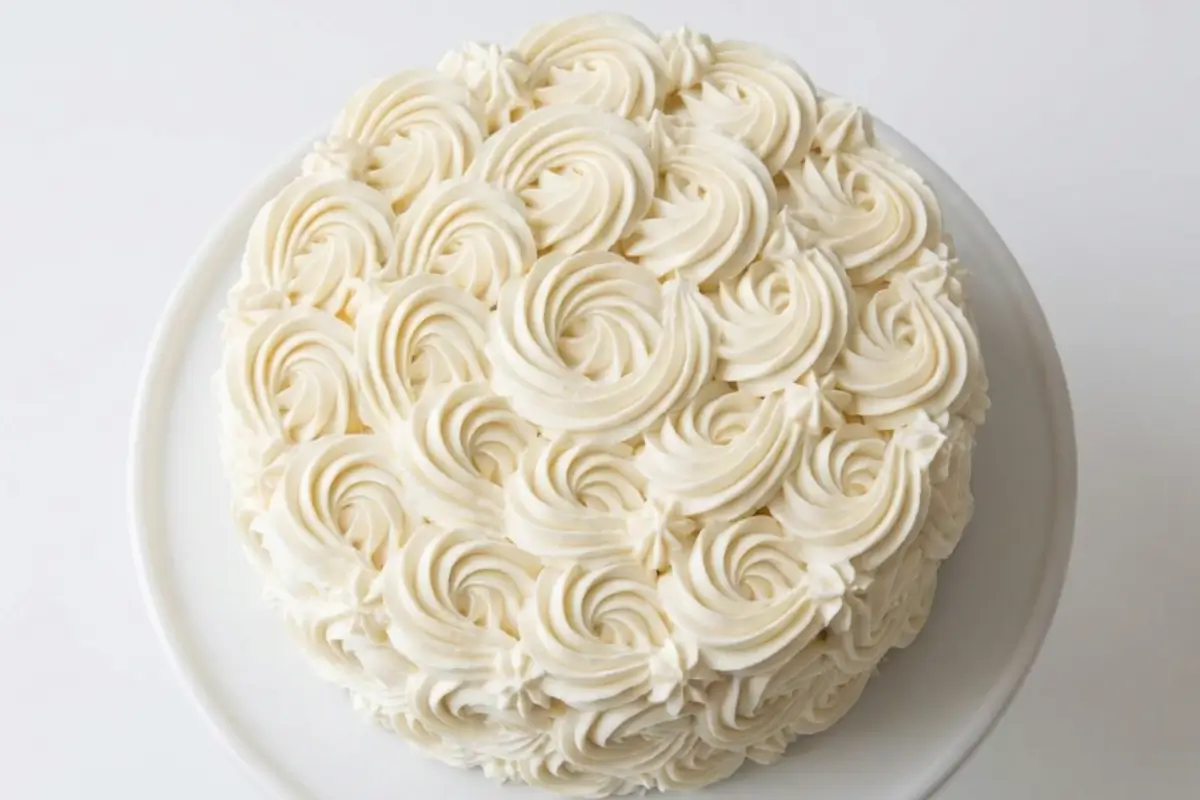
Frosting consistency guide: those three words land in a search bar most often when someone is standing in their kitchen, spatula in hand, staring at something that looks more like soup than frosting. I know, because I've been that person. More than once.
It was my niece's eighth birthday. I'd made the cake layers the night before, felt very proud of myself, and then made the buttercream the next afternoon in a kitchen that had been warming up from the oven all morning.
I piled it onto the first layer and watched slowly, then all at once, as the swirl slid sideways. There was a moment of complete silence in my head. Then panic.
Here's what I wish someone had told me right then: frosting consistency is not mysterious. It is not some rare skill you either have or don't. It comes down to two things: temperature and ratios, and once you understand those two things, you will never feel powerless over your frosting again.
This guide lays out everything I know in the plainest way I can manage. We're going to cover what consistency actually means, the three levels you'll use most, the real reason things go wrong (hint: it's seldom the recipe), and exactly how to fix it when they do.
You've got this. Let's start.
From Memory to Method
Every frustrating batch of frosting I've ever made taught me something that no recipe card bothered to write down. The recipe gives you the ratios. This guide gives you the understanding behind the ratios, the kind of thing Nonna would have passed along just by letting you stand beside her at the counter, watching how she held the spoon.
The goal is simple: by the time you finish reading, you'll know exactly what your frosting should look and feel like at every stage, what to do if it drifts off course, and how to trust your own hands to fix it. Joy, not perfection. That's the whole heart of it.
What Frosting Consistency Guide Actually Means
This part is simpler than it looks.
Frosting consistency describes how thick or thin your frosting is and, more specifically, whether it can hold a shape, spread smoothly, or flow freely.
Get it right, and your frosting does exactly what you need it to do: it glides onto a crumb coat without tearing the cake, it swirls on top of a cupcake and stays there, and it holds a rose petal without going floppy.
Get it wrong, and no amount of effort with a piping bag is going to save you.
The most reliable way to check your consistency is what I call the peak test: dip a spatula or spoon into your frosting and lift it out. Watch what the frosting does.
Soft peak: the peak forms but immediately flops over. The frosting is ribbon-like and loose.
Medium peak: the peak holds its shape for a few seconds, then the very tip curls over gently. Like a little wave.
Stiff peak: the peak stands completely upright. Firm, sharp, no curl. It resists a finger poke for a full second or two before giving slightly.
You'll know you've got medium consistency right when you run a butter knife across the surface, and it leaves a clean, even line. You'll know stiff consistency is right when the frosting feels almost like modelling clay under your hands – firm, but not dry.
Here's the trick I learned the hard way: the peak test only works when your frosting is at the right temperature. Cold frosting will seem stiffer than it actually is. Warm frosting will seem runnier than it should be. Temperature first, always. More on that shortly.
The smell of real butter warming in the bowl, that faintly sweet, slightly nutty softness that's the smell of frosting that's right on the edge of perfect. Trust your nose as much as your spatula.
The Three Consistency Levels and When to Use Each
Here's the part everyone overthinks, but you absolutely won't.
Thin Consistency For Painting, Writing, and Drizzling
Think of thin consistency as pourable honey. When you lift your spatula, the frosting flows off in a slow, steady ribbon and settles flat within a few seconds. It won't hold a peak, and that's fine, because thin isn't for peaks.
What it looks like: glossy, smooth, and fluid. When you dip your finger and pull it out, the frosting runs back together quickly.
Best for: painting thin colour washes onto a cake, writing a name on top in a flowing script, creating a very fine final "glaze" layer, or drizzling over bundt cakes.
Difficulty: This is the most forgiving consistency because even if it's slightly too thin, a little more powdered sugar (added a tablespoon at a time) brings it right back.
You'll know it's right when a spoonful poured over the back of your hand runs smoothly towards your wrist without stopping.
Mistake to avoid: don't try to pipe swirls or rosettes with thin frosting. It will collapse immediately and break your heart a little.
Medium Consistency: The Everyday Workhorse
Medium consistency is the one you'll use most. It's reliable, it's forgiving, and it's what my vanilla buttercream produces right out of the bowl without any adjustments needed.
What it looks like: the peak test gives you that gentle curl at the tip. When you spread it with an offset spatula, it glides smoothly without dragging and holds the shape of the spatula stroke.
Best for: spreading and smoothing a final coat on a layer cake, filling between cake layers, crumb coating, and decorating cupcakes with simple swirls (think the classic round swirl from a 1M tip).
Difficulty: it requires attention to temperature, but once you feel it, you'll always recognise it.
You'll know it's right when you can drag a bench scraper along the side of your frosted cake, and it pulls a clean, smooth line without tearing.
Mistake to avoid: don't use medium consistency for detailed piping flowers or tall rosettes. The petals will slump. You need stiff for that.
Stiff Consistency For Piping Flowers and Rosettes
Stiff consistency is where frosting becomes sculptural. This is what lets you pipe a rose with petals that actually stand up or a rosette that holds its definition all the way to the centre.
What it looks like: the peak stands completely upright. The frosting resists a finger poke for a full second or two before giving. When you pull your spatula out of the bowl, it comes out clean with a sharp peak that doesn't move.
Best for: piping flowers (roses, chrysanthemums, and daisies), tall rosettes, stiff borders, and any decoration where the shape needs to hold for hours, especially in a warm room.
Difficulty: Stiff frosting is less forgiving. If it's too stiff, it will crack as it comes through the piping tip. The sweet spot is stiff but still smooth.
You'll know it's right when you press a small amount between two fingers and it feels like cool Play-Doh – pliable but not sticky, with no crumbling.
Mistake to avoid: going too far. Stiff enough to pipe is not the same as stiff enough to crack. If your frosting is crumbling at the tip as you pipe, it's over-stiffened. Add a teaspoon of room-temperature cream and beat briefly.
See? You already understand the whole map. Take a breath; the next part is the piece most guides skip, and it's the most important one.
The Real Reason Your Frosting Goes Wrong (It's Not What You Think)
Here's the part I wish someone had explained to me years ago: almost every time, your frosting isn't wrong because the recipe is wrong. It's wrong because of the temperature of yours, your kitchen's, or your butter's.
Most home bakers reach immediately for more powdered sugar when frosting is too runny or more cream when it's too stiff. Sometimes that's the right move. But more often, what the frosting actually needs is a few minutes in the fridge or to sit out at room temperature and then get a fresh beat.
Cold butter produces frosting that is stiff, lumpy, and won't fully incorporate. You can see it in the bowl; it looks chunky and uneven, almost curdled. The fix is not more cream. The fix is warmth.
A few minutes in a slightly warm (not hot) bowl, or using a hair dryer gently around the outside of the mixing bowl while the mixer runs, will bring cold butter back into a smooth emulsion.
Warm butter or a warm kitchen produces frosting that is soft, runny, and collapses under its own weight. The fix is not more powdered sugar.
The fix is chill. Cover the bowl and put it in the refrigerator for 20–30 minutes, then beat again. You'll be amazed how often this single step takes you from "soup" to "perfect".
I ruined this exact batch before I figured this out. I was making a tiramisu-style cake on a hot afternoon and kept adding more powdered sugar, trying to fix the runny frosting, until it was so sweet it tasted like pure icing sugar. All I needed was the fridge. Ten minutes. That's it.
Why Does My Frosting Look Grainy or Curdled?
Grainy texture usually means one of two things: your powdered sugar wasn't fully incorporated (always sift it if you have time), or your frosting went through a temperature shock, with warm and cold components meeting each other too fast.
Curdled-looking Swiss or Italian buttercream almost always means the butter went in too cold. Don't throw it away.
Put the bowl in a warm water bath or use the hair dryer trick, keep mixing, and watch it come back together. It will. I know it looks like it won't, but it will.
If yours looks a little broken right now, that's completely normal. Keep reading.
Elena's No-Fail Frosting Fixes
This is the section to save. Bookmark it, pin it, and screenshot it because this is what you reach for when things go sideways mid-bake.
My Frosting Is Too Runny: What Do I Do?
What's probably happening: your butter or kitchen was too warm, or you added cream too quickly.
Fix step by step:
Stop adding anything. Put down the cream.
Cover the bowl and refrigerate for 20–30 minutes.
Remove and beat with a hand mixer or stand mixer for 2–3 minutes.
Do the peak test. If it's still too soft, you can now add a tablespoon of sifted powdered sugar and beat again.
Repeat tablespoon at a time, always until the peak holds.
The trap to avoid: adding too much powdered sugar to fix runny frosting makes it unbearably sweet. The chill-first approach solves the problem without changing the flavour.
You'll know it's fixed when the peak holds its curl for a few seconds, and the frosting doesn't slide off the spatula when you hold it upside down.
My Frosting Is Too Stiff. How Do I Soften It?
What's probably happening: your butter was too cold, or you added too much powdered sugar, or the frosting has been sitting in the fridge.
Fix step by step:
Let the frosting sit at room temperature for 10–15 minutes first. This alone often does it.
Beat for 2 minutes. The friction of mixing warms it slightly.
If still too stiff, add a teaspoon of room-temperature milk or cream (never cold) and beat again.
Repeat one teaspoon at a time until you reach the consistency you need.
The trap to avoid: adding cold cream or milk. Cold liquid into stiff, cold frosting will make it grainy. Room-temperature liquid only.
You'll know it's fixed when the frosting spreads without dragging or tearing, and the peak curls gently rather than standing rigid.
My Frosting Looks Grainy or Curdled. Is It Ruined?
No. It is not ruined.
If it's grainy (feels like fine sand), the powdered sugar didn't fully incorporate. Keep beating. Give it a full 5 minutes on medium-high speed before you judge it. The friction and time usually dissolve the graininess completely.
If it looks curdled (like cottage cheese), the temperature is the issue. The butter is probably too cold. Wrap a warm, damp towel around the outside of the mixing bowl, or gently warm the edges with a hair dryer set on low while the mixer runs.
Beat until it comes back smooth; it will, within a few minutes, look silky again. You're closer than you think; keep going. This is where the magic starts to happen.
How to Adjust Frosting Consistency Without Ruining the Flavour
Take a breath; you're doing great so far.
The golden rule of frosting adjustments: always add in small amounts, and always mix thoroughly before deciding you need more. One teaspoon of cream can take you from medium to thin without warning. One tablespoon of powdered sugar can swing stiff when you want medium. Slow is the only way.
To thin your frosting: add room-temperature milk or heavy cream, one teaspoon at a time. Heavy cream will give you a slightly richer, smoother result; milk works perfectly well for most purposes. Most people I know have wondered whether milk "counts"; it absolutely does, and I use it all the time.
To thicken your frosting: add sifted powdered sugar, one tablespoon at a time. Sifting matters unsifted powdered sugar can create lumps and add to graininess. If you're already worried about sweetness, try the refrigerator first (see above) before reaching for more sugar.
A note on dairy-free and vegan frostings: if you're using vegan butter or coconut cream, the consistency rules still apply, but vegan frostings are slightly more sensitive to temperature fluctuations.
Chill is your best friend here. Coconut cream-based frostings in particular firm up beautifully with 15 minutes in the refrigerator. If you're using oat milk to thin, add in even smaller amounts; it has more water content than dairy cream and can loosen faster than you expect.
A word of reassurance: standard buttercream and cream cheese frosting contain no gluten. If you're baking for someone with a gluten sensitivity, the frosting is the one part you don't need to worry about changing.
Saving Joy for Tomorrow: Storage Tips
One of the best things you can do for yourself as a baker is to make your frosting a day ahead. It gives you one less thing to manage on the day of, and properly stored frosting actually benefits from resting overnight.
Refrigerating frosting: store in an airtight container for up to 5 days. When you're ready to use it, take it out of the refrigerator and let it sit at room temperature for 30–45 minutes before using.
Then beat it again either with a hand mixer or in your stand mixer for 2–3 minutes until it returns to a smooth, workable consistency. It will seem stiff at first, and then it will soften. Don't skip the re-beating step, or you'll end up spreading what feels like cold butter.
Freezing frosting: buttercream freezes beautifully for up to 3 months. Store in an airtight, freezer-safe container. Thaw overnight in the refrigerator, then bring to room temperature and beat before using. Cream cheese frosting can be frozen, but the texture can shift slightly after thawing; it is still usable, just give it a longer beat.
Make-ahead timing: for a birthday cake or a celebration bake, I always make my frosting 1–2 days ahead and store it in the refrigerator. The morning of the event, I take it out, let it sit for an hour, and beat it smooth, and it's ready. One less thing. One less moment of kitchen panic. That's one less thing standing between you and a good morning.
Making Sweet Memories
That birthday cake, the one with the sliding swirl, eventually got frosted. I scooped off what had gone wrong, put the buttercream in the fridge for twenty minutes, beat it again, and started over.
It wasn't the most perfect cake I'd ever made. But it was there, on the table, with eight candles and a little girl who didn't notice anything except that it had sprinkles on top.
That's the thing about frosting and about baking in general: the goal was never perfection. The goal was the table. The candles. The faces.
Frosting consistency is just the knowledge that gets you there without the panic. And now you have it. You know the peak test, you know that temperature is the real villain most of the time, you know how to fix it when it goes sideways- and it will sometimes, even for experienced bakers – and that's completely fine.
At AddCakes, we believe in memories, not masterpieces. Save this guide for the next time your frosting gives you trouble. You'll know exactly what to do.
[…] is the Frosting consistency guide. Trust it. Once you understand it, you can adapt it to your kitchen, your climate, your […]
[…] Before we talk about ghosts, spider webs, and graveyard scenes, we need to talk about frosting. Because the 1 reason Halloween cupcake decorations fail ghost peaks that droop, spider webs that smear, candy eyes that slide off overnight is not the design. It's the frosting consistency. […]