
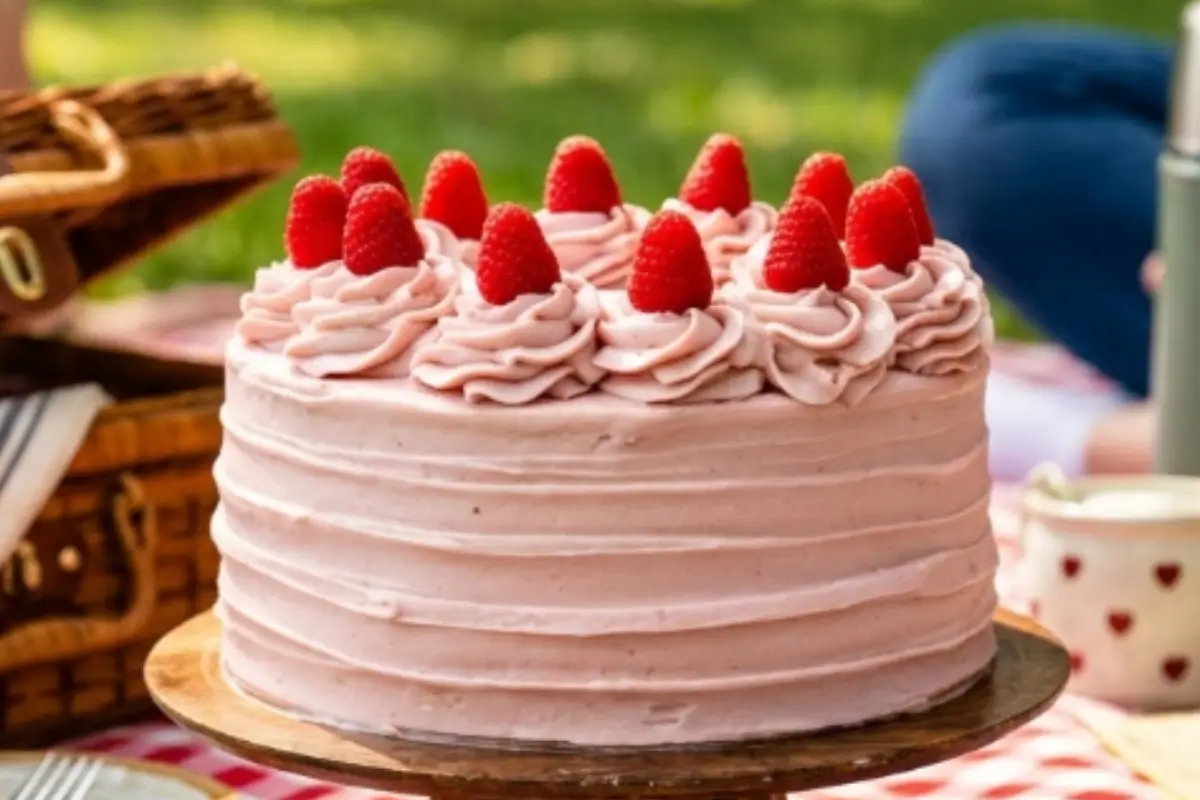
There is a Raspberry Cake in my life that I have made more times than I can count, and every single time, it takes me right back to Nonna's kitchen. I remember watching her carefully strain berries at the counter, the air thick with the scent of sugar and fruit, her wooden spoon tapping the edge of the bowl in that same steady rhythm. She told me that capturing summer in a jar was a way to hold onto joy, no matter the season.
Life gets busy, and I know it feels like we are constantly racing against the clock. Some weeks it seems like there is barely time to sit down for dinner, let alone bake a layer cake from scratch.
But every once in a while, I like to stop, slow down, and bake something that reminds me of those sun-drenched afternoons the ones where the only thing on the schedule was a bowl of berries and a little patience.
This cake is my way of holding onto that feeling. And I promise you, it is far more forgiving than it looks.
The Key Ingredients For The Raspberry Cake And Why They Matter
Take a breath this part is simpler than it looks. Every ingredient here is doing one specific job, and once you understand why, the whole recipe starts to make sense.
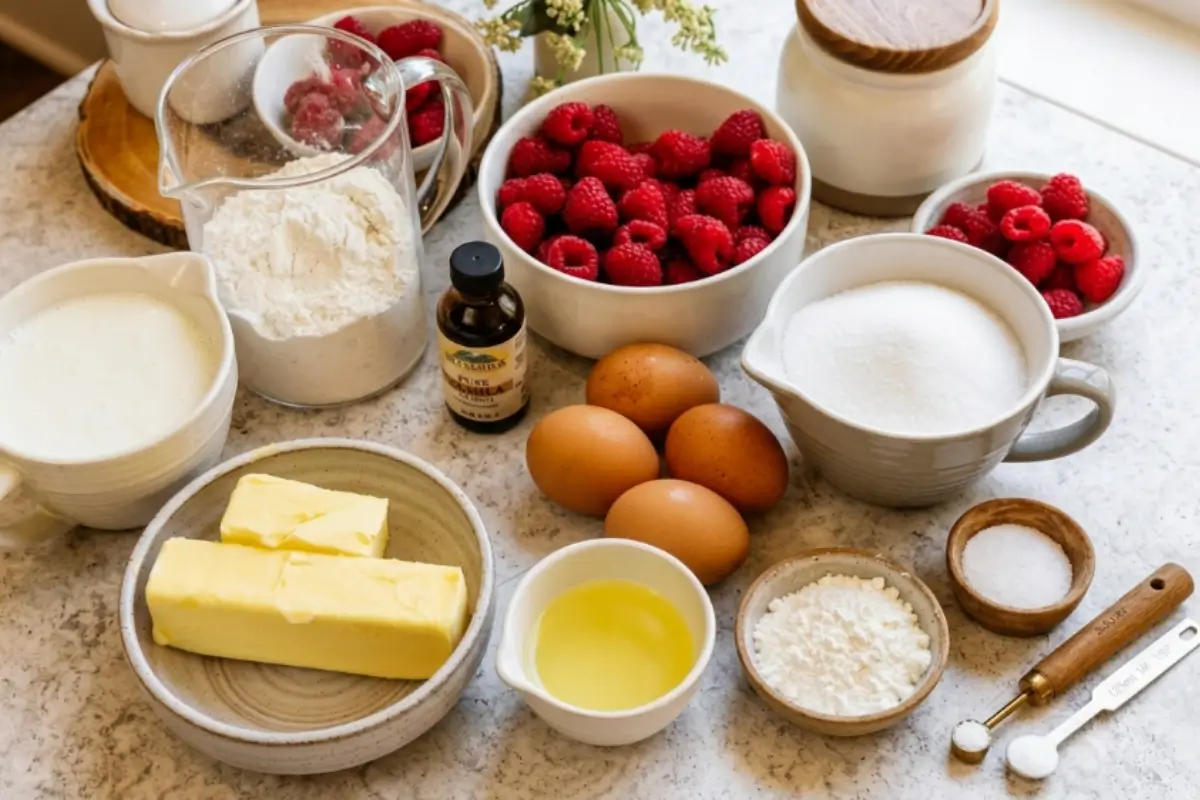
Fresh raspberries are the heart of this cake, both in the jam and on top for that gorgeous final touch. If fresh berries aren't in season where you are, frozen raspberries work beautifully here too; just don't thaw them first. Add them straight from the freezer when the recipe calls for them, and they'll behave the same way.
Buttermilk is what gives this vanilla cake its soft, tender crumb and that gentle tang that keeps it from tasting flat.
If you need a dairy-free version for a guest, a plant-based milk stirred with a splash of vinegar or lemon juice and left to sit for ten minutes will mimic buttermilk beautifully.
Butter and vegetable oil, together, are the secret to a cake that's both flavorful and moist days later. The butter brings richness, the oil brings softness that butter alone can't quite manage.
It's a little trick I learned the hard way after one too many cakes that were delicious on day one and dry by day two.
All-purpose flour builds the structure here. If you're baking for someone who needs a gluten-free option, a 1:1 gluten-free baking blend can be substituted in equal measure just be gentle with your mixing, since gluten-free batters can dry out a touch faster in the oven.
Cream cheese folded into the butter frosting is what makes this cake feel special-occasion-worthy. It adds a soft tang that balances the sweetness of the raspberry jam swirled inside, and it holds its shape beautifully when you smooth it with a bench scraper, which is exactly the kind of detail that makes a homemade cake look like it came from a bakery.
You're already doing beautifully. Let's talk about how it all comes together.
The Golden Rule Step-by-Step Instructions
Here's the part everyone overthinks, but you won't, because I'm walking through it with you.
Preheat your oven to 350°F. Grease and line three 8-inch cake pans with parchment paper. This little bit of prep now saves you a headache later, I promise.
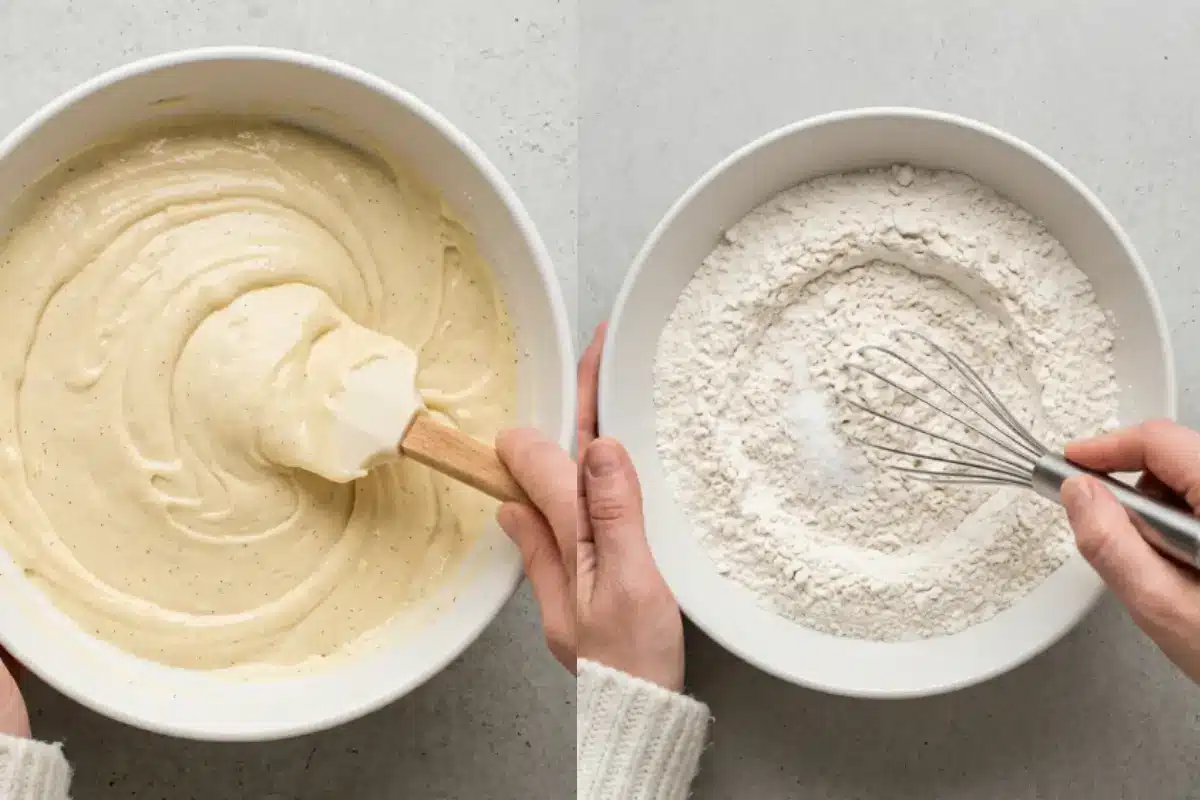
Whisk together the flour, baking powder, baking soda, and salt in a bowl and set it aside. Nothing fancy here; make sure it's well combined so your leavening is spread evenly through the cake.
Beat the butter, oil, and sugar together for two minutes, until the mixture turns pale and looks almost fluffy, like softly whipped clouds. That's your cue that it's ready. If it still looks dense or heavy, give it another thirty seconds.
Beat the butter, oil, and sugar together for two minutes, until the mixture turns pale and looks almost fluffy, like softly whipped clouds. That's your cue that it's ready if it still looks dense or heavy, give it another thirty seconds.
Add the eggs one at a time, mixing well after each, then mix in the vanilla extract. You'll notice the batter turning silky and glossy as you go; that's exactly what you want. Add one-third of the buttermilk, then one-third of the dry ingredients, mixing on low speed. Repeat until everything is combined.
Elena's Tip: Use a spatula to fold the batter at the end so you don't over-mix.
This one step is the difference between a cake that's soft and tender and one that turns out dense. Over-mixing develops the gluten in the flour too much, and that's what gives cakes that heavy, gummy texture nobody wants.
Divide the batter into your pans and bake for about 30 minutes. Here's a little secret most recipes don't tell you: pull the cakes when the toothpick comes out with just a few moist crumbs clinging to it, not perfectly clean.
A completely clean toothpick often means the cake has already gone a touch too long in the oven, and that's what leads to dryness. A few soft crumbs are exactly right. Let the layers cool completely before you touch them — this part takes patience, but it's worth it.
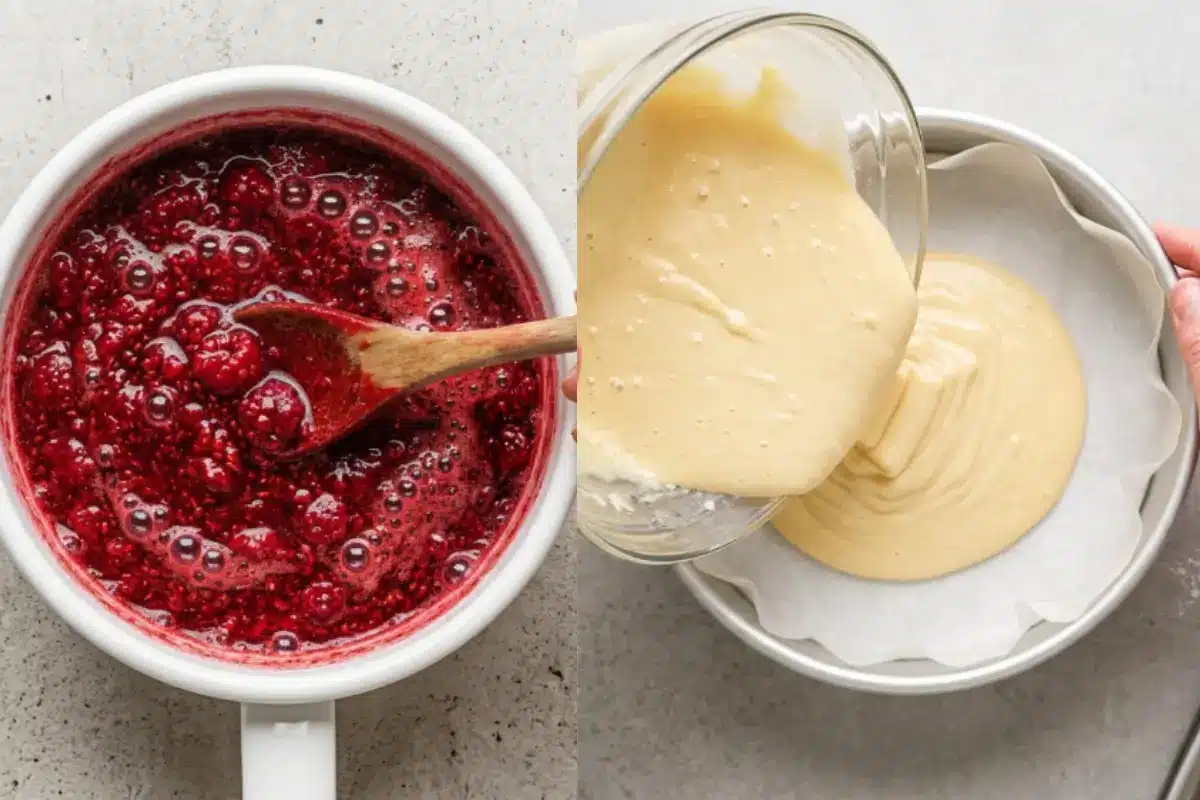
To make the jam, simmer the raspberries, sugar, and lemon juice in a saucepan until the berries break down and go soft and jammy.
Whisk the cornstarch and water together and stir it into the simmering berries until the jam thickens and turns glossy, almost like a jewel.
Press the jam through a fine-mesh sieve to remove the seeds. This is the step Nonna taught me, standing at her counter with that same patient rhythm, pressing gently, not rushing it.
It's what gives the filling that silky, spoonable texture instead of a seedy, uneven one. Let the strained jam cool completely before using it; warm jam will melt straight into your frosting and cake layers instead of staying neatly in place.
For the sugar syrup, heat the sugar and water in a saucepan until the sugar dissolves, then let it cool. Brushing this over your cake layers before frosting is a little insurance policy; it locks in moisture, so even if a layer bakes a minute or two longer than planned, your cake will still taste soft and fresh.
To make the frosting, beat the butter and cream cheese until smooth. Add half the powdered sugar and the raspberry jam, and mix. Gradually add the rest of the sugar until you have a smooth, fluffy frosting.
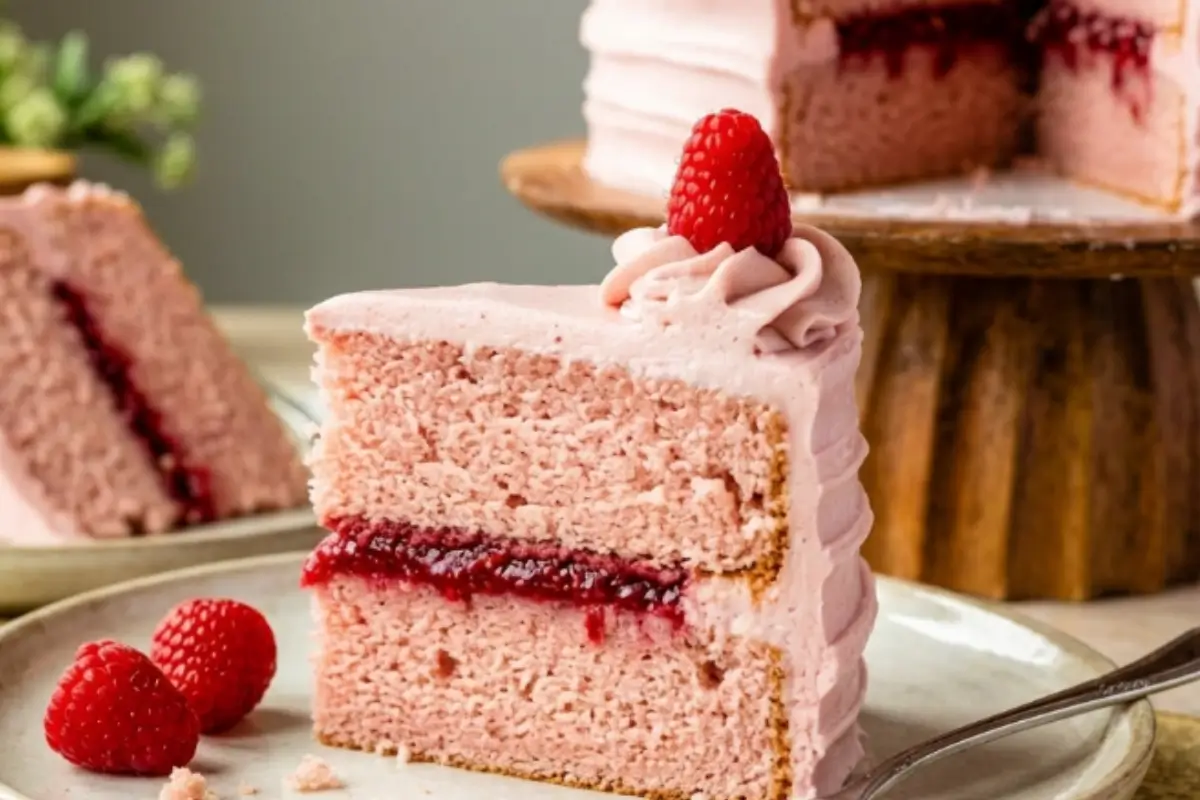
To assemble the cake, brush each layer with the sugar syrup first. Then, before you spread your raspberry jam, pipe a ring of frosting around the edge of each layer to create a little dam.
This keeps the jam tucked neatly inside instead of sliding out the sides when you cut into it later a trick that saves so many home bakers from a slippery, oozing cake. Spread your frosting inside the dam, then fill with the raspberry jam, and stack your layers.
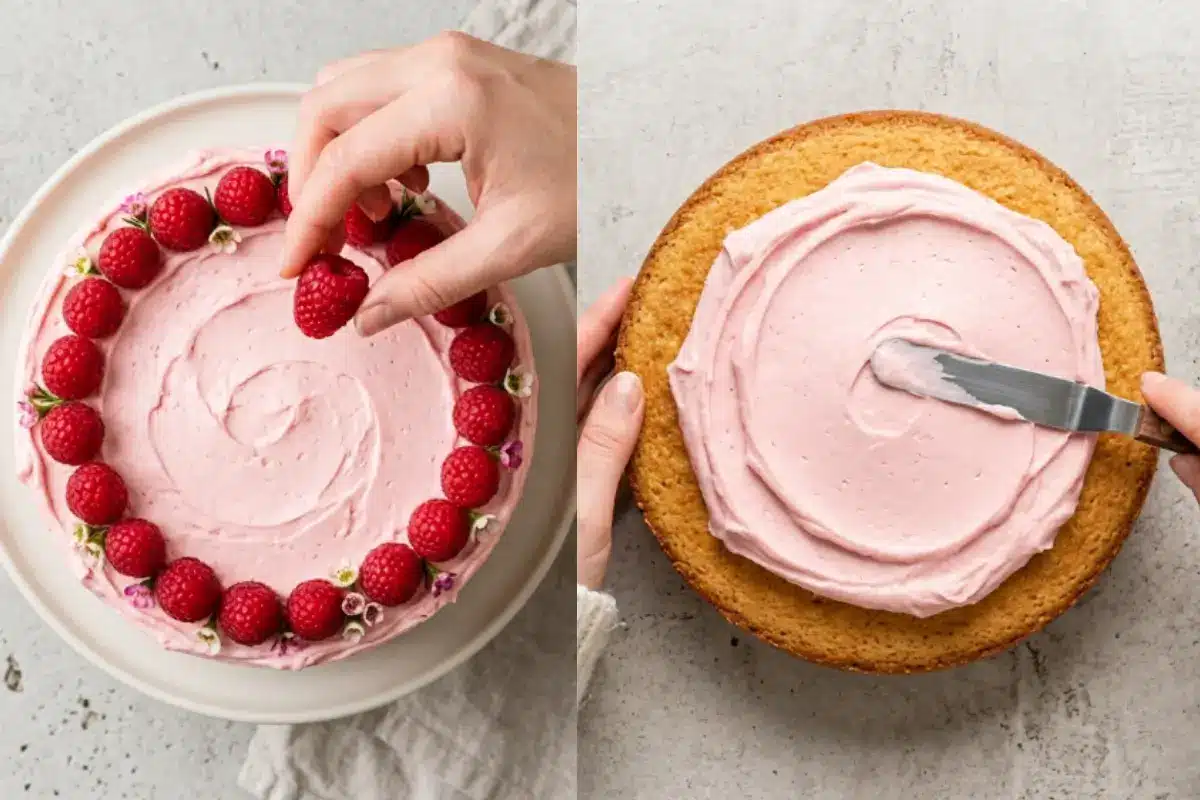
Chill the cake for 15–20 minutes after crumb-coating, then add your final layer of frosting and fresh raspberries. If your crumb coat looks a little messy at this stage, that's completely normal; it's not meant to be perfect; it's just meant to hold everything in place while it chills.
Elena's Tip: Use a bench scraper to gently smooth the sides for that professional look gently. This is the moment everyone waits for: watching a simple cake turn into something that looks like it came straight from a bakery window.
See? You're already so much closer than you think.
Why This Raspberry Cake Works
A little insight into the "why" behind these steps, so you understand your cake instead of just following along blindly:
Straining the jam removes the seeds and stabilizes the texture, so your filling stays smooth, glossy, and sliceable instead of runny or uneven between layers.
The sugar syrup is your moisture insurance policy. Even if your bake runs a touch long, this simple brush-on step keeps every layer soft.
Folding gently, rather than overmixing, is the single biggest factor in whether your crumb turns out light and tender or dense and heavy. It's a small habit that makes a big difference.
Chilling before the final coat of frosting is what gives you that clean, bakery-style finish — it firms everything up just enough to smooth beautifully with a bench scraper.
The buttercream dam holds the jam exactly where it belongs, so every slice looks as good as the first one.
Elena's No-Fail Tips
This is where I answer the questions I hear most, so nothing catches you by surprise.
Why is my raspberry jam too runny?
Take a breath; this is one of the most common questions I get, and it has a simple fix. A jam that's too thin usually just needs a touch more cornstarch slurry stirred in while it's still simmering, and a full minute or two at a gentle boil to let it thicken properly.
Let it cool completely before spreading; it will continue to set as it cools, becoming glossy and spreadable rather than runny.
And always pipe that buttercream dam before adding your filling; it's your safety net even if the jam is a little looser than you'd like. You'll know it's right when the jam coats the back of a spoon and holds a soft, jewel-like shape rather than dripping off.
Can I use frozen raspberries instead of fresh?
Absolutely, this is one of my favorite shortcuts, and it works just as well as fresh fruit. Use frozen raspberries straight from the freezer, without thawing them first, both in the jam and for the fresh berries on top
(Just let the topping berries sit out for a few minutes to soften slightly before decorating). This makes the cake something you can bake any time of year, not just in raspberry season.
My cake turned out dense; what happened?
It always looks like this at first if you're not sure what to look for, so don't worry. Dense cakes almost always come down to one of two things: over-mixing the batter once the flour goes in, or baking a little too long.
A quick test is to gently press the top of the cake with your finger if it springs back completely, it's done. If it leaves a dent, give it a few more minutes. And remember, a toothpick with a few moist crumbs is exactly what you want to see, not a completely clean one.
Can I make this gluten-free or dairy-free?
Yes, and it comes out just as soft and tender. Swap in a 1:1 gluten-free baking flour for the all-purpose flour, mixing just as gently as usual.
For dairy-free, use a plant-based milk with a splash of vinegar in place of the buttermilk, and a dairy-free butter alternative in both the cake and the frosting. It's a wonderful way to make sure everyone at the table gets a slice of this cherished cake.
Saving a Little Joy for Tomorrow: Storage Tips, Freezing & Make-Ahead Notes
Here's the part that makes this cake so lovely to plan around: you don't have to do everything in one day.
If you're baking for a gathering, bake your cake layers up to two days ahead and keep them wrapped tightly in the refrigerator until you're ready to fill and frost. For longer than that, wrap the cooled, unfrosted layers well and freeze them for up to two months; just let them thaw at room temperature, still wrapped, before assembling.
Once assembled, this cake keeps beautifully in the refrigerator for up to four days, covered loosely so the frosting doesn't dry out. Let it sit at room temperature for about thirty minutes before serving so the frosting softens and the flavors come forward the way they should.
Breaking the process up over a couple of days isn't cutting corners — it's exactly how I plan for special occasions myself, so the day of is calm instead of chaotic.
The Most Beautiful Raspberry Jam Vanilla Cake
Ingredients
Method
- Pre-heat your oven to 350°F. Grease and line three 8-inch cake pans with parchment paper.
- Whisk together the flour, baking powder, baking soda, and salt. Set aside.
- In a large bowl, beat the butter, oil, and sugar together for two minutes until light and fluffy.
- Add the eggs one at a time, mixing well after each. Mix in the vanilla extract.
- Add one-third of the buttermilk, then one-third of the dry ingredients, mixing on low speed. Repeat until all is combined.
- Divide the batter into your pans and bake for about 30 minutes, or until a toothpick comes out clean. Let them cool completely.
- To make the jam, simmer the raspberries, sugar, and lemon juice in a saucepan until the berries break down.
- Whisk the cornstarch and water together and stir into the simmering berries until the jam thickens and looks glossy.
- Press the jam through a fine-mesh sieve to remove the seeds. Let the strained jam cool down before using.
- For the sugar syrup, heat the sugar and water in a saucepan until the sugar dissolves. Let it cool.
- To make the frosting, beat the butter and cream cheese until smooth. Add half the powdered sugar, the raspberry jam, and mix. Gradually add the rest of the sugar until you have a smooth, fluffy frosting.
- Assemble the cake by brushing layers with the sugar syrup, spreading a layer of frosting, and filling with the raspberry jam.
- Chill the cake for 15-20 minutes after crumb-coating, then add your final layer of frosting and fresh raspberries.
Notes
Making Sweet Memories
Every time I make this cake, I think of Nonna at her counter, patiently straining berries, telling me that a little jar of summer could carry us through the whole year. This cake is my version of that same idea: a way of folding a little bit of memory into something we get to share at the table.
If your layers aren't perfectly even, or your frosting isn't quite as smooth as you pictured, that's alright. That's more than alright, actually; it's exactly how it should be. Because this was never about a flawless cake. It's about memories, not masterpieces, and about the joy of slowing down long enough to make something worth gathering around.
I hope this cake finds its way to your table soon, sun-drenched afternoon or not.
What is a dessert that always makes you feel connected to the people you love? I would love to hear your stories in the comments below.
[…] That birthday cake, the one with the sliding swirl, eventually got frosted. I scooped off what had gone wrong, put the buttercream in the fridge for twenty minutes, beat it again, and started over. […]
[…] for: Italian-style cakes, citrus cakes, fruit-topped desserts, anything rustic and […]