
Finding the perfect ice cream cake recipe shouldn't feel like a high-stakes baking experiment; it should feel like a shortcut to pure joy. There is something so incredibly special about those long, hazy summer afternoons in Nonna’s kitchen.
I can still remember the distinctive rush of cold air every time we opened the freezer, and the unadulterated excitement of waiting for a treat that didn't require turning on a hot oven.
We all crave those soulful, nostalgic childhood treats—the ones that remind us of that classic, chocolate-crunch centerpiece from our youth. But as an adult hosting friends or family, there is a real, nagging anxiety: What if it melts into a puddle before I even get it to the table?
I completely understand that fear of a melting disaster in front of your guests, especially when you are celebrating a cherished milestone. But I want you to remember our kitchen philosophy: joy, not perfection.
This foolproof approach honors the cozy, "just like Nonna's" past while removing all the guesswork. I am going to guide you through a simple, completely stress-free method that guarantees a beautiful, towering slice every single time.
The Key Ingredients For Your Ice Cream Cake Recipe And Why They Matter
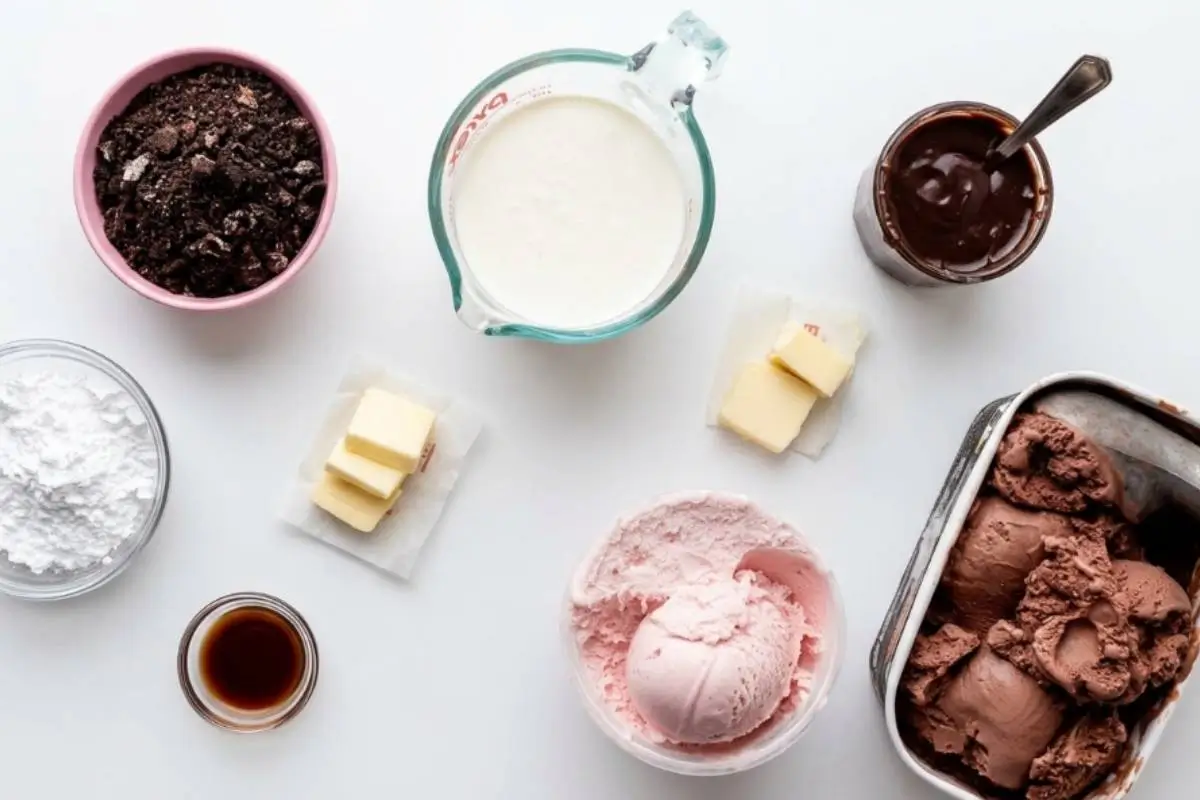
I promise, gathering your ingredients is the easiest part, and this step is so much simpler than it looks.
Every great recipe starts with understanding the why behind what we use. In this cake, our crushed chocolate sandwich cookie crust is non-negotiable. It is critical that you mix those crushed cookies with melted butter.
The butter acts as a structural binder against freezing temperatures, holding that beautiful crunch layer together so it doesn't crumble apart when sliced.
Whatever you do, please avoid using standard sponge cake layers in an ice cream cake! Freezing a traditional baked sponge often results in a deeply unpleasant texture akin to wet cardboard once it thaws on the plate. We want rich, buttery, sweet crunches in every bite.
Dietary & Heritage Variations:
If you want to create an inclusive table, this is beautifully adaptable. You can use gluten-free chocolate sandwich cookies for the crunch layer.
If you need a dairy-free version, swap in your favorite dairy-free ice cream—just note that because of the lack of milk fat, dairy-free alternatives may freeze a little harder and thaw a little faster, so keep an eye on your timing!
Want to turn this into a cherished, heritage-inspired twist to really impress your guests? Try swapping the strawberry layer for a bright Pistachio Kulfi with cardamom whipped cream, or use a joyful Italian Stracciatella ice cream over an espresso-soaked cookie base.
The rich, nutty, and buttery smells that fill the kitchen while you prep will instantly transport you.
You have everything you need right in front of you—see? You’re already doing beautifully.
The Golden Rule Step-by-Step Instructions
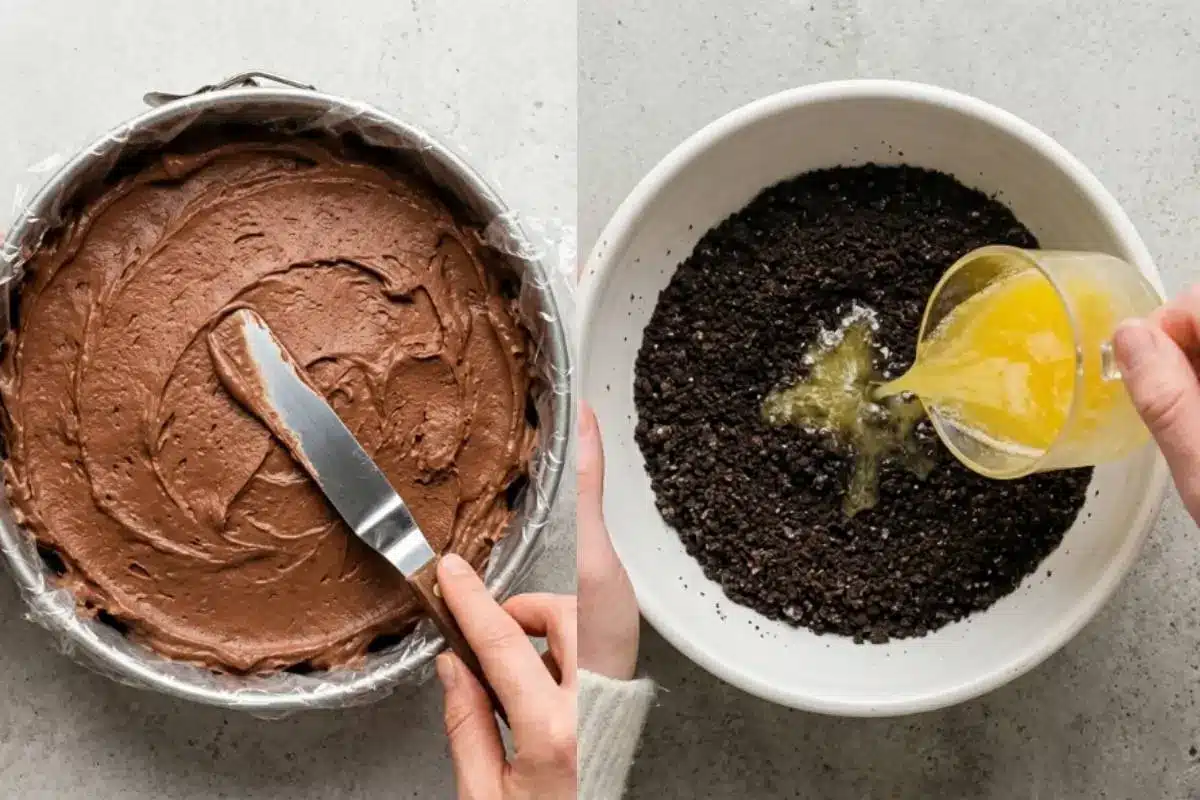
Take a deep breath; building the layers is actually incredibly forgiving.
Before we even open a carton of ice cream, let's look at our roadmap. The secret to this cake isn't complicated techniques; it's just patience.
Assembly Timeline:
Freeze Layer 1 (Chocolate): 30 minutes
Freeze Layer 2 (Fudge & Crunch): 30 minutes
Final Freeze: 12 hours minimum
Step 1: Prep the Pan (Do Not Skip!) Line a 9-inch or 10-inch springform pan heavily with plastic wrap, ensuring you leave plenty of overhang on the sides. Here's the trick I learned the hard way: skipping this step will cause the cake to permanently adhere to the pan, making it impossible to remove cleanly.
Step 2: The Foundation. Spread your softened chocolate ice cream into an even layer in your prepared pan. Place it in the freezer for exactly 30 minutes.
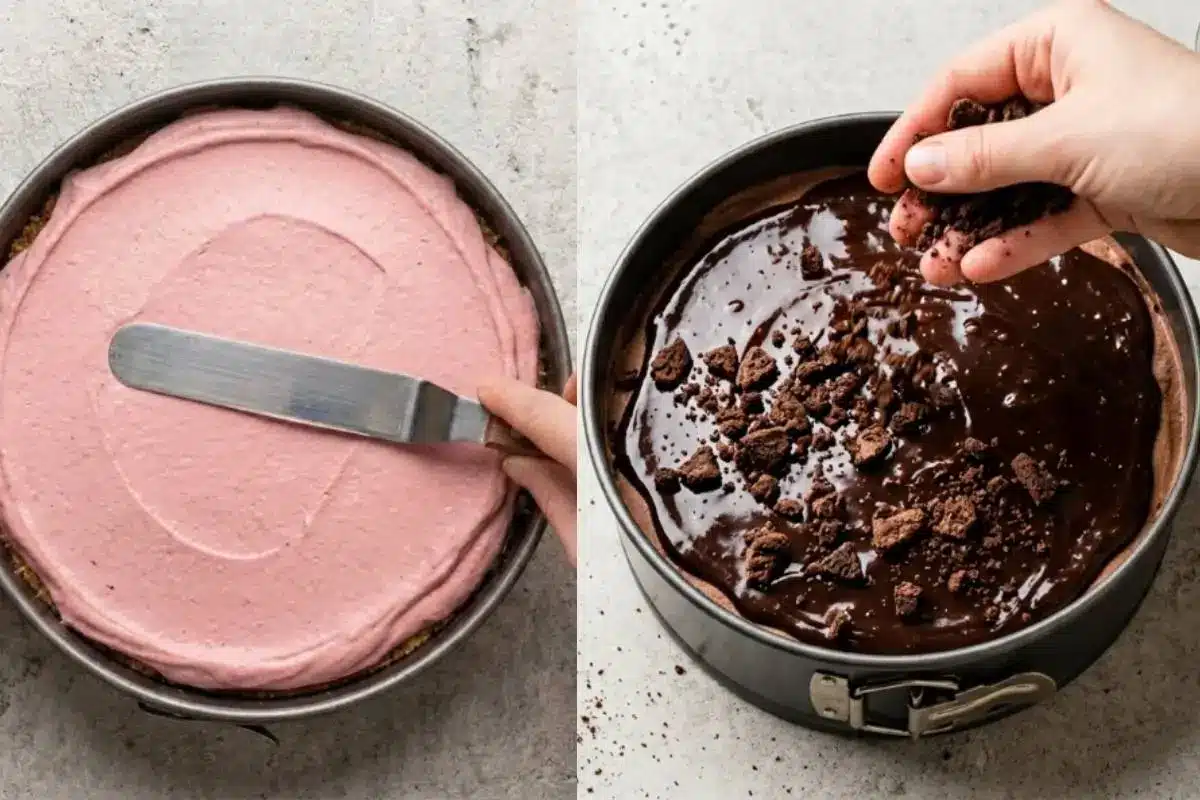
Step 3: The Crunch Layer. A gentle reminder for this step: let your hot fudge cool completely to room temperature before drizzling. If it goes on hot, it will melt all your beautiful work! Spread the room-temperature fudge over the chocolate layer, then sprinkle evenly with your butter-mixed cookie crumbs. Freeze for another 30 minutes.
Step 4: The Top Layer. Drizzle the remaining 1/2 cup of room-temperature hot fudge over the cookie layer. Spread the softened strawberry ice cream evenly on top. Cover the pan tightly with the plastic wrap overhang and freeze for at least 12 hours. If yours looks a little messy or uneven here, that’s completely normal—the whipped cream covers everything!
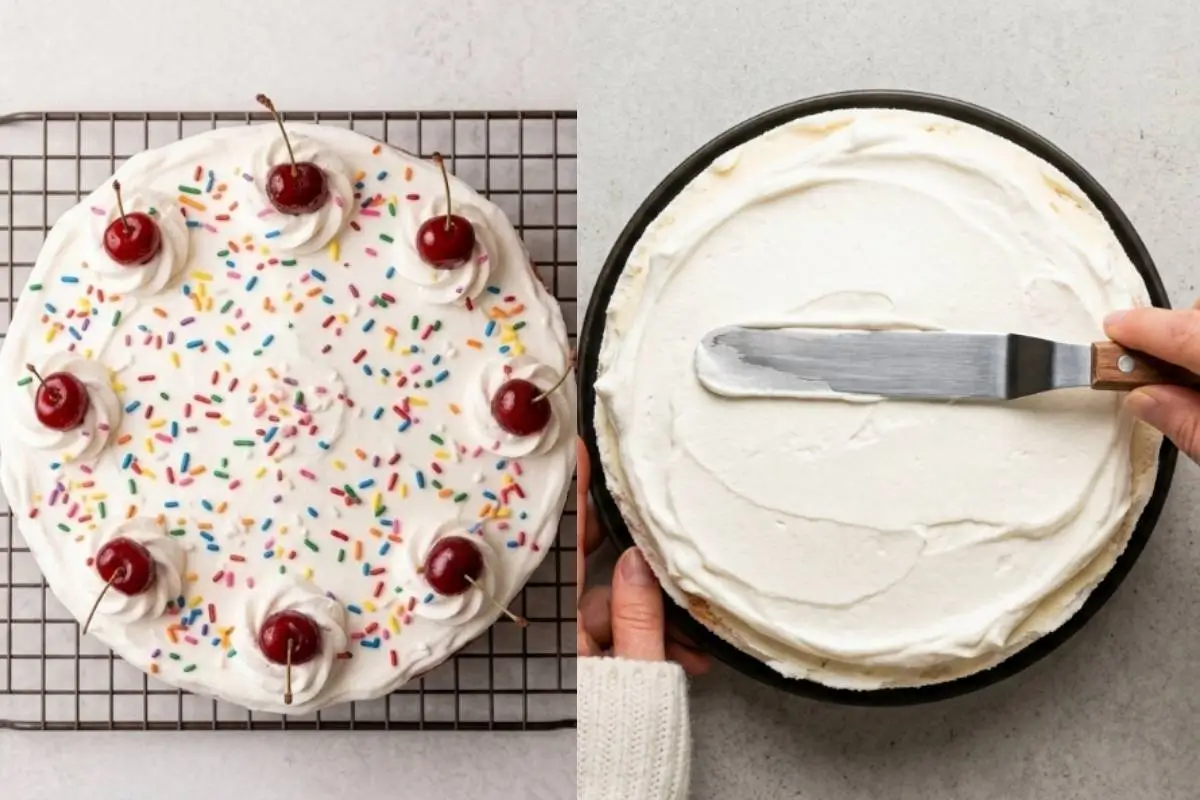
Step 5: The Cloud-Like Finish: Whip your heavy cream, confectioners’ sugar, and pure vanilla extract until stiff peaks form. You’ll know it’s right when you pull the whisk up and the cream stands straight up without folding over.
The rhythmic sound of the whisk tapping the bowl is one of my favorite kitchen sounds! Remove the cake from the freezer, unclip the springform rim, pull away the plastic wrap, and frost the entire cake.
Pop it in the freezer and relax—this is where the magic starts to happen.
Why This Ice Cream Cake Recipe Works
Here’s the part everyone overthinks—but you won’t, because you have the roadmap.
I ruined this recipe twice before I figured this out, but you won't have to. The reason this cake stands tall and slices beautifully in front of a crowd comes down to three pro insights:
The Plastic Wrap Secret: Mashing softened ice cream into a plastic-lined pan guarantees uniform removal. When you pull that plastic away, you are left with a visually stunning, perfectly clean cross-section.
The Frosting Truth: We strictly use stabilized whipped cream instead of standard Swiss Meringue or American buttercream.
Traditional buttercreams freeze rock solid in the freezer, slide right off the cake upon thawing, and replicate the thoroughly unpleasant experience of eating a greasy stick of butter. Whipped cream stays soft, silky, and cloud-like.
The Thermodynamic Pause: Freezing each layer individually for 30 minutes isn't a chore; it is a necessary structural pause that prevents the colors and flavors from bleeding together.
Knowing the why makes all the difference—you're closer than you think, keep going.
Elena’s No-Fail Tips For Your Ice Cream Cake
Don’t let the idea of slicing and serving intimidate you; you are perfectly prepared for this.
Why do my layers separate when cutting?
If your cake falls apart on the plate, it's usually the crunch layer's fault. The cookie crunch layer absolutely requires the melted butter to bind it against the ice cream.
Without the butter, it acts as loose gravel, and the top tier of ice cream will just slide right off.
How do I get those perfect, bakery-clean slices?
The secret to ensuring you look like a master baker in front of your guests is the "Hot Knife Trick." Fill a tall glass with very hot water.
Dip a sharp metal chef's knife into the hot water, wipe it completely dry with a kitchen towel, and make your cut. Repeat this process—dip, wipe dry, cut—between every single slice.
Can I frost this with my favorite buttercream?
No, please don't! Buttercream is meant for room-temperature baked goods. On an ice cream cake, buttercream freezes into an unpleasantly hard shell that shatters when cut and tastes waxy. Always stick to the stabilized whipped cream.
Which pan is best if I actually want it to come out?
A springform pan is absolutely non-negotiable for structural integrity and ease of serving. Trying to dig an ice cream cake out of a standard cake tin will result in a soupy, scooped mess instead of beautiful, towering slices.
With these little tricks up your sleeve, you are going to look like a master baker!
Saving a Little Joy for Tomorrow: Storage Tips, Freezing & Make-Ahead Notes
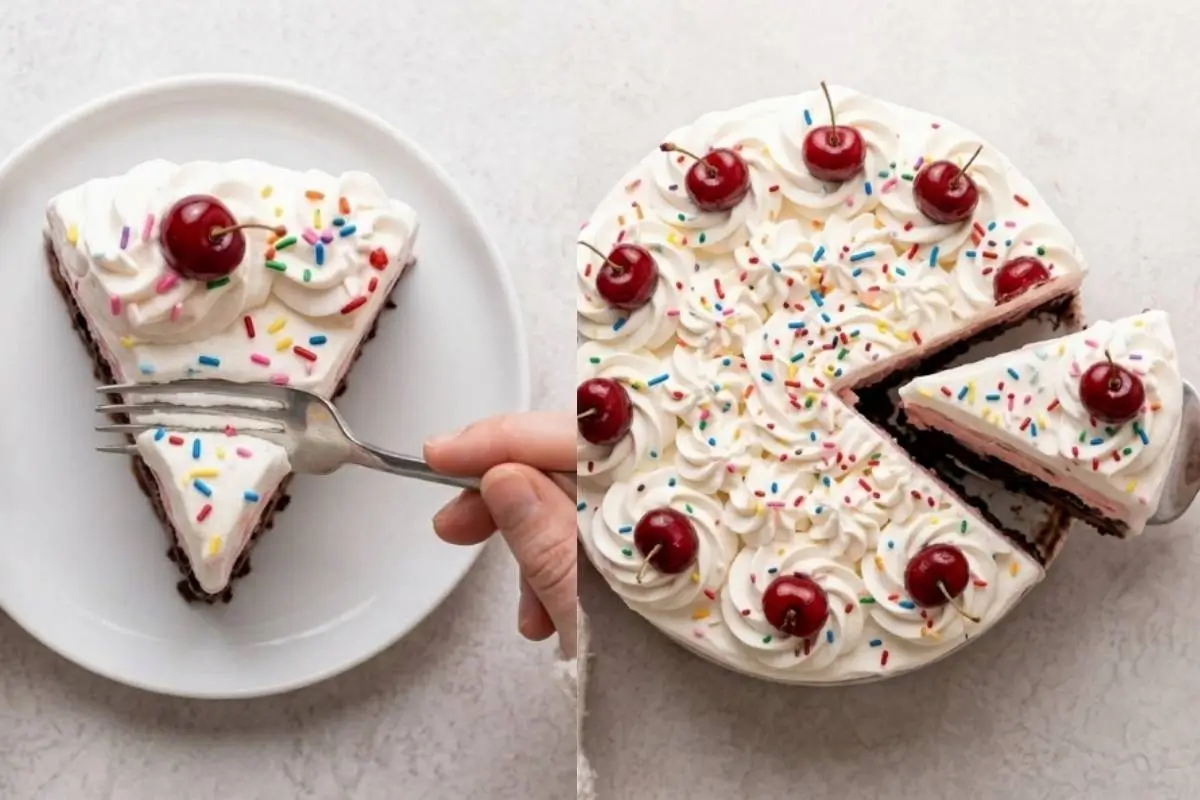
If you’re hosting this weekend, let your shoulders drop—this is the ultimate make-ahead dream.
Perfect for slow Sunday afternoons or busy birthday weekends, this cake is designed to make your life easier. Let's settle the debate right now: this cake lives in the freezer, never the refrigerator.
Because it requires a 12-hour setting time, this is the ultimate make-ahead dessert, perfectly aligned with your need to prep in advance and reduce day-of party stress.
When it is time for dessert, follow the golden Host's Timeline: pull the cake out of the freezer and let it sit for 10 to 15 minutes at room temperature before serving—no more, no less.
It will soften just enough to slice beautifully while keeping those golden edges of the cookie crumb layer holding firmly together. (If you love creamy textures, you’ll also love my classic ricotta-based frozen desserts, which follow a very similar, stress-free prep style!)
Just tuck it safely in the freezer, and your future self will thank you.
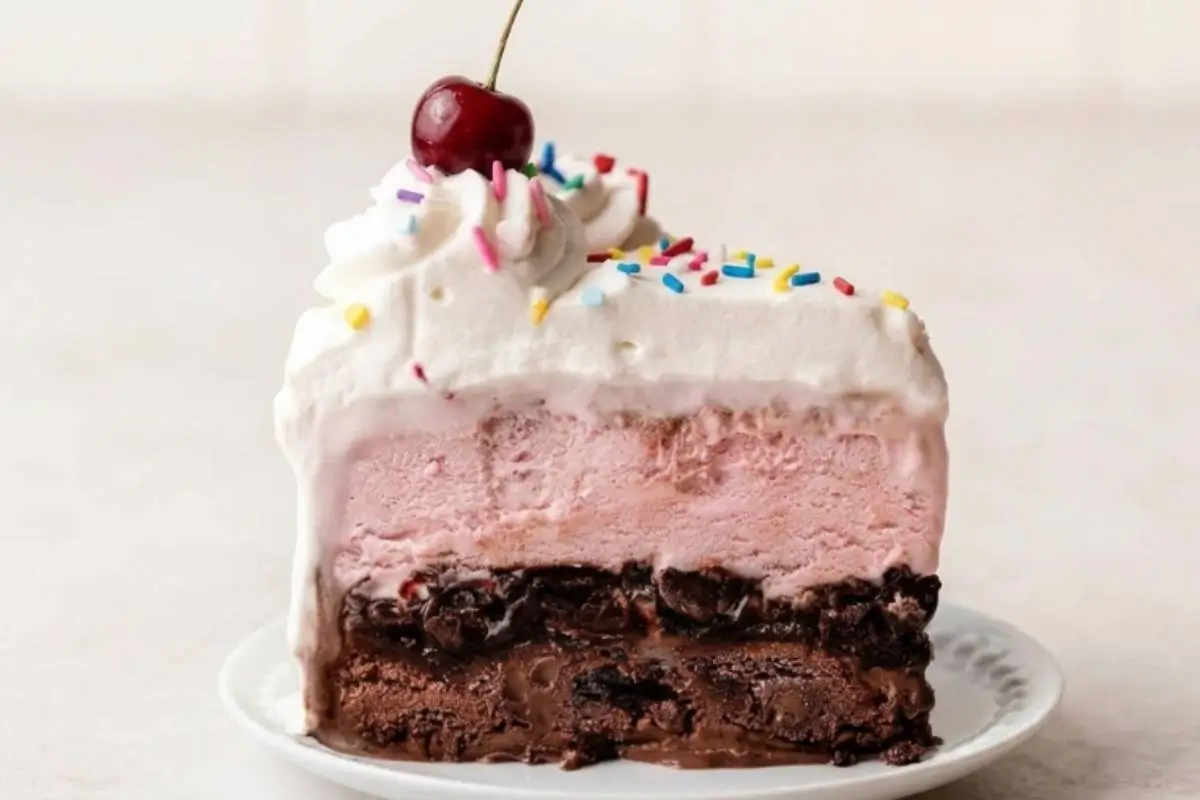
The Most Magical Ice Cream Cake Recipe
Ingredients
Method
- Pulse the chocolate sandwich cookies into a coarse crumb using a food processor. Mix these crumbs with the melted butter and set aside.
- Line a 9x3-inch springform pan with plastic wrap, ensuring you have enough overhang on the sides.
- Spread the softened chocolate ice cream into an even layer in your pan. Freeze for 30 minutes.
- Spread 1/2 cup of hot fudge over the chocolate layer, then sprinkle with the cookie mixture. Freeze for another 30 minutes.
- Drizzle the remaining 1/2 cup of hot fudge over the cookie layer. Spread the softened strawberry ice cream evenly on top.
- Cover the pan and freeze for at least 12 hours.
- To finish, whip the heavy cream, confectioners' sugar, and vanilla until stiff peaks form.
- Remove the cake from the freezer, take off the pan rim, and carefully remove the plastic wrap. Frost the top and sides with your fresh whipped cream and add sprinkles if you like.
- For clean slices, dip your knife in hot water between each cut.
Notes
Making Sweet Memories
In my family, this is the moment everyone waits for. Pulling this cake out of the freezer brings back that exact rush of cold air from those long, hazy summer afternoons at Nonna's.
It reminds us that an ice cream cake is never just a dessert; it is a shared memory, plated and passed around the table to the people we love most.
Remember, baking for our loved ones is about joy, not perfection. The time spent waiting for those layers to freeze isn't a chore—it is a beautiful ritual of anticipation. You've created something magical, and I am so proud of you.
Did this cake bring back family memories? Share your perfect cross-section slice with us!