
Vegan Vanilla Bean Cupcakes are one of those recipes I didn't come to right away, but once I did, I never looked back.
I remember the first time one of my nieces came to visit with her little daughter, who had just been diagnosed with a dairy allergy. It was a birthday weekend, and I had already planned a cake, the kind with butter in every layer and cream in the frosting.
I remember watching that tiny girl at the table while everyone else ate, pushing a plain cookie around her plate and trying to pretend she didn't care. She was four years old.
I made a promise to myself that afternoon. I was going to have a cupcake recipe a real one, beautiful and fluffy and worthy of a birthday that nobody at my table ever had to sit out from again.
This is that recipe.
They're soft. They're tender. They carry the warmth of real vanilla bean, those tiny black specks you can see right in the batter, like little flecks of something precious.
And they are completely free of eggs and dairy, though I promise you, nobody will know unless you tell them. My own sister ate two of these at a family dinner and asked me which bakery I'd ordered from.
Whether you're baking for someone vegan, for a child with allergies, or simply because you want something warm and real and made with love, these cupcakes are for you.
Let me walk you through everything. The ingredients, the steps, and all the tiny details that make the difference between a flat, dense disappointment and a bakery-worthy cupcake that gets asked for again and again.
You're going to be just fine. This one is genuinely no-fail.
The Key Ingredients for Vegan Vanilla Bean Cupcakes
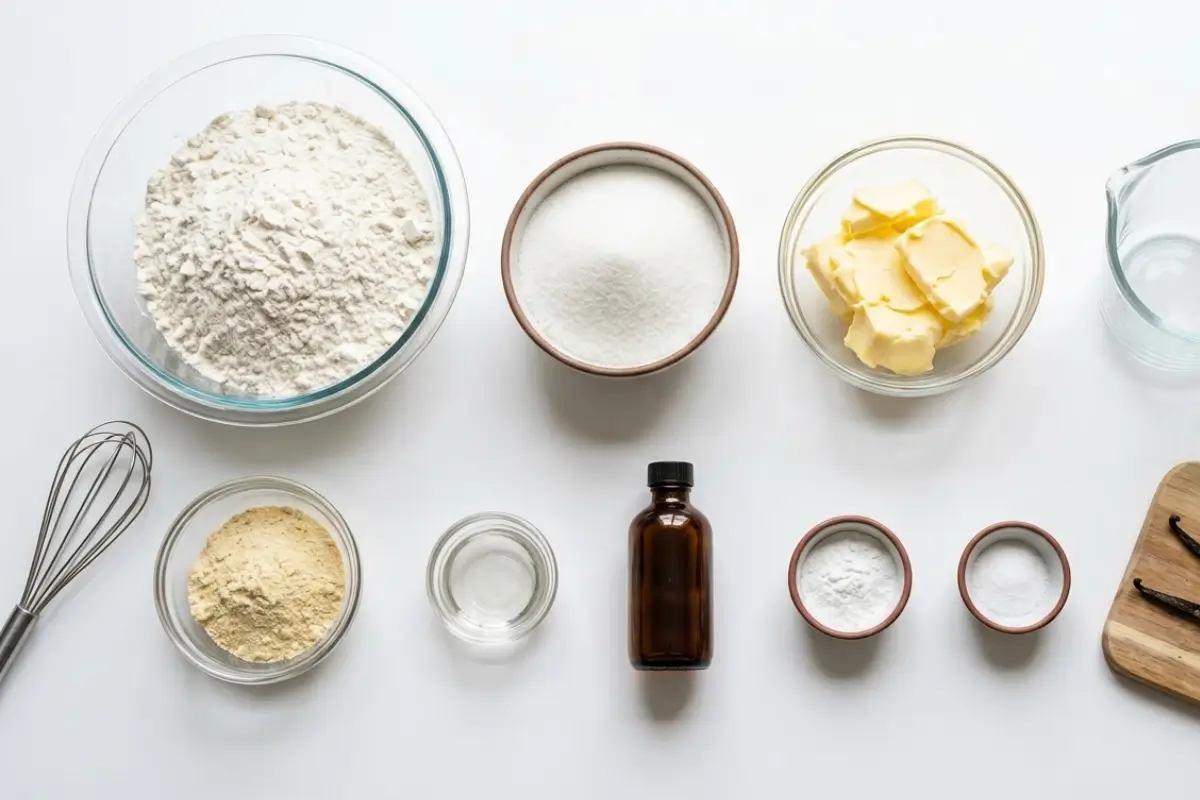
This part is simpler than it might look, I promise.
Egg-free and dairy-free baking isn't really magic. It's just understanding what each ingredient is doing for you so you can make it work every time. Let me walk you through each one.
All-Purpose Flour:
This is your reliable foundation. All-purpose flour gives the cupcakes their structure and that tender crumb that holds together when you peel back the liner.
If you want a slightly softer, more delicate result, cake flour is a beautiful upgrade. For a gluten-free version, a quality 1:1 gluten-free baking flour (I like King Arthur Measure for Measure) works well, though the cupcakes will be slightly less airy.
Baking Soda+Acid (Lemon Juice or Apple Cider Vinegar):
Here's something I want to explain properly, because most recipes just tell you to add vinegar and move on. What's actually happening is a chemical reaction the baking soda and the acid meet each other and release tiny bubbles of carbon dioxide.
Those bubbles are what make your cupcakes rise and stay light. This is your lift engine in the absence of eggs. It is not optional. Don't skip it, don't reduce it, don't wonder if it matters. It matters enormously.
Plant Milk (Soy or Full-Fat Oat Milk)
You're going to combine your plant milk with the acid to make a quick "vegan buttermilk." It will look slightly curdled and separated after a few minutes, and that is exactly what you want.
Here's the thing I learned the hard way: not all plant milks curdle equally well. Soy milk and full-fat oat milk are your best choices for this technique.
Very thin almond milk sometimes doesn't curdle properly, which means your buttermilk doesn't thicken the way it should. When in doubt, reach for soy milk it's the most reliable for baking.
Neutral Oil:
Oil is what keeps these cupcakes moist for days, not hours. Unlike melted butter, neutral oil (canola, sunflower, or light vegetable oil) stays liquid at room temperature, which means the cupcake stays soft even after it cools.
Some recipes suggest swapping oil for applesauce, and yes, it works, but I want to be honest with you: applesauce produces a denser, heavier crumb. If you prefer the lighter, bakery-style texture, stick with the oil.
Vanilla Bean Paste:
This is the heart of the recipe, and I want to take a moment with it. Vanilla bean paste is made from real vanilla bean seeds suspended in a thick, syrupy base. When you add it to your batter or your frosting, those tiny black specks actual seeds from an actual vanilla pod go with it.
The flavor is warmer, deeper, and more complex than extract. And visually? Those little specks in your frosting swirl are what make these cupcakes look like they came from somewhere special.
If you don't have paste, pure vanilla extract (not imitation, which makes a real difference) will still give you a beautiful result. But if you can get your hands on vanilla bean paste, use it. You'll notice immediately.
Vegan Butter (Block-Style, for the Frosting):
This is important, so I want to say it clearly: use block-style vegan butter, not a spread or margarine. Spread-style vegan butter has a higher water content, which makes your frosting loose and difficult to pipe.
Block-style (Earth Balance Buttery Sticks, Miyoko's, or Violife ProButter (all reliable) gives you a stable, creamy frosting that holds its shape. I've made the mistake of using the wrong kind. You only do it once.
Powdered Sugar (Sifted):
One small step that makes a big difference: sift your powdered sugar before you add it to the frosting. Unsifted powdered sugar can leave tiny lumps that make your frosting gritty, and there's nothing sadder than a beautiful cupcake with gritty frosting. Thirty seconds with a sieve fixes this entirely.
A note for busy bakers: Unfrosted cupcakes freeze beautifully for up to three months. Bake a batch ahead, freeze them once they're fully cooled, and frost them fresh for whatever occasion comes up. In the future, you will be so grateful.
Step-by-Step Instructions Your Golden-Rule Method
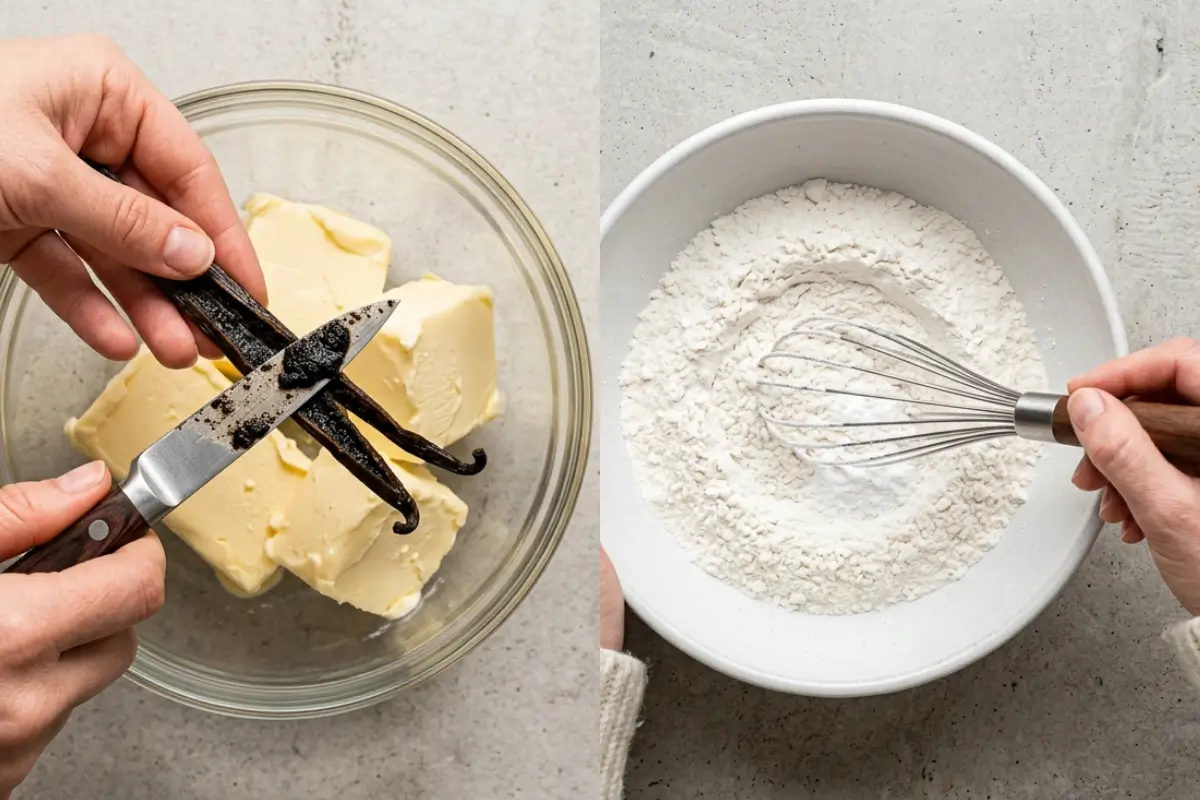
Take a breath you're about to make something wonderful, and this part is more straightforward than it looks.
Makes 12 cupcakes | Prep: 20 minutes | Bake: 18–20 minutes
Step 1: Make your vegan buttermilk first:
Combine your plant milk and your acid (lemon juice or apple cider vinegar) in a small bowl or measuring jug. Stir gently and set it aside for at least 5 minutes.
You're looking for it to thicken slightly and look a little separated, almost curdled. That's not a mistake. That's exactly right. That transformation is what gives these cupcakes their tenderness and lift.
Step 2: Preheat and prep:
Preheat your oven to 350°F / 175°C. Line a 12-cup muffin tin with paper cupcake liners. If your liners tend to stick, a very light spray of cooking oil on the inside of each liner helps.
Step 3: Cream your vegan butter and sugar:
In a large bowl, beat your room-temperature block-style vegan butter and sugar together until pale and fluffy, about 2 minutes with a hand mixer or stand mixer.
Here's the trick I always mention: cold butter from the fridge won't cream properly, and it will affect the final texture. Take your butter out 30 minutes before you bake. That small act of planning makes a real difference.
Step 4: Add the wet ingredients and the vanilla:
Add the neutral oil, vegan buttermilk, and vanilla bean paste to your creamed butter and sugar. Mix until combined. The batter may look slightly separated at this point it will come together when you add the flour. Don't worry. This is where the kitchen starts to smell like something wonderful is happening.
Step 5: Add the dry ingredients. Then stop:
Sift your flour, baking soda, and salt directly into the wet mixture. Fold or mix gently and stop the moment you can no longer see dry streaks of flour. I know the urge is to keep going until the batter looks perfectly smooth.
Please resist it. Over-mixing is the single most common reason vegan cupcakes turn out dense and gummy. Lumpy batter is fine. Perfectly smooth batter at this stage means you've mixed too much. Mix until combined, then put down the spoon.
Step 6: Fill your liners:
Spoon or pour the batter into your prepared liners, filling each one about two-thirds full. Half full will give you flat, sad-looking cupcakes. Three-quarters full will overflow and mushroom. Two-thirds is the sweet spot that gives you that gentle dome.
Step 7: Bake and resist the urge to peek:
Bake for 18–20 minutes. Do not open the oven door in the first 15 minutes. The batter is rising during that window, and cold air from the oven door can cause it to collapse before it sets.
Step 8: Check for doneness the right way:
Most recipes say to use the toothpick test. Here's something important: vegan cupcakes can register a "clean" toothpick before they're actually done, because there's no egg to set the same way.
The more reliable test is to gently press the center of a cupcake with one finger. If it springs back immediately, they're done. If it leaves a small dent, give it 2 more minutes and test again.
Step 9: Cool in stages:
Let the cupcakes cool in the pan for 10 minutes before transferring to a wire rack. Flipping them out too early can cause the structure to collapse while it's still setting.
After the pan, cool completely on the rack at least 30 minutes. If the cupcakes are even slightly warm when you frost them, the buttercream will melt and slide. This is worth the wait.
For the Frosting:
Step 10: Beat your vegan butter until pale:
Beat your room-temperature block-style vegan butter alone for 2 full minutes before adding anything else. This is the step most people skip. The air you're beating in here is what makes the frosting light and creamy, not stiff and dense.
Step 11: Add the powdered sugar gradually:
Add your sifted powdered sugar in three additions, mixing on low between each. Add a teaspoon of plant milk as needed to loosen the consistency. You're looking for frosting that holds a soft peak when you lift the beater, firm enough to pipe, soft enough to spread smoothly.
Step 12: Add the vanilla bean paste:
Mix in your vanilla bean paste and watch those little black specks swirl through the white frosting. This is my favorite moment in the whole recipe. It looks so beautiful, and it costs you nothing extra.
Step 13: Frost your completely cooled cupcakes:
Pipe or spread the frosting generously onto each cupcake. Top with sprinkles if you're celebrating something or even if you're not. Some days just deserve sprinkles.
See? You've already done the hard part.
Why These Vegan Vanilla Bean Cupcakes Work Every Time
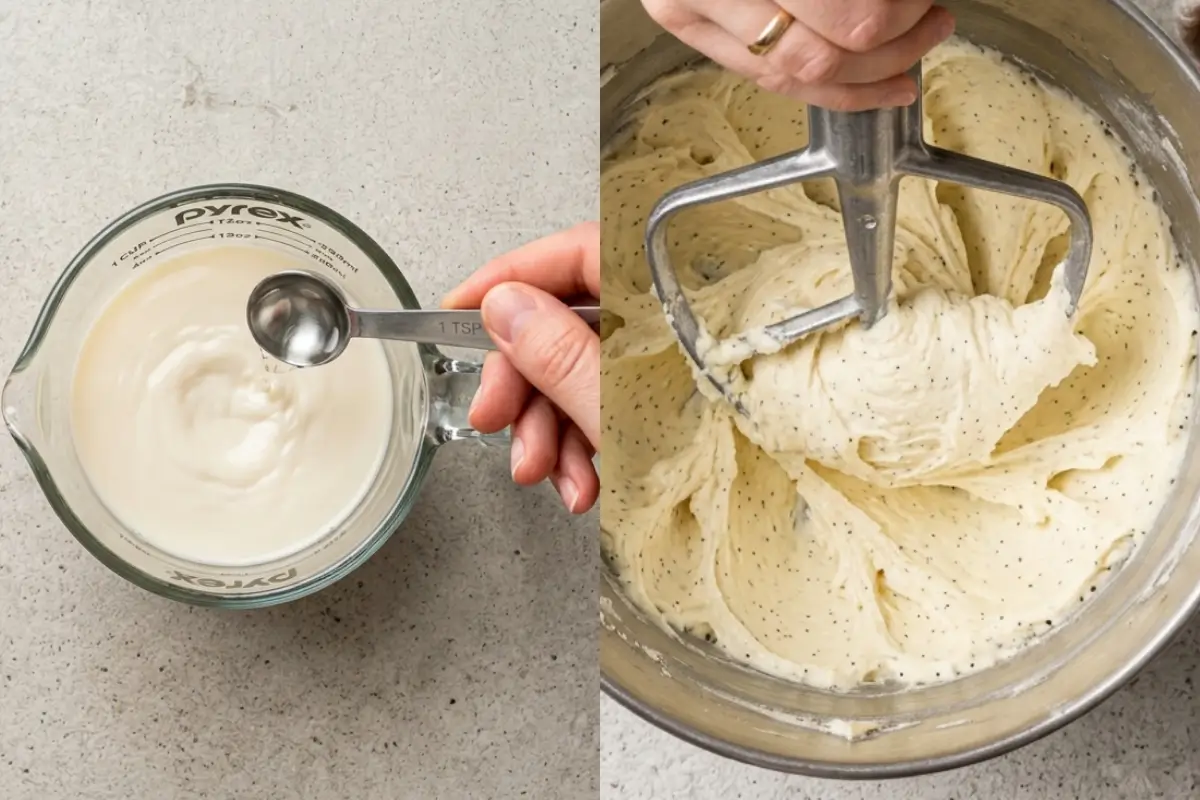
Here's the part everyone overthinks but once you understand it, you'll never have a failed batch again. If you've tried vegan cupcakes before and they turned out flat, dense, or flavorless, I want to explain why and why these won't.
The acid-milk reaction is your lift, your structure, and your tenderness all at once: When lemon juice or apple cider vinegar meets baking soda, carbon dioxide bubbles form.
Those bubbles expand in the oven and push the batter upward. Without this reaction working properly, you get a flat, heavy cupcake. With it, you get light and airy. The vegan buttermilk step is not optional it's the engine.
Vanilla bean paste bakes differently than extract: The paste's thicker base helps it distribute more evenly through the batter, and the real flavors inside the vanilla seed hold up to heat better than most extracts, so instead of fading in the oven, the vanilla deepens.
That's why these taste so much warmer than a cupcake made with a few drops of extract.
Neutral oil keeps these moist for days: Oil stays liquid at room temperature. Butter solidifies as it cools. This is why a cupcake made with oil stays tender on day two and even day three, while a butter-based cupcake goes stiff.
For a recipe that needs to survive a birthday party, a bake sale, or a busy week, oil is your quiet hero.
Stopping mixing early protects the air: When you stop folding the moment the flour disappears, you preserve all those little air bubbles the acid reaction created. Every extra turn of the spoon breaks more of them.
The result of over-mixing is exactly what it sounds like: a dense, airless cupcake that no amount of frosting can save. Trust the process. Stop early.
These are actually more forgiving than traditional cupcakes because there's no egg to curdle, no dairy to split, and no butter to separate. Once you know the rules, vegan baking has fewer failure points, not more.
Elena's No-Fail Tips
This is where I want to sit with you for a moment and answer everything I know you're wondering.
Why did my vegan cupcakes turn out dense?
Nine times out of ten, this comes back to one of two things: over-mixing or the wrong flour.
Over-mixing is the biggest culprit. The moment you add flour to a wet batter and start working it, you begin developing gluten, which is wonderful for bread and damaging for cupcakes.
The batter should look barely combined when you stop. If it looks perfectly smooth and silky, you've likely already gone too far.
The second issue is flour type. All-purpose flour is reliable and produces a good cupcake. But if you've used whole wheat flour, spelt, or oat flour, thinking they'd work as direct swaps, they won't.
They're heavier proteins that produce a denser crumb. For a lighter result, stick with all-purpose or cake flour.
Why does my frosting go runny?
Almost always, this is the vegan butter. Spread-style or margarine-style vegan butter has a higher water content than block-style, and that water turns your frosting loose.
If your frosting is sliding, check what butter you used. Switch to a block-style vegan butter, and you'll notice an immediate difference.
Warm room temperature also matters. If your kitchen is very warm, your frosting will soften faster.
A quick fix: pop your frosted cupcakes in the fridge for 10 minutes. They'll firm right back up, and the cold will actually make the vanilla bean paste flavor even more pronounced.
Can I actually taste the difference between vanilla bean paste and extract?
Yes, meaningfully so. And I say that as someone who has made this recipe both ways many times. The paste delivers a warmth and depth that extract alone doesn't quite reach.
It's the difference between vanilla as a flavoring and vanilla as a real ingredient with its own story.
That said, pure vanilla extract (and I do mean pure, not imitation) still makes a delicious cupcake. If that's what you have, use it confidently. The cupcakes will be beautiful.
You'll just want to use a generous amount a full teaspoon at minimum- and I'd go to one and a half for a strong vanilla presence.
Can I make these ahead of time?
Yes, and honestly I encourage it. Bake the cupcakes, let them cool completely, and freeze them unfrosted in an airtight container or zip-lock bag for up to three months.
When you need them, thaw them at room temperature for about an hour, then frost fresh.
The texture after freezing and thawing is honestly one of my favorites, sometimes even more moist than the day they were baked. This is one of those rare recipes that actually benefits from the freeze-thaw process.
My oven runs hot. Will that affect these?
Yes, and it's completely normal. Home ovens can vary by 25°F in either direction from what the dial says, and that variance affects bake time. If your oven runs hot, start checking at 16 minutes.
If it runs cool, you may need the full 20 or even 22. The spring-back-to-touch test is your friend here use it regardless of what the clock says, and you'll never overbake a cupcake again.
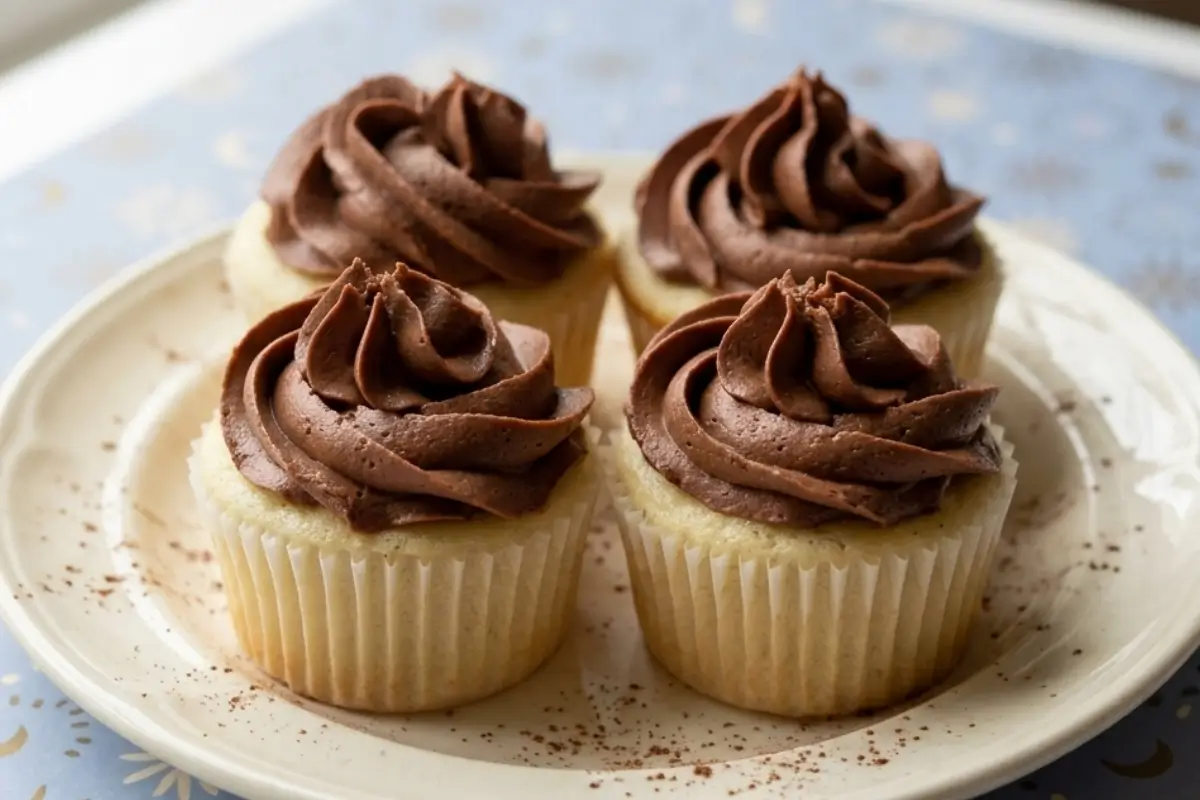
The Dreamiest Vegan Vanilla Bean Cupcakes
Ingredients
Method
- Preheat your oven to 350 degrees F. Line two cupcake pans with paper liners and set them aside.
- In a medium mixing bowl, combine the cake flour, baking powder, and salt. Whisk everything together and set aside for later.
- Add the room temperature vegetable butter to the bowl of an electric mixer. Gently scrape the tiny seeds from your split vanilla bean right into the bowl with the butter.
- Beat the butter and vanilla seeds on medium-high speed for 3 minutes until light and creamy. Scrape down the sides of the bowl and beat for one more minute.
- In a small cup, combine the vanilla soy milk with the white vinegar. This creates a quick, wonderful dairy-free buttermilk. Set it aside for a moment.
- Gradually add the sugar to the butter mixture, about a quarter cup at a time, beating for 1 minute after each addition to keep things light and fluffy.
- Mix in your prepared egg replacer mixture until it is completely blended in. Scrape down the sides of the bowl.
- Pour the vanilla extract into the soy buttermilk cup.
- With the mixer on low speed, gently alternate adding the dry flour mixture and the wet milk mixture. Always begin and end with the dry ingredients, mixing just until everything is combined so the cake stays tender. Scrape down the sides and mix for 15 seconds longer.
- Divide the batter evenly between your prepared paper liners, filling each cup about two-thirds of the way full.
- Bake for 18 to 22 minutes, or until a toothpick inserted in the center comes out perfectly clean.
- Allow the cupcakes to cool in the pans for 5 to 10 minutes, then transfer them to a wire rack to cool completely before adding your favorite frosting.
Notes
Saving a Little Joy for Tomorrow
One of the things I love about this recipe is how well it holds.
At room temperature: Frosted cupcakes keep beautifully in a covered container at room temperature for 2–3 days. After that, the frosting begins to lose its freshness.
In the refrigerator: You can refrigerate frosted cupcakes for up to 5 days. The cold air will firm the frosting slightly just bring them to room temperature for about 20 minutes before serving, and they'll be exactly as you remember them.
In the freezer: Unfrosted cupcakes freeze for up to 3 months. Frosted cupcakes can be frozen too freeze them on a flat tray first until the frosting is solid, then transfer to an airtight container so the swirls don't get crushed.
They'll keep for up to 2 months. Thaw overnight in the fridge or at room temperature for a couple of hours.
Make-ahead strategy: My favorite approach is to bake a double batch, freeze half unfrosted, and always have cupcakes one hour away from being ready. In the future, you will feel very organized and very loved.
Making Sweet Memories
I still think about that little girl at the birthday table.
I think about her every time I pull a tray of these out of the oven, and the kitchen fills with that warm, sweet smell of real vanilla, and every time someone takes a bite and gets that look on their face. The one that says, "This is actually really good."
That's the whole point, you know. Not the recipe itself. Not even the cupcakes. It's the moment when the table becomes a place where everyone belongs.
These vegan vanilla bean cupcakes have become one of the most-requested things I make. Not because anyone knows they're vegan usually, they don't- but because they're genuinely delicious, and they come from a place of wanting everyone to feel included and celebrated.
I hope they do that for you, too.
Tell me who you're baking these for in the comments below. I'd love to know.
At Add Cakes, we believe in memories, not masterpieces. Simply add cake and joy will follow.