
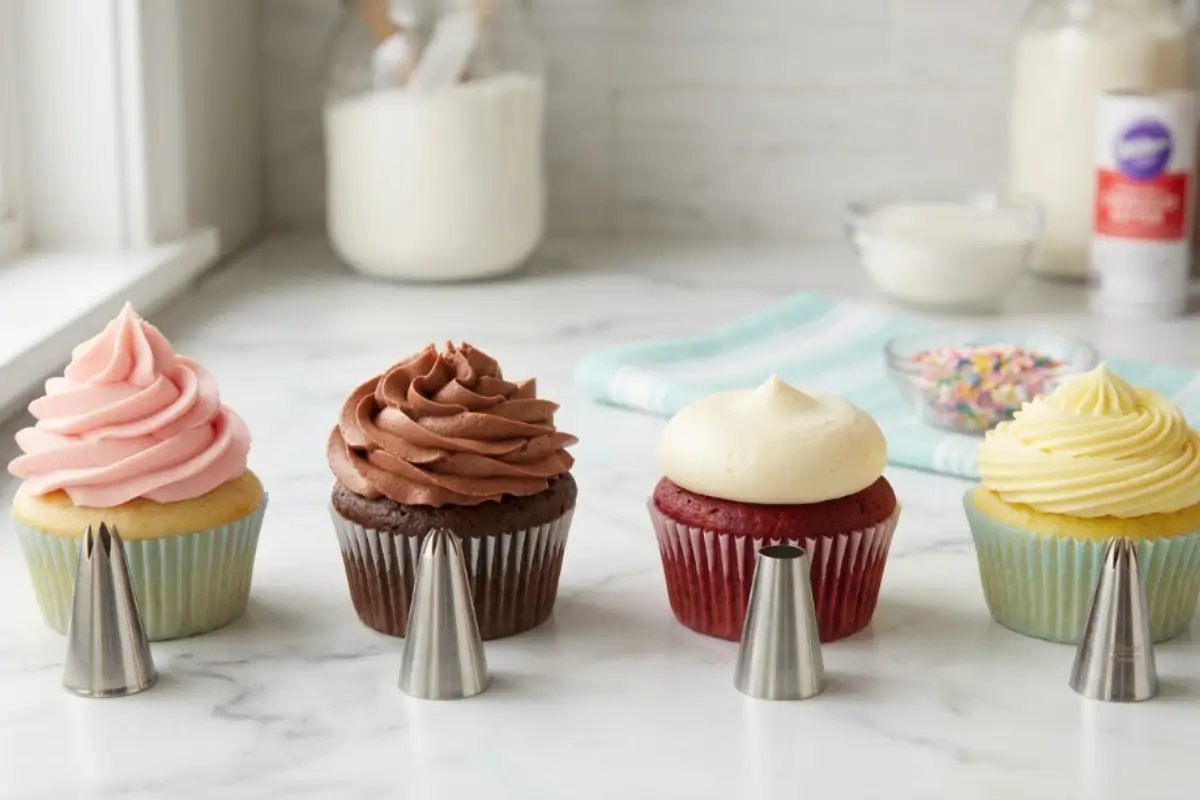
Best piping tips for cupcake frosting that's a sentence I wish someone had sat me down with years ago, before I'd wrestled my way through three sad, collapsed swirls and a kitchen counter covered in buttercream.
I still remember standing at Nonna's elbow the first time she piped frosting. She didn't have a fancy kit. Just a cloth bag she'd had since before I was born and a single star tip that had seen decades of birthday cakes, Christmas cookies, and Sunday treats.
She squeezed, moved her wrist in one smooth arc, and a tall, gorgeous swirl rose like a little crown.
I tried it next. Mine looked like a deflated marshmallow.
Nonna laughed, not unkindly, just the laugh of someone who has been there and handed me the bag again. It's not magic, she said. It's three things you don't know yet.
That afternoon, I learnt those three things. And today, I'm passing them straight to you.
What You Actually Need Before You Pipe a Single Cupcake
This part is simpler than it looks, I promise. Before we even talk about which tip to use, you need a few things sorted because the right equipment makes the difference between a battle and a breeze.
Piping bag size: bigger is better. Get yourself a 16-inch piping bag, disposable or reusable; either works fine. A 12-inch bag sounds reasonable until you realise it barely holds a cup of frosting and you're constantly refilling mid-cupcake.
The 16-inch gives you room to grip, twist, and control without your hand crowding the tip.
Large tips only for cupcakes. If someone gave you a set with 50 tiny tips, put those aside for now. Small piping tips were made for cookie outlines and writing on cakes.
They're too narrow for buttercream to flow through smoothly, they clog if your frosting has even a tiny air bubble, and they produce those thin, spidery swirls that look like they belong on a 1992 sheet cake. For cupcakes, you want large tips every single time.
Do you need a coupler? Here's the thing nobody tells you: no, you don't use couplers with large tips. Couplers help with smaller tips when you want to swap them mid-bag.
For the large tips we're using today, you just drop the tip into the bag, snip the end to fit, and you're ready. One less thing to fuss with.
Fill your bag only halfway. I know it feels efficient to fill it all the way to the top. But a too-full bag means you're using the wrong part of your hand to squeeze (your palm instead of your fingers), you lose control of pressure, and the frosting wants to come out the wrong end. Halfway full. Every time.
The test squeeze, and this is the step nobody talks about. Before you touch a single cupcake, hold your bag over a bowl and give it a firm squeeze. You're pushing any trapped air out first.
Air pockets in the bag cause the frosting to sputter and spit through the tip, which leaves gaps in your swirl. Nonna always said it: "Squeeze the air out first, then the frosting goes where you tell it." Take ten seconds. Do the test squeeze. It changes everything.
The Best Piping Tips for Cupcake Frosting: Your Essential Starter Set
You don't need fifty tips. You need four, maybe five someday. Let me introduce you to the ones that will carry you through every cupcake you'll ever make.
The Wilton 1M Open Star Tip: Your Best Friend for Life
If I had to pick only one tip for the rest of my baking life, and I'd pick it happily, it would be this one.
The Wilton 1M is the single most recommended piping tip for cupcake frosting beginners across every baking community I know. I'd call it the workhorse of the cupcake world, except that makes it sound plain, and this tip is anything but.
An open star tip means the teeth (those little ridges that create the swirl's definition) point straight out, rather than curving inward towards the centre. The result? A tall, ridged, gorgeous swirl that looks exactly like the ones in a bakery case.
You can also use it to pipe a flat buttercream rose starting in the centre and spiralling outward, or to create a hydrangea effect by piping small individual mounds in clusters.
You'll know it's working when the frosting comes out in clean, defined ridges that hold their shape without spreading. It should look grooved, like soft-serve ice cream at its most lovely.
The Wilton 2D / Ateco 845 Closed Star Tip When You Want More Drama
There's a lively debate in the home baking world: 1M or 2D? Here's my honest answer: start with the 1M, and reach for the 2D when you're ready for something more defined.
A closed star tip has those same teeth, but they curve slightly inward towards the centre. This creates deeper grooves and a tighter, more sculpted swirl. The result is dramatic, almost ruffled and it photographs gorgeously.
The catch: your frosting needs to be perfectly smooth for this tip. Any resistance a small sugar lump, a tiny air pocket and it clogs the tighter grooves. This tip rewards a well-made, well-rested buttercream. But when conditions are right, the result is breathtaking.
You'll know it's working when the swirl has clean, deep lines that look almost like a flower in bloom.
The 4B Open Star Tip: The Most Forgiving Tip You'll Ever Use
If the 1M is your best friend, the 4B is your safety net.
Instead of a single swirl, the 4B produces clusters of open stars you simply press the tip down, apply gentle pressure, and lift. The frosting comes out in a little star shape, and you repeat across the cupcake top until it's covered in a constellation of buttercream.
Here's why I love recommending this tip to nervous beginners: the design hides imperfection. If one star is slightly off, the surrounding ones fill in the gap. Nobody will ever know.
I often use this tip when I'm baking for a crowd and want gorgeous-looking cupcakes without the pressure of perfectly uniform swirls.
You'll know it's working when each press-and-lift produces a clean little star with pointed tips. If it looks blobby, your frosting is too soft add a bit more powdered sugar.
The Round Tip (Ateco 808 / Wilton 1A) For Silky, Soft Frostings
This tip is the great equaliser. Unlike star tips, the round tip produces a smooth, ribbon-like swirl with no defined ridges, which makes it perfect for frostings that are too soft or too silky to hold a star shape.
Think cream cheese frosting. Think whipped buttercream. These frostings are delicious, but they don't have the stiffness to hold deep grooves.
A round tip works with their texture, not against it. Start in the centre, spiral upward, and lift you get a lovely dome that looks intentional and clean.
I also love using this tip with a single beautiful sprinkle on top. Simple. Joyful. Very Nonna.
You'll know it's working when the frosting comes out in a smooth, unbroken ribbon with no gaps or air spurts.
The Petal Tip (Wilton 104 / Ateco 127) When You're Ready to Level Up
I'm mentioning this one for the day you feel brave enough to try it, but it's not where you start.
The petal tip is wide and curved, and it creates the ruffle or carnation effect you see on fancy bakery cupcakes.
The fat side of the tip faces down; you move the bag slightly up and down while rotating the cupcake in your other hand. The result is a ruffled, layered look that's genuinely stunning.
It takes practice. Your first attempt will be uneven. That's not a flaw that's learning. When you're ready, this tip is waiting for you.
The Golden Rule: How to Actually Hold the Bag and Pipe the Perfect Swirl
Here's the part everyone overthinks, but you won't, because I'm going to walk you through it exactly.
The angle is everything: Hold your piping bag straight up and down, perpendicular to the cupcake, at a 90-degree angle. Not tilted. Not at 45 degrees. Straight down.
This is how you get height and definition. The moment you tilt the bag, you lose height, and the swirl flattens.
Start with a centre dollop: Before you begin your swirl, pipe a small mound of frosting about half an inch high right in the centre of the cupcake. This sounds like an unnecessary step.
It isn't. Without it, the centre of your swirl has nothing to rest on, and the whole thing caves inward. This dollop is the foundation. It is the single most important thing Nonna taught me that day, and I didn't understand its importance until I stopped doing it and ruined six cupcakes in a row.
Then, the classic tall swirl: starting at the outer edge of the cupcake, pipe in a circle moving inward, layer on top of layer, until you reach the centre. Increase height slightly with each rotation. End at the centre peak.
For a rosette: start in the very centre and spiral outward, keeping the swirl flat and building width rather than height.
Consistent pressure, start to finish: Don't squeeze hard at the beginning and ease off at the end this creates a swirl that's fat at the base and thin at the top. Keep your grip even throughout. Think of it less like squeezing and more like guiding.
Ending the swirl without an awkward peak: as you approach the finish, ease the pressure slightly and rotate the tip just a whisper in the direction of the swirl before lifting away. This gives you a soft, clean end rather than a sharp point.
If your first swirl looks a bit messy, that is completely normal: Always pipe your test squeeze over a bowl first. Cupcake number two is almost always better than number one. Cupcake number five looks like you've been doing this for years.
Why Your Swirl Keeps Collapsing (And How to Fix It Right Now)
Before we dive in, this whole guide assumes your buttercream is at what bakers call a "stiff peak" consistency. If you're not sure what that means, my frosting consistency guide walks you through every texture so you're always piping-ready.
Now let's talk about the heartbreak: you pipe a lovely swirl, step back to admire it, and watch it slowly sink into itself. Here's what's actually happening and how to fix it.
Is Your Frosting Too Soft?
This is the most common culprit. Frosting that's too soft will flow out of the tip but won't hold any shape. The swirl collapses because the frosting doesn't have enough structure to support itself.
The peak test: dip a spatula into your frosting, lift it out, and observe. The frosting should stand up in a peak that bends slightly at the tip like a gentle wave.
If it droops completely, add powdered sugar a quarter cup at a time and beat again. If it's stiff and dry and tears as you lift it, add heavy cream a teaspoon at a time.
One more thing: if you're using food colouring, use gel colouring only. Liquid food colouring thins your frosting sometimes enough to turn a perfect buttercream into something that slides right off a cupcake.
Gel colouring is concentrated, so a tiny amount creates vivid colour without touching the texture.
Are Your Hands Warming the Frosting?
Here's the thing nobody in the baking world seems to talk about, but I learned it the uncomfortable way: your body heat transfers through the piping bag into the frosting.
If you're squeezing a bag for ten or fifteen minutes straight, the frosting closest to your hand gets warmer and softer, and suddenly your swirls start falling flat even though your frosting was perfect ten minutes ago.
The fix is simple: chill your filled piping bag in the refrigerator for 5 minutes before you start. And if you're piping a large batch, set the bag down between every few cupcakes.
Let it rest. Let it stay cool. I pipe in batches of six, set the bag in a cool spot, do something else for two minutes, and come back. The difference in swirl quality is remarkable.
Are You Missing the Central Dollop?
We've talked about this, but it bears repeating here because it's that important. Without the centre dollop, your swirl is piping on air. The outer ring of frosting has nothing to support it, so it leans inward and collapses. Add the dollop. Always.
Is Your Tip Too Small?
If you're using a tip from a large set and the swirls look thin, ropey, and inconsistent, the tip is probably too small for cupcakes.
Small tips require you to apply more pressure to push the frosting through, which means less control, more hand fatigue, and more inconsistent results.
The rule: if the opening of your tip is smaller than about half an inch across, it's not your friend for cupcake swirls. Stick with the large tips we've covered.
Elena's No-Fail Tips for Beautiful Cupcakes Every Time
A few more things I wish someone had whispered to me at the beginning:
Use a tall glass to fill your piping bag. Fold the top of the bag down over the rim of a large glass or wide-mouth jar, and spoon the frosting in.
Both hands are free, the bag stands upright, and you don't end up with buttercream on your elbow. I discovered this trick after my third ruined kitchen towel.
Always test-squeeze over a bowl before touching a cupcake. We've mentioned this, but it deserves its place in the no-fail list. Air pockets cause stuttering frosting that ruins the start of a swirl. Ten seconds over a bowl saves the whole batch.
Freeze for 5 minutes after piping if you're transporting them. Pop the frosted cupcakes uncovered in the freezer for five minutes before packing them. The swirls firm up just enough to survive the journey without getting dented. I don't skip this when I'm bringing cupcakes somewhere, not once.
Mess up a swirl? No problem. Slide a small offset spatula under the frosting, scrape it off cleanly, smooth the cupcake top, and start again. It takes about ten seconds. The frosting you scraped off goes back in the bowl. Nothing is wasted. Nothing is ruined.
Ready to try something fun? Once you've got the basic swirl down, try loading two colours into one bag, one colour on each side, and pipe normally.
The tip blends them as they come out, creating a two-tone swirl that looks impossibly fancy and takes no extra skill. This is my party trick for birthdays.
Storing Beautifully Frosted Cupcakes
You've done the lovely part now let's make sure it stays that way.
At room temperature: cupcakes with buttercream frosting keep well for up to two days under a dome or loosely covered. Avoid sealing them tightly buttercream needs a little air circulation to stay soft.
In the refrigerator: they'll keep for up to five days. The important part: take them out 30 to 45 minutes before serving. Cold buttercream is stiff and dense and doesn't have that lovely, cloud-like texture. Let them come to room temperature first, and they'll taste and feel completely fresh.
In the freezer: frosted cupcakes freeze beautifully for up to three months. The trick: freeze them uncovered for one hour first, so the swirls firm up and hold their shape, then wrap individually or pack in a container with a tall lid (never a flat-lidded container you'll crush every swirl you worked so hard for).
Thaw overnight in the refrigerator, then 30 minutes at room temperature before serving.
For make-ahead parties: pipe your cupcakes the day before, refrigerate, and pull them out 40 minutes before guests arrive. They'll look just-piped and taste just as good.
Making Sweet Memories
My first swirl that afternoon in Nonna's kitchen wasn't beautiful. It was lopsided, a little flat on one side, and the peak at the top curved in entirely the wrong direction.
Nonna handed it to my youngest cousin, who ate the whole thing in three bites and immediately asked, "Can I have another one?"
Nobody cared that it wasn't perfect. The frosting was sweet, the cupcake was soft, and there was a child's sticky hand reaching for more. That's what baking is, at its heart.
Whether this is your first time holding a piping bag or your hundredth, whether your swirl comes out tall and proud or a little crooked, I hope it brings that same simple joy to your kitchen today.
At AddCakes, we believe in memories, not masterpieces. And the next swirl you pipe? I think it's going to surprise you.
Love making your own frosting from scratch? My frosting consistency guide walks you through every texture so your buttercream is always piping-ready.
And if you need the Easy cupcake base to practise on, my Keto lemon blueberry cupcakes from scratch are exactly what you're looking for.