
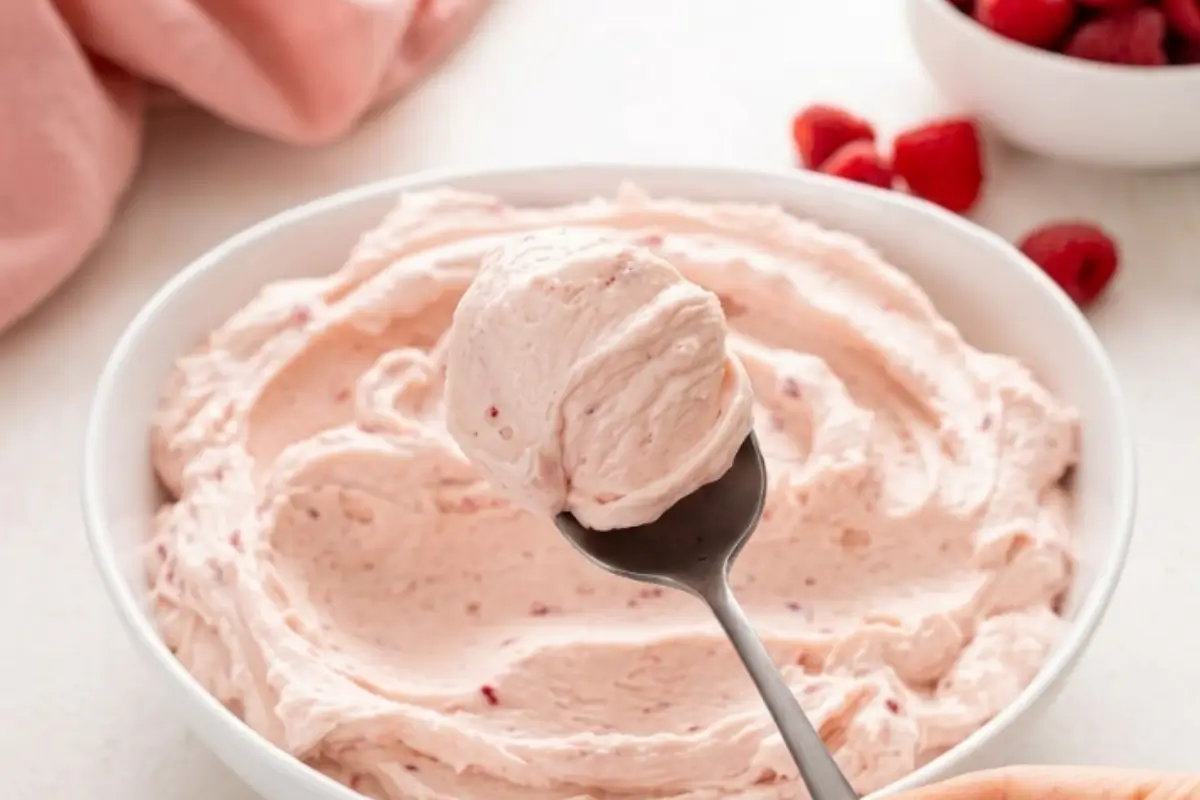
Homemade buttercream frosting is one of those recipes that sound complicated, but it isn't. It's four ingredients, ten minutes, and a result that makes people close their eyes when they taste it. I learned that from watching Nonna.
She never had a stand mixer, never used a piping bag, and never once looked at a recipe card. On the morning of every family birthday, I'd find her in the kitchen with a bowl, a wooden spoon, and total calm, spreading frosting over a cake with the back of a warm spoon in slow, gentle circles. It wasn't perfect.
It had little peaks and swirls that went nowhere in particular. But it tasted like the best thing any of us had ever eaten. For years, I was terrified of making buttercream myself.
I'd read recipes that said things like "beat until fluffy" and then stand there wondering, how? How long? What if it looks wrong? I added the cream and held my breath. More than once, I ended up with something grainy, or claggy, or so sweet it made my teeth ache.
This recipe fixes all of that. And I'm going to walk you through every step, including the parts the other recipes skip, so your cake gets the frosting it deserves.
What You Need for Homemade Buttercream
This part is simpler than it looks. Every ingredient in this frosting earns its place.
Unsalted butter is the heart of this recipe. I use unsalted so I can control the salt level myself. Every brand of salted butter is different, and that inconsistency can throw off the whole flavor.
Use a standard American unsalted butter for a beautifully pale, stiff frosting. European-style butter (like Kerrygold) has slightly more butterfat and produces a richer, creamier result with a softer texture both are lovely, just slightly different.
Powdered sugar, and here is the single most important thing I will tell you in this entire recipe: sift it. I know it feels unnecessary. I skipped this step for the first two years I made buttercream.
Every time, my frosting had a faint grit to it that I couldn't explain. The moment I started sifting, it disappeared. Lumps in the sugar = lumps in the frosting, every single time. This takes thirty extra seconds, and it changes everything.
Heavy cream is what gives homemade buttercream that soft, silky texture that makes it taste bakery-made. Milk works in a pinch, but the frosting will be slightly less rich and less smooth.
If you only have milk today, go ahead just know that cream is worth buying for this.
Pure vanilla extract gives the frosting its warm, familiar flavor. A good vanilla makes a real difference here.
A pinch of salt. Don't skip this. Salt is what cuts through the sweetness and makes the vanilla sing. Without it, buttercream tastes flat and one-dimensional: all sugar, no depth. A tiny pinch changes the whole frosting.
A few notes before we begin:
This frosting is naturally gluten-free, so it works for everyone at the table.
For dairy-free buttercream, use a good plant-based butter (I like the ones made with coconut oil or cashews) and swap in oat milk for the cream. It works beautifully.
If you're using salted butter, skip the added pinch of salt and taste at the end.
The Golden Rule Step-by-Step Homemade Buttercream Instructions
Here's the part everyone overthinks, but you won't. I'm going to give you one extra step at the very beginning that most recipes leave out, and it changes everything.
Step 0: The Butter Temperature Check
Before you do anything, press your fingertip gently into the top of a butter stick. It should give slowly, leaving a shallow indent, cool to the touch but not cold, pliable but not squishy.
If it feels hard and resists your finger, it needs another 15–20 minutes on the counter. If it feels greasy or your finger sinks straight through, it's too warm pop it in the fridge for 10 minutes.
This one check is the difference between silky buttercream and frosting that fights you every step of the way.
Step 1: Beat the Butter Alone
Place your room-temperature butter in the bowl of a stand mixer fitted with the paddle attachment (if you have a hand mixer, that works perfectly more on that in the tips below). Beat on medium speed for 2 to 3 minutes until the butter turns pale and looks almost like thick whipped cream.
Most people stop here too early. Keep going. The longer you beat the butter at this stage, the lighter and fluffier your final frosting will be. You'll know it's right when the butter has visibly changed color it should look almost white, not yellow.
Step 2: Add the Powdered Sugar, One Cup at a Time
Turn the mixer down to low before you add a single spoonful of sugar. Start with one cup, let it incorporate fully, then add the next. This slow method prevents two things: a sugar cloud in your face and grit in your frosting.
If yours looks a bit stiff and dry at this point, that's completely normal. You're about to fix it.
Step 3: Add the Heavy Cream
Add the cream one tablespoon at a time, with the mixer running on low. After each tablespoon, let it mix fully before adding the next.
Here's the moment everyone worries about: after you add the first tablespoon of cream, the frosting might look slightly curdled or broken, like it's separating. Don't panic.
Keep the mixer running for 60 more seconds. It almost always comes back together into a beautiful, smooth frosting. This is one of those times that looks worse before it looks wonderful.
Step 4: Add the Vanilla and Salt
Add your vanilla extract and the pinch of salt, and mix on low until combined. The frosting will shift ever so slightly, a little warmer, a little more fragrant. Taste it here.
Step 5: Beat Until Cloud-Like
Now turn the mixer up to medium-high and beat for 2 full minutes. Watch what happens: the frosting goes from smooth to genuinely pillowy light, airy, and almost luminous. This is the moment Nonna called it done.
You'll know it's right when a spoonful holds a soft peak that falls gently to the side not stiff, not droopy. Exactly right.
Why This Homemade Buttercream Works
Take a breath you're doing beautifully. But before you frost that cake, let me tell you the why behind what we just did. Understanding this means you'll never make bad buttercream again.
Butter temperature is everything. This is the single most important variable in the entire recipe. Butter that's too cold won't aerate you'll get dense, heavy frosting that tastes more like sweetened lard than something cloudlike.
Butter that's too warm is already starting to melt and won't hold its structure; you'll end up with frosting that slides right off the cake. The finger-press test in Step 0 exists specifically because "room temperature" means something different in every kitchen.
Sifted sugar is the only sugar. Powdered sugar clumps in the bag you can't always see it, but it's there. Those microscopic lumps survive the mixer and end up as grit in your frosting. Sifting takes thirty seconds. It solves the single most common texture complaint I hear from home bakers.
Salt isn't optional it's a flavor switch. A pinch of salt at the end of a sweet recipe sounds counterintuitive. But salt doesn't make frosting taste salty it makes it taste more like itself. Without it, American buttercream can tip into cloying sweetness. With it, the vanilla comes forward, and the whole frosting tastes balanced and real.
The paddle, not the whisk. A whisk attachment beats in too much air, which creates tiny bubbles in the frosting beautiful for meringue, not ideal for smooth buttercream you're trying to pipe or spread cleanly. The paddle gives you the silky, dense-but-light texture we're after.
Heavy cream over milk every time. The fat content in cream is what gives buttercream that slightly thick, melt-in-your-mouth quality. Milk thins the frosting without adding richness, which means you may need more powdered sugar to compensate, making it sweeter than you wanted. Cream and sugar are already in balance in this recipe. Trust the cream.
Elena's No-Fail Tips for Perfect Buttercream Every Time
Here's the part I wish someone had given me years ago: all the questions I've heard, all the panicked messages at midnight before a birthday, answered warmly and clearly.
Why Is My Buttercream Grainy? (And How to Fix It)
Nine times out of ten: unsifted powdered sugar. The grit you're tasting is tiny sugar lumps that the mixer couldn't break down fully. The fix going forward is simple: sift every time, no exceptions.
If you're already in the bowl and the frosting is grainy, try adding a tablespoon of warm cream and beating on high for another 2 minutes. Sometimes this smooths it out; sometimes the best answer is to start fresh with sifted sugar. I've been there. You learn it once and never forget it.
Why Does My Buttercream Look Curdled After Adding Cream?
This is the moment that sends most home bakers straight to the bin and it shouldn't. When you add cream to butter that's been beaten, the temperature difference can make the mixture look broken, split, or lumpy.
It looks terrible. It rarely is. Keep the mixer running on medium for 60 to 90 seconds without adding anything else. The warmth from the friction of mixing brings everything back together.
I have rescued every single batch this way. If it truly won't come back, your butter was probably too warm at the start. Chill the bowl in the fridge for 10 minutes, then beat again.
My Buttercream Is Too Sweet What Do I Do?
First: add a tiny bit more salt. It sounds odd, but salt cuts perceived sweetness more reliably than anything else.
Second: add another tablespoon of cream, which dilutes the sugar ratio slightly. If you consistently find American buttercream too sweet, try reducing the powdered sugar by a quarter cup next time and adjusting from there.
This frosting is meant to taste sweet it's the whole point, but it shouldn't be sharp sweetness. If it's making your teeth ache, more salt and a touch more cream will bring it home.
Can I Make Homemade Buttercream Ahead of Time?
Absolutely, and I encourage it. Buttercream actually rests beautifully. You can leave it at room temperature in an airtight container for up to 2 days. In the fridge, it keeps for up to a week.
In the freezer, up to 3 months. Press it into a zip-lock bag, squeeze out the air, and lay it flat. When you're ready to use it, bring it all the way to room temperature first (this matters do not try to frost a cold cake with cold frosting), then drop it back in your mixer and beat on medium for 1–2 minutes. It will come back to exactly where you left it.
What If I Don't Have a Stand Mixer?
A hand mixer works just fine. Nonna made buttercream with a wooden spoon and a strong arm, and it was the best frosting I've ever tasted. With a hand mixer, give yourself a little extra time on the initial butter-beating step aim for 3 minutes instead of 2, and hold the bowl steady. The result will be just as good.
Flavor Variations: One Buttercream, Endless Celebrations
Once you have this base recipe in your hands, you have everything you need. Here are my three favorite ways to take it somewhere new.
Chocolate Buttercream: Sift ⅓ cup of unsweetened cocoa powder and add it after the butter is beaten, before the powdered sugar. Add an extra tablespoon of heavy cream cocoa absorbs liquid, and the frosting will thicken noticeably. The result is dark, rich, and deeply comforting.
Lemon Buttercream: Add the zest of one large lemon and a tablespoon of fresh lemon juice along with the vanilla. The kitchen smells exactly like Nonna's citrus cake: bright, floral, and impossibly sunny. This is what I reach for every spring.
Strawberry Buttercream: Skip the fresh strawberries (they add too much liquid and make the frosting weep). Instead, pulse freeze-dried strawberries into a fine powder and stir in 2–3 tablespoons. You get beautiful blush color and intense strawberry flavor without changing the texture at all.
Feeling adventurous? Brown the butter before using it cool it fully back to room temperature first, then proceed as normal. The nutty, caramel depth it adds to buttercream is something most people can't identify but no one can stop eating.
Saving a Little Joy for Tomorrow: Storage, Freezing & Make-Ahead Notes
This is the part that makes homemade frosting truly practical, not just beautiful.
Counter: Up to 2 days in an airtight container, covered tightly so it doesn't crust over.
Fridge: Up to 1 week. Press plastic wrap directly onto the surface of the frosting before sealing to prevent it from drying out.
Freezer: Up to 3 months. I keep bags of it in my freezer the way other people keep emergency chocolate. Because sometimes Wednesday needs cake.
To revive: Always bring to full room temperature before re-whipping. Then beat in your mixer for 1–2 minutes, and it will be exactly as it was.
One more thing: never frost a cold cake with cold buttercream. The frosting will drag and tear, and you'll wonder what went wrong. Both the cake and the frosting should be at room temperature. If your frosting has been in the fridge, take it out an hour before you plan to use it.
Making Sweet Memories
I still think about that birthday morning in Nonna's kitchen the smell of butter and vanilla, the sound of the spoon against the bowl, and the way she never once seemed worried about whether it would turn out.
It always did.
Not because she followed every rule. But because she understood the most important thing: the frosting doesn't have to be perfect. It just has to be made with care.
Whatever you're putting this buttercream on today a birthday cake, a batch of Tuesday cupcakes, something a little crooked and entirely homemade I hope it brings someone you love real, simple happiness. That's what Nonna always said cake was for.
At AddCakes, we believe in memories, not masterpieces. Simply add cake and a little joy.
[…] than the interior crumb. When you trim it away, you expose the tender, open crumb that soaks up buttercream, jam, or custard. In my family, this is the moment I stop thinking of it as a baking project and […]
[…] Homemade buttercream frosting is one of those recipes that sound complicated, but it isn't. It's four ingredients, ten minutes, and a result that makes people close their eyes when they taste it. I learned that from watching Nonna. […]
[…] store them unfrosted in an airtight container at room temperature. The day you plan to serve them, make the buttercream and frost them […]
[…] we dive in, this whole guide assumes your buttercream is at what bakers call a "stiff peak" consistency. If you're not sure what that means, my frosting […]
[…] buttercream holds its shape under the weight of candy decorations and holds its peak when you pipe it upright. […]
[…] on the rack at least 30 minutes. If the cupcakes are even slightly warm when you frost them, the buttercream will melt and slide. This is worth the […]