
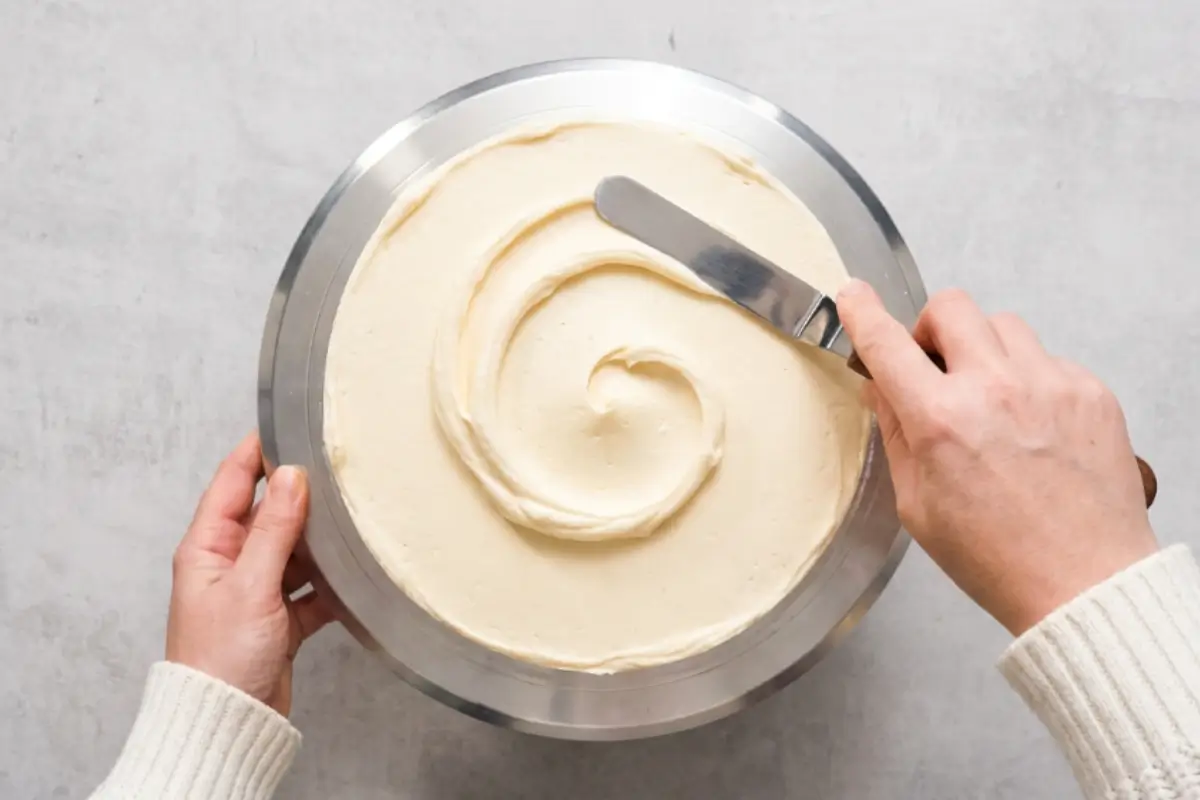
How to smooth frosting is one of those questions that lives quietly in the back of every home baker's mind, the one we're almost too embarrassed to Google.
We spend an hour baking a beautiful cake, pull it out of the oven glowing with pride, and then... the frosting fight begins. Lumps. Drag marks. Air bubbles that won't quit. That lip of buttercream building up on top like it has a grudge against us.
I know this feeling. Nonna never had these problems her cakes always looked like they came from a pasticceria in Naples, finished with this perfectly smooth, cloud-like coat of frosting that made you want to press your finger against it.
I asked her once how she did it. She handed me her bench scraper, pointed at the turntable, and said, "Piano piano, Elena. Slow and patient." I didn't understand what she meant, not really, until I ruined my third birthday cake in a row and finally sat down to figure it out properly.
So today, this is for every home baker who has ever stood over a messy, lumpy cake wondering if they'll ever get it right. You will. I promise. And it's so much simpler than you think.
The Key Tools You'll Need to Smooth Frosting Like a Pro
This part is simpler than it looks you don't need a full bakery setup. Just a few tools that make all the difference.
The non-negotiables:
Offset spatula: your go-to for spreading frosting in an even layer before you smooth. A 9-inch angled spatula works beautifully.
Bench scraper (cake scraper): the real hero. This flat metal tool is what gives you those glassy-smooth sides. You cannot get truly smooth results without one.
Turntable or lazy susan smooth: frosting is about controlled spinning, not frantic spreading. If you don't have a cake turntable, a microwave lazy Susan placed on a flat counter works perfectly. (This tip went viral for a reason: Nonna's generation didn't waste money on gadgets they didn't need.)
Cake board: keeps your cake stable and gives you a clean base to work from.
Nice to have:
Piping bag for applying the final coat in a controlled, even way before scraping
Non-slip mat or damp paper towel under the cake board so nothing slides around mid-swirl.
Here's the trick I learned the hard way: A bench scraper that's even slightly warm glides through buttercream like silk. A cold or wet one drags and tears. Keep this in mind we'll come back to it.
The Key Ingredients for Perfectly Smooth Buttercream (And Why They Matter)
Take a breath this is where most people go wrong before they even touch the cake. The secret to smooth frosting on the outside starts inside the mixing bowl.
Butter softened, not melted: Cold butter creates lumps. Melted butter turns greasy. You want butter that yields slightly when you press it, like pressing a ripe peach. Room temperature. This is non-negotiable.
Powdered sugar always sifted: Skipping the sift is the #1 cause of bumpy frosting. Clumps of powdered sugar refuse to dissolve no matter how long you mix. Thirty seconds of sifting saves ten minutes of frustration later.
Heavy cream a tablespoon at a time: Too much liquid makes frosting soft and impossible to hold. Too little makes it stiff and prone to drag marks. Add cream gradually and watch the texture change.
A pinch of salt: Don't skip this. Salt cuts through the sweetness and rounds the flavor in a way that makes buttercream taste homemade, not store-bought.
Vanilla extract: Pure, always. Imitation vanilla works in a pinch, but pure extract has a warmth that comes through in the finished cake.
A note on consistency: The biggest mistake I see is frosting that's either too stiff (creates tearing and drag marks) or too soft (slides right off the cake).
You want buttercream that holds a gentle peak but smooths out when you run a spatula across it. If it feels like peanut butter, it's too thick. If it slumps off the spatula, thin it with just a teaspoon of cream.
For those avoiding dairy: A high-quality vegan butter (one that's solid at room temperature, not spreadable) works beautifully in this recipe. The technique stays exactly the same.
How to Smooth Frosting: The Golden Rule Step-by-Step Method
Here's the part everyone overthinks but you won't. Just follow these steps in order, and trust the process.
Step 1: Level your cake layers
Before any frosting touches any cake, level the tops of your layers with a serrated knife. Even a slight dome means an uneven surface, which means frosting that shifts and cracks.
This one step is the difference between a cake that looks homemade and one that looks made with intention.
Step 2: Crumb coat first, always
This step is your safety net, and I will never stop talking about it. Spread a thin layer of frosting all over the cake sides and top, just enough to trap the crumbs.
It doesn't need to be pretty. Refrigerate for 20–30 minutes until firm to the touch. This is the step that separates a bakery cake from a home cake.
You'll know it's set when the crumb coat feels dry and slightly firm under your fingertip, not sticky.
Step 3: Apply the final coat generously
Using a piping bag (or a big spoon), apply a generous layer of buttercream to the sides of the chilled crumb-coated cake. Don't be shy you want more frosting than you think you need. It's easier to remove excess than to patch gaps.
Add a big mound to the top and spread it out to the edges with your offset spatula.
Step 4: Smooth the sides with a bench scraper
Place your bench scraper flat against the side of the cake, holding it straight (90 degrees to the turntable). With one hand on the bench scraper and the other spinning the turntable slowly, let the scraper do the work. Keep your hand still the spinning motion creates the smooth surface.
Apply only light pressure. This is the single most important instruction in this entire post. Pressing too hard creates pockmarks and drag marks. The scraper should glide, not dig.
After each pass, wipe the excess frosting off the scraper. A clean scraper gives a clean finish.
Step 5: Deal with air bubbles
If you notice tiny air bubbles appearing as you scrape, warm your bench scraper. Dip it in hot water, dry it completely with a paper towel, and run it gently over the surface. The warmth irons out air pockets beautifully. This is the technique that made me cry happy tears the first time I tried it.
Alternatively, microwave about ¼ cup of your buttercream for 5 seconds, mix it back into the bowl, and use this slightly warmed frosting for your final smoothing pass.
Step 6: Create the "crown" for sharp edges
After smoothing the sides, you'll notice a lip of frosting building up around the top edge. Don't remove it yet this is your crown, and it's how you get clean, sharp edges.
Once you're happy with the sides, use your offset spatula held flat and parallel to the top of the cake.
Slowly spin the turntable and sweep the frosting crown inward, toward the center of the cake. Work in short, gentle strokes. This creates a clean, level top and sharp top edges at the same time.
Step 7: The final chill
Refrigerate the finished cake for 15–30 minutes before decorating further or slicing. A chilled cake stays beautiful. A warm cake sags.
You're closer than you think keep going.
Why This Method Works
Most frosting tutorials jump straight to technique without explaining why things go wrong, and then home bakers feel like failures when their cake doesn't match the photos. Let me fix that right now.
The crumb coat is not optional:
This is the most universally agreed-upon truth in cake decorating. Every professional baker, every YouTube tutorial with millions of views, every Reddit baking thread comes back to this. Skipping the crumb coat is the #1 reason home cakes end up with crumb-flecked frosting that can't be fixed.
Temperature is the invisible ingredient:
Cold cake layers prevent frosting from sliding. A chilled crumb coat gives the final layer something to grip. Slightly warm frosting (or a slightly warm scraper) flows smoothly instead of dragging. Every step in this process is a temperature management step, even when it doesn't look like one.
Pressure control changes everything:
Light, steady pressure with a clean bench scraper produces a smoother result than heavy, urgent pressure. The instinct when frosting looks messy is to press harder but this tears the surface. Ease up, breathe, and let the scraper float.
The turntable creates the smoothness, not your hands:
This is why the spinning motion matters. Your hand stays still; the cake moves. The bench scraper catches and levels as the cake spins past it. Without this rotation, you're essentially dragging frosting back and forth, which creates lines and tears.
Sifted, room-temperature frosting cannot be skipped:
Lumpy powdered sugar creates surface bumps that no amount of scraping will fix. Butter that's too cold creates a greasy-looking finish. These aren't decorating problems they're mixing bowl problems that need to be solved before the cake is touched.
Elena's No-Fail Tips: Your Most Common Questions, Answered
Why does my frosting keep tearing instead of smoothing?
Almost always, your frosting is too stiff, or your scraper is too cold, or both. Add a tiny splash of cream to your buttercream (a teaspoon at a time) to soften it. Warm your bench scraper before each pass.
Ease the pressure of your hand. The frosting should glide, not resist. If it feels like you're fighting it, you are, and the solution is always to make the frosting a little warmer and softer.
Why do I keep seeing little air bubble craters in my buttercream?
This happens when too much air gets incorporated during mixing, usually from running the mixer on high speed for too long. To fix it, switch to the paddle attachment (not the whisk) for the last two minutes of mixing.
Then, using a rubber spatula, press the buttercream firmly against the sides of your bowl in a side-to-side motion. This bursts trapped air pockets. You can also microwave a small scoop of the frosting for 5 seconds and fold it back in the warmth eliminates remaining bubbles.
Can I make the frosting ahead of time?
Yes, and I'd actually encourage it. Buttercream made a day ahead and refrigerated overnight tends to be denser and more bubble-free than freshly made frosting.
Just bring it fully to room temperature before using, then re-beat gently with the paddle attachment on low speed for two minutes.
What if my frosting is bulging between the cake layers?
This means either the filling layer was too thick or the top cake layer is pressing down unevenly. The fix: pipe a buttercream "dam" around the edge of the bottom layer before adding any filling.
The dam holds the filling in place and prevents it from squeezing outward. This is a standard professional trick that almost no beginner tutorial mentions.
Do I really need a turntable? I don't have one.
You don't need to buy one. A microwave lazy Susan is the internet's favorite substitute it's sturdy, washable, and spins beautifully on a flat counter.
An upside-down plate or cake pan works in a pinch. The goal is simply rotation on any surface that lets you spin the cake with one hand while your scraper stays still.
Saving a Little Joy for Tomorrow: Storage Tips, Freezing & Make-Ahead Notes
A beautifully frosted cake deserves to stay beautiful, and the good news is that buttercream is a genuinely forgiving, sturdy frosting.
At room temperature: A frosted cake will keep beautifully at room temperature (covered loosely) for up to two days. If your kitchen is warm, lean toward refrigerating.
In the refrigerator: Store the frosted cake uncovered for the first hour (so the frosting can firm up into a protective shell), then cover loosely with plastic wrap or a cake dome.
It will keep for up to five days. Bring to room temperature for 30–60 minutes before serving cold buttercream can taste flat and dense; room-temperature buttercream tastes like a warm hug.
Freezing the frosted cake: Yes, you absolutely can freeze a fully frosted cake. Place it uncovered in the freezer for one hour until the frosting is solid. Then wrap carefully in plastic wrap, then foil.
It will keep for up to three months. Thaw overnight in the refrigerator, then bring to room temperature before serving.
The make-ahead strategy I love best: Bake and crumb-coat the cake the day before. Wrap it well and refrigerate. Then do the final frosting coat the morning of your event. You'll be calm, the cake will be perfectly chilled, and the final smoothing will take twenty minutes.
This is what I do before every big occasion, and it has never let me down once.
Making Sweet Memories
How to smooth frosting is not about natural talent or professional equipment. It's about a sequence of patient steps, a little understanding of why each one matters, and the willingness to trust the process even when the cake looks messy halfway through. (It always looks a little messy halfway through. That's just cake.)
Nonna never worried about whether her cakes looked perfect. She worried about whether they tasted like love, like Sunday, like something worth gathering around.
The smooth frosting was just her way of saying, "You are worth the extra ten minutes. And so are you. And so are the people you're baking for.
At AddCakes, we believe in memories, not masterpieces. Simply add cake and joy will follow.
[…] the mixer running for 60 more seconds. It almost always comes back together into a beautiful, smooth frosting. This is one of those times that looks worse before it looks […]
[…] A turntable or a lazy Susan. Here's where I want to calm a very common worry. Yes, a proper cake turntable makes smooth frosting easier. […]
[…] this isn't perfectly smooth, that's part of the charm. Rustic frosting is absolutely, completely […]
[…] a large bowl and beat it on medium speed, alone, for about 2 minutes before adding anything else. You want it smooth and slightly fluffy before the sugar goes in. Add the powdered sugar and vanilla and beat until […]