
I’m so happy you’re here to make this cannoli cake recipe with me today. I remember standing on a wobbly wooden stool in my Nonna's sun-drenched kitchen in Sanremo, the warm scent of orange zest in the air, watching her whip ricotta until it was perfectly smooth.
I often long for those simple, cherished memories when life feels so rushed. I know the thought of baking a layered cake for guests can bring up a lot of tension, and the acute technical anxiety of serving a "mushy mess" is so real.
But I promise you, true beauty lies in the messy, shared, joyful process of making it together, rather than bakery perfection.
This tender cake promises a melt-in-your-mouth crumb that will make you so incredibly proud.
Let’s move from those beautiful memories into a promise I’m making to you: the Fail-Proof Cannoli Cream Guarantee. Traditional recipes often use finicky mascarpone that can separate and turn to liquid overnight, causing so much unnecessary heartbreak.
But this tender, simple cake uses a highly stable cream cheese and ricotta blend. It will confidently support your celebration, providing a heartwarming, no-fail experience instead of kitchen tears.
The Key Ingredients For Cannoli Cake Recipe And Why They Matter
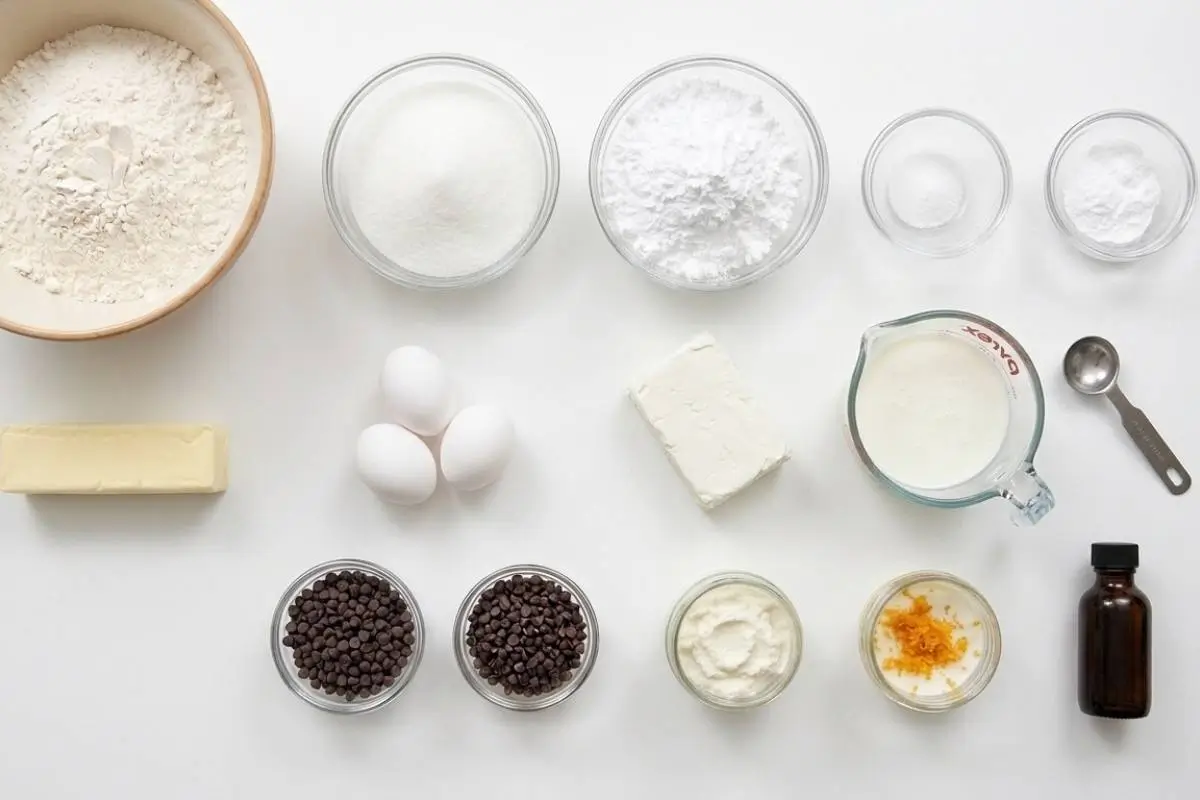
Gathering your ingredients is the easiest part, so take a breath; you’re doing great so far. To make sure your cake stands tall and proud, we need to follow a few simple ingredient rules.
Whole-Milk Ricotta: This is mandatory. Part-skim ricotta leads to an icy, watery filling that won't hold up.
Powdered Sugar: We use this because it is vastly superior to granulated sugar here—it dissolves instantly to prevent a gritty mouthfeel.
Mini Chocolate Chips: Please strictly use the mini size! Large chocolate chips will ruin the slicing process and make your beautiful cake unstable.
Cream Cheese (The Secret Weapon): While purists demand mascarpone, it frequently splits and curdles. We are using a foolproof, reliable method with cream cheese for a sturdy hold.
Orange Zest: A cherished addition to brighten the heavy, rich fat profile of the dairy.
A quick note for my gluten-free friends: You can easily swap the buttermilk sponge for a flourless Almond-Ricotta base, and the filling remains completely safe for you!
The sweet, buttery aroma of the vanilla cake batter baking will instantly transport you to a comforting Italian bakery.
Here’s the trick I learned the hard way: always check the label twice to ensure your ricotta is whole milk. If your cream cheese looks a little lumpy at first when mixing, that’s completely normal it just needs a little more time to come to room temperature.
You'll know it's right when the mixture turns incredibly silky. This is what I make when I want something comforting but simple for a Sunday family gathering. See? You already know everything you need to begin keep going.
The Golden Rule Step-by-Step Instructions
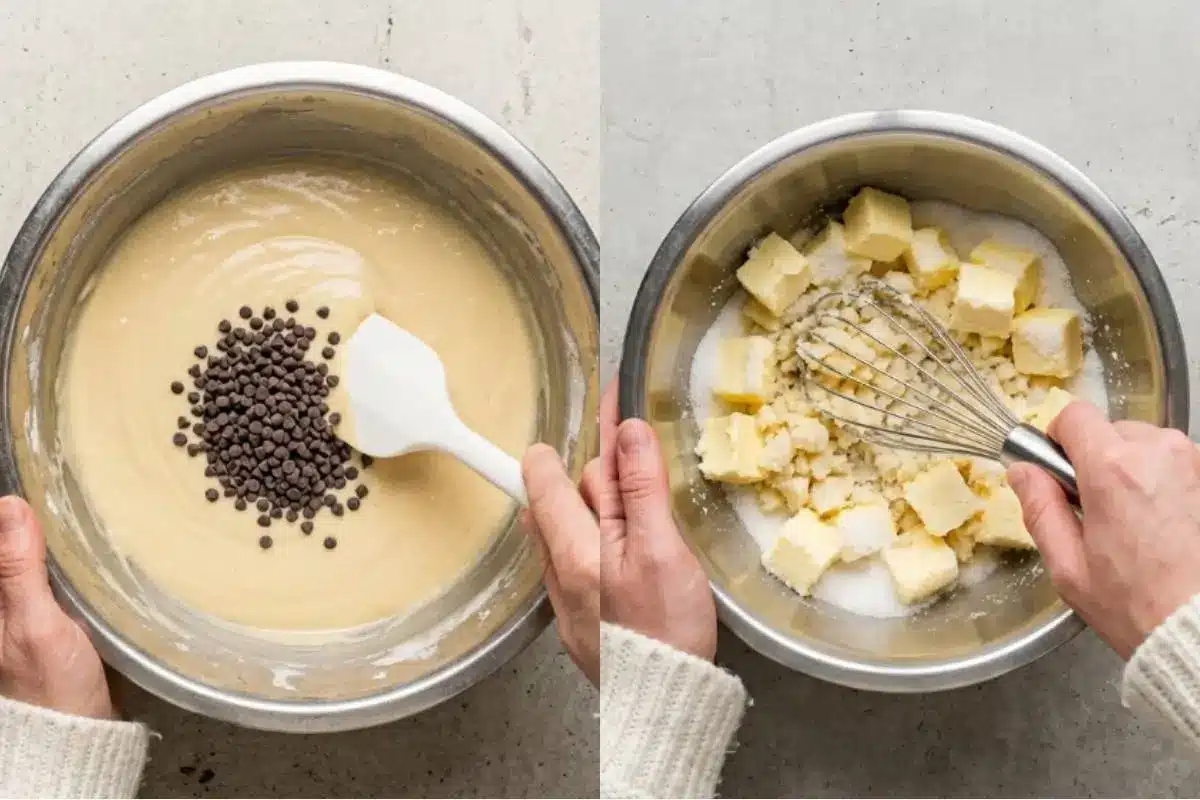
I know layering a cake can feel intimidating, but this part is simpler than it looks.
Step 1: The 24-Hour Stress-Free Timeline
Don't rush the process. Day 1 is for baking your layers and setting up your cheese to drain. Day 2 is for assembly. Breaking it up eases your workflow anxiety so you can actually enjoy the process.
Step 2: The Mandatory Drain
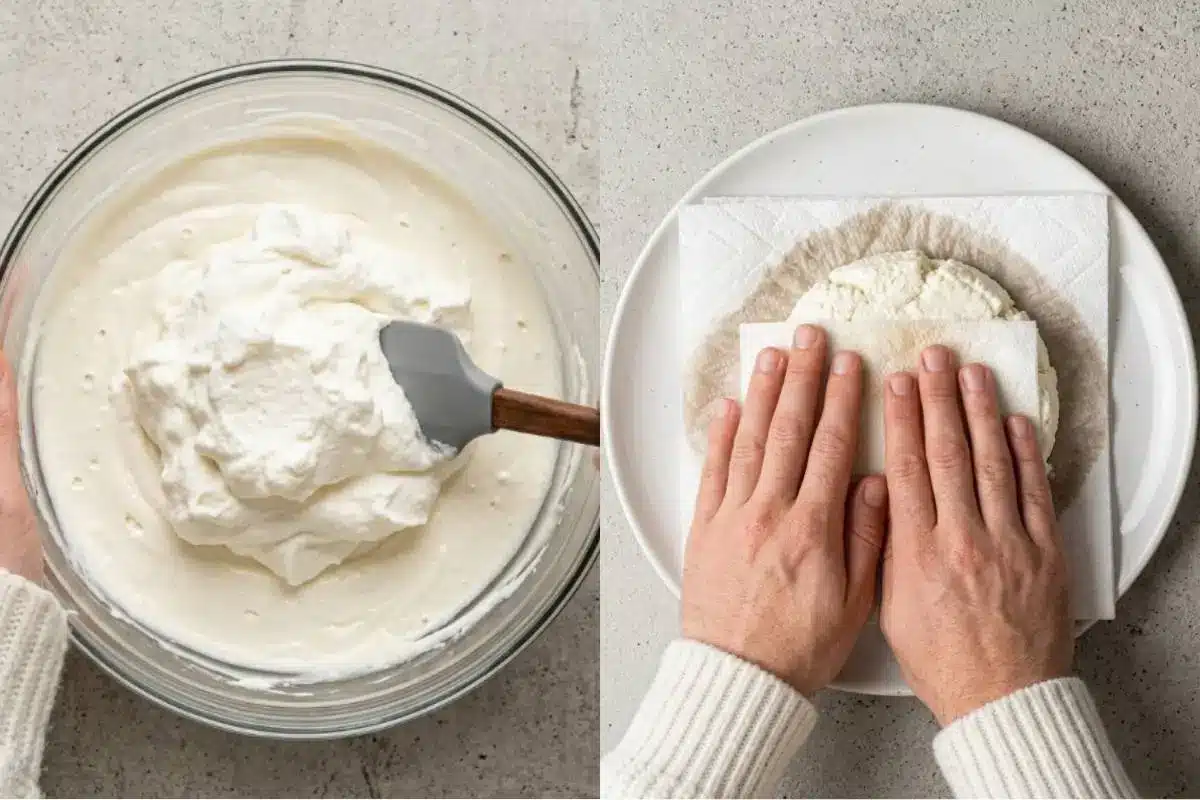
You must drain and press your ricotta to remove the whey. Ideally, let it press for 12 hours. This is your ultimate defense against sliding layers.
Step 3: Gentle Hand-Folding (My Secret to Success)
When it comes time to add the whipped cream into your beautiful ricotta mixture, you must gently hand-fold it. Using an electric mixer at this final stage is the #1 failure point that causes the filling to liquefy.
Step 4: The Secret Bakery Dam
To ensure zero spillage, pipe a stiff buttercream border (or use a little extra of your sturdy cream cheese mixture) around the very edge of your cake rounds. This acts as a protective wall to lock the softer ricotta filling safely inside.
Step 5: The Cooling Rule
Please do not rush the cooling step! Trying to slice a warm cake horizontally will only lead to tears and crumbs. Pour yourself a cup of coffee and wait.
Listen to the rhythmic, comforting tap of your wooden spoon against the bowl as you fold in the chocolate chips. I ruined this recipe twice before I figured out that draining the ricotta is non-negotiable!
If your frosting dam looks a little messy here, that’s completely normal—it gets covered by the next layer anyway.
A quick test to know if your cakes are cooled enough is to gently press the center; they should feel entirely room temperature to the touch. You’re closer than you think—keep going.
Why This Cannoli Cake Recipe Works
If you’re ever wondering how all these parts come together, here’s the part everyone overthinks—but you won’t.
A Sturdy, Dependable Cake Base: Our buttermilk vanilla sponge is created to be sturdy enough to support heavy dairy layers without collapsing under the weight.
Keeping the Moisture Out: By diligently pressing the ricotta, we remove the excess moisture that notoriously ruins other recipes I've tried in the past.
The No-Curdle Guarantee: Avoiding temperamental mascarpone means absolutely no sudden splitting when you are rushing to finish dessert.
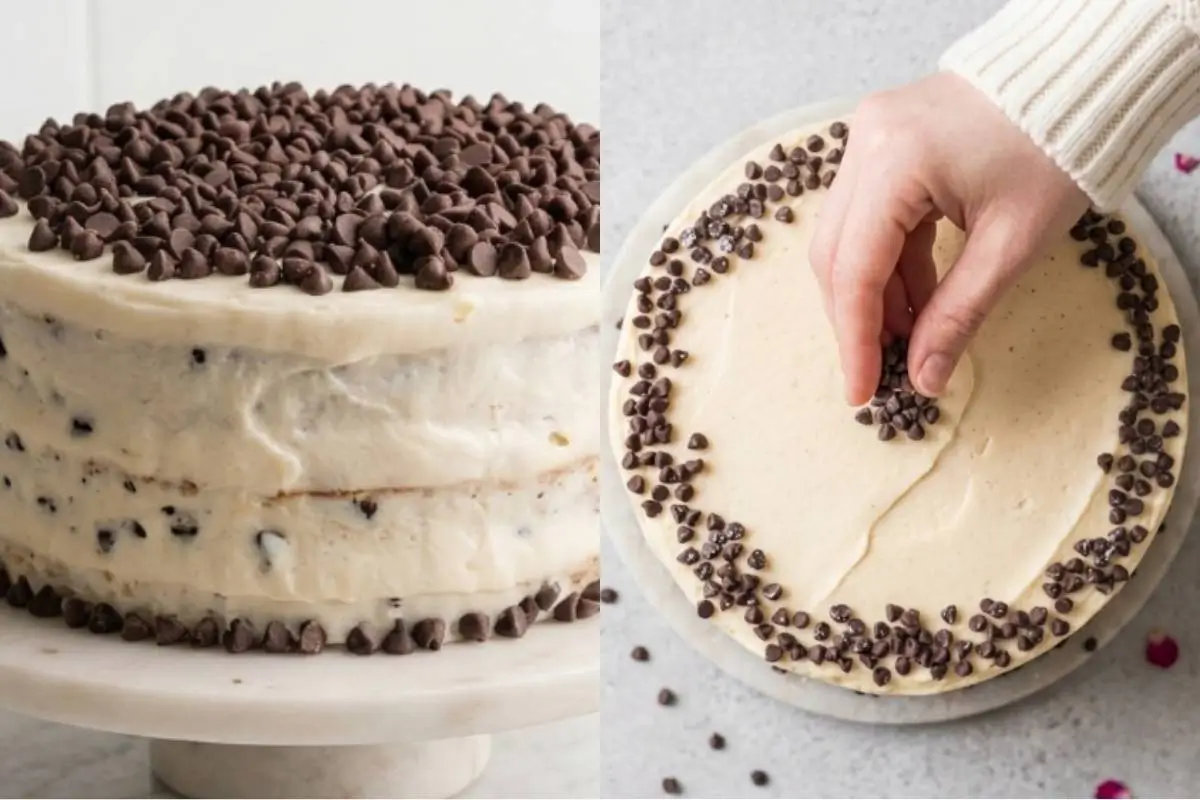
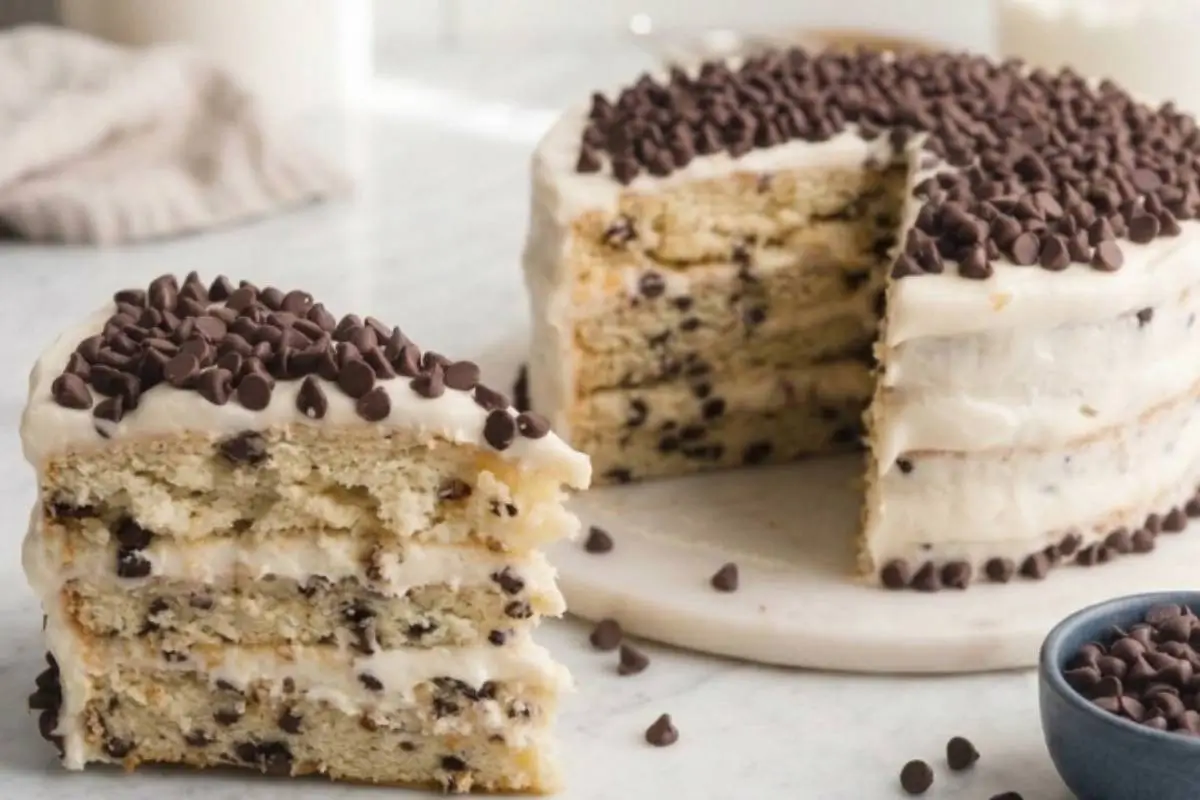
That Beautiful Bakery Look: Spreading a thin layer of frosting for a "naked cake" look, with those bulging, chocolate-chip-studded cream layers, feeds right into the most beautiful, trending visual aesthetics you see online.
The visual of those golden cake edges peeking through the rustic cream is just stunning. If you love creamy textures, you’ll also love my other ricotta-based desserts that use this same foolproof logic.
Understanding the "why" makes you a better baker instantly. You're doing beautifully.
Elena’s No-Fail Tips For Your Cannoli Cake Recipe
Even the best home cooks have questions, so don't worry if you do too.
Why is my cannoli filling runny?
Almost every time, this is caused by under-drained ricotta. Always use the paper towel or cheesecloth pressing method for several hours to extract that hidden moisture.
Can I use a stand mixer for the filling?
You can absolutely use your mixer for the cream cheese and ricotta base! However, the final whipped cream addition must be folded in by hand to protect the delicate fat structure.
Is there a shortcut for busy days?
Yes! If you are short on time, try the trending "Cannoli Poke Cake" variation. You can use a baked boxed mix and pour over sweetened condensed milk, topping it with our cannoli cream for a semi-homemade, high-speed hack.
Most people miss this hand-folding step, but it makes all the difference in achieving that perfectly fluffy texture. You are fully equipped to handle any little hiccup now.
Saving a Little Joy for Tomorrow: Storage Tips, Freezing & Make-Ahead Notes
Don't stress about timing; this cake is actually very forgiving when you plan ahead.
Your assembled cannoli cake must be refrigerated to set properly. However, for the absolute best flavor and texture, let it sit out on the counter for about 20 minutes before serving to soften the crumb.
Please note: freezing a fully assembled ricotta cake is not recommended because the dairy separates upon thawing. Instead, if you want to prep early, bake and freeze the sponge layers ahead of time, and make the joyful filling fresh on the day you assemble.
The chill of the fridge helps that fluffy, cloud-like frosting set into the most perfect, photogenic slices. Now you can truly relax before your guests arrive.
The Most Heavenly Cannoli Cake
Ingredients
Method
- Line two 8-inch cake pans with parchment paper and spray the insides with nonstick cooking spray.
- In a small bowl, combine the flour, baking powder, and salt. Set this aside.
- Add your butter and sugar to a stand mixer, then mix on medium speed for 3 minutes until it looks light and fluffy.
- Add the eggs and vanilla, then mix again.
- Add one third of the flour mixture and mix until combined. Add half a cup of buttermilk and mix.
- Repeat this with the flour and buttermilk, ending with the flour, until everything is combined.
- Gently fold in the three quarters cup of mini chocolate chips.
- Pour the batter evenly between your prepared cake pans.
- Bake at 350 degrees F for 28 to 35 minutes, or until a toothpick inserted in the center comes out clean.
- Allow the cakes to cool for 5 minutes before inverting them onto a cooling rack.
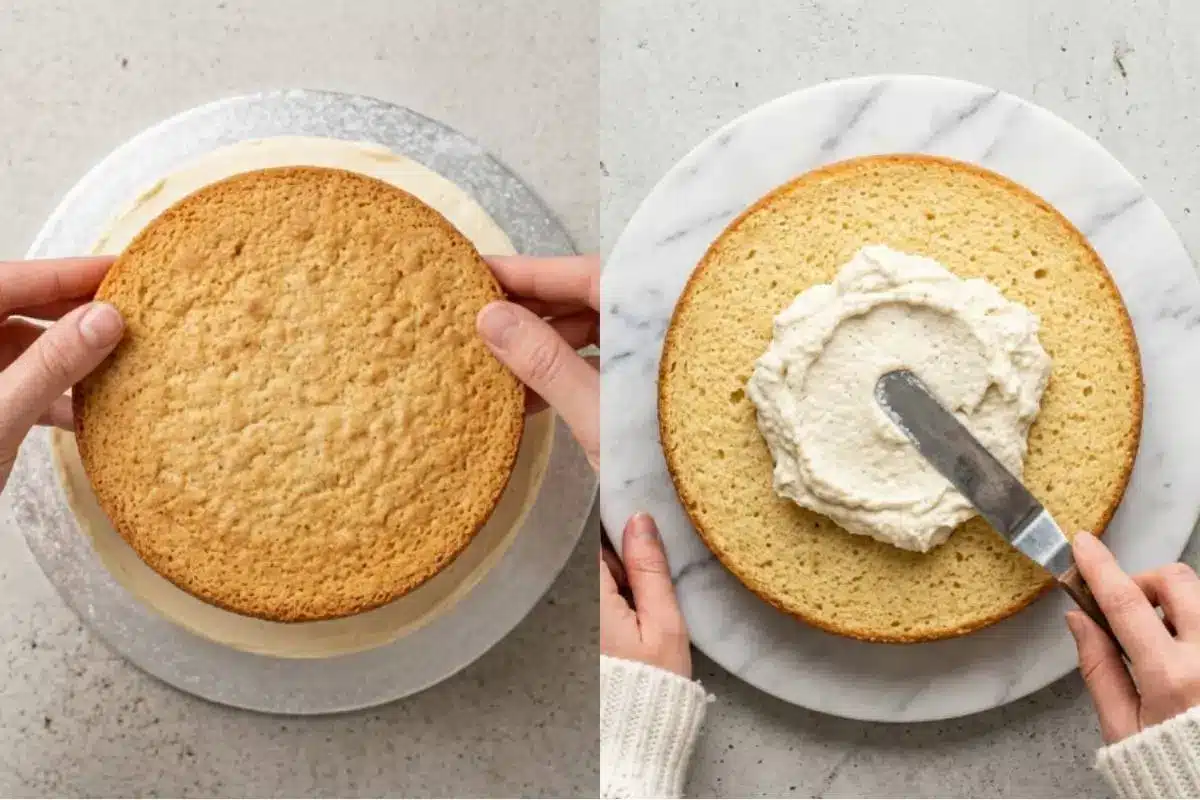
- Once the cakes have cooled completely, use a sharp serrated knife to slice each cake round in half horizontally to create 4 thin cake rounds.
- Measure out the ricotta, then place it on a plate lined with several paper towels. Place a few more paper towels on top of it, and press down gently to remove some of the moisture.
- Add the pressed ricotta to a mixing bowl with the cream cheese and powdered sugar, then beat with electric mixers until smooth.
- In a separate bowl, add the heavy cream and vanilla, then beat until you see stiff peaks.
- Gently fold the whipped cream, and the orange zest if you are using it, into the ricotta mixture.
- Place one baked cake round on a cake stand or cake board. Spread about half a cup of frosting on top.
- Add the second cake layer, and spread more frosting. Repeat this with the remaining cake layers.
- Spread a thin layer of frosting all around the outsides of the cake for a rustic, naked cake look. Add a little extra frosting right on top.
- Sprinkle the 1 cup of mini chocolate chips on top of the cake. Cover and refrigerate for 1 hour before serving.
Notes
Making Sweet Memories
Real love is not found in a bakery-perfect display. It is in the powdered sugar dusted across your nose and the stolen chocolate chips eaten before the cake is even built.
Whenever I make this, I am instantly brought back to that sun-drenched kitchen in Sanremo with my Nonna. She never worried about making her cakes look flawless on the outside.
She always said the true beauty was in the sweet layers hidden inside, and the messy, joyful process of making it together.
I know the days feel long and busy right now, and the thought of baking an entire layered cake might feel like too much.
But I promise you, this is about creating those same sweet, messy kitchen memories with your own family, not about perfection.