
There is something deeply comforting about the quiet hours of the night when the house is finally still. If you are looking for the perfect Biscoff cheesecake recipe, you are in the right place.
Often, when the kitchen is dark and the daily rush has faded, it is the only time I feel like I can truly catch my breath. Preparing a beautiful dessert for guests can sometimes feel wrapped in tension—that quiet fear of serving a collapsed, soupy mess to the people you love.
But I promise you, tucking a little something special into the fridge is the best way to be kind to your future self. This soulful, comforting dessert is my cherished secret; it practically makes itself, and I guarantee it will be the very first thing to disappear off the dessert table.
We all want that bakery-level masterpiece, but no one wants the stress that usually comes with it. I know that waiting six to eight hours for a dessert to set can feel like an agonizing wait, but let’s reframe that.
That chilling time is actually your ultimate stress-free entertaining secret! It means the work is done long before your doorbell rings, allowing you to actually sit, breathe, and enjoy your own party.
This is what I make when I want something comforting but simple. In my kitchen, we believe in joy, not perfection.
The Key Ingredients For The Dreamiest Biscoff Cheesecake And Why They Matter
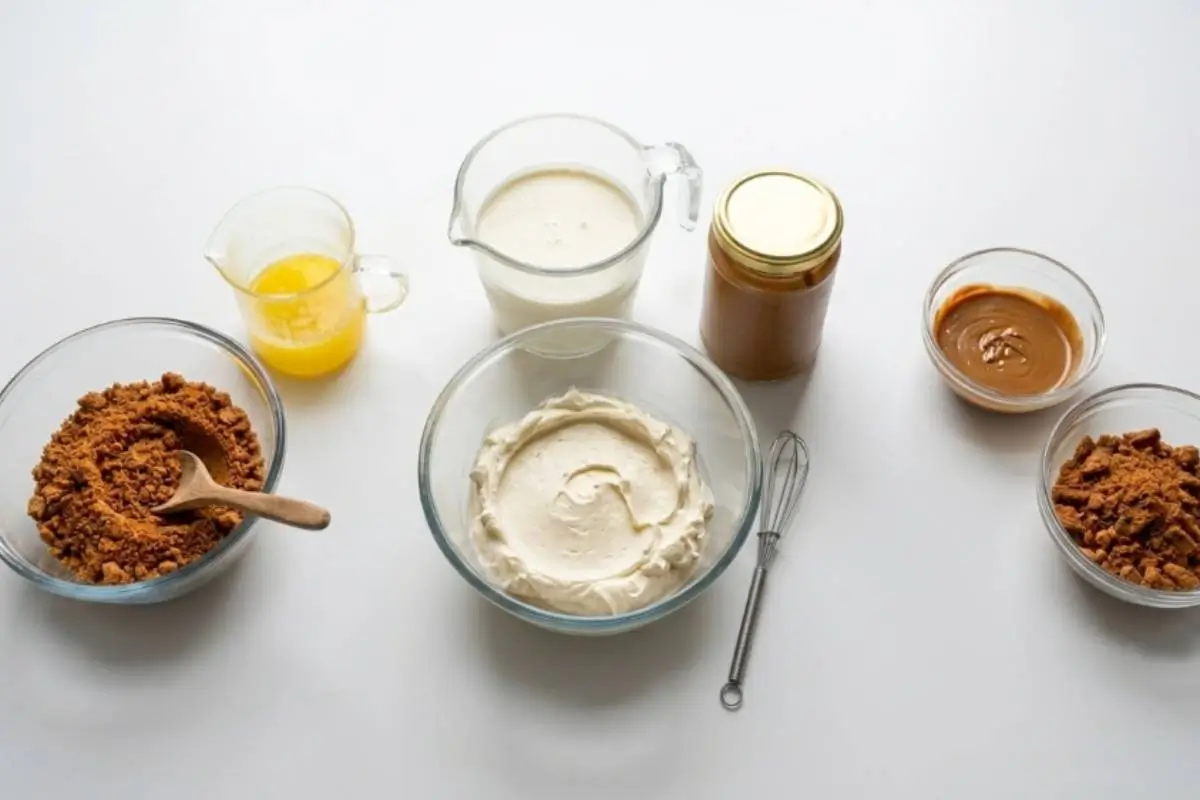
Gathering your ingredients is the easiest part; I promise, this part is simpler than it looks. To make this dessert truly foolproof, we have to start with the right foundation.
I ruined this recipe twice before I figured this out, so let me save you the heartache: you must use full-fat block cream cheese.
Please, step away from the spreadable tub cream cheese! Tub spreads contain excess water, which will cause a catastrophic soupy failure. The dense, rich blocks are mandatory for structural integrity.
Temperature Rules: Your double cream (heavy whipping cream) must be straight-from-the-fridge cold to whip properly, but your cream cheese must be softened to room temperature. This prevents the batter from curdling instantly and keeps everything silky smooth.
Dietary Opportunities: One of the most beautiful things about Biscoff cookies and spread is that they are naturally vegan! If you have dairy-free loved ones, you can easily adapt this by swapping in your favorite vegan cream cheese blocks (like Violife) and a high-quality coconut cream.
As you crush those spiced biscuits, the warm, nutty aroma of cinnamon and caramel will fill your kitchen, wrapping you in the coziest embrace—just like walking into Nonna's kitchen on a Sunday afternoon.
The Golden Rule Step-by-Step Instructions
Take a breath; you’re doing great so far, and I am right here with you.
The Crust
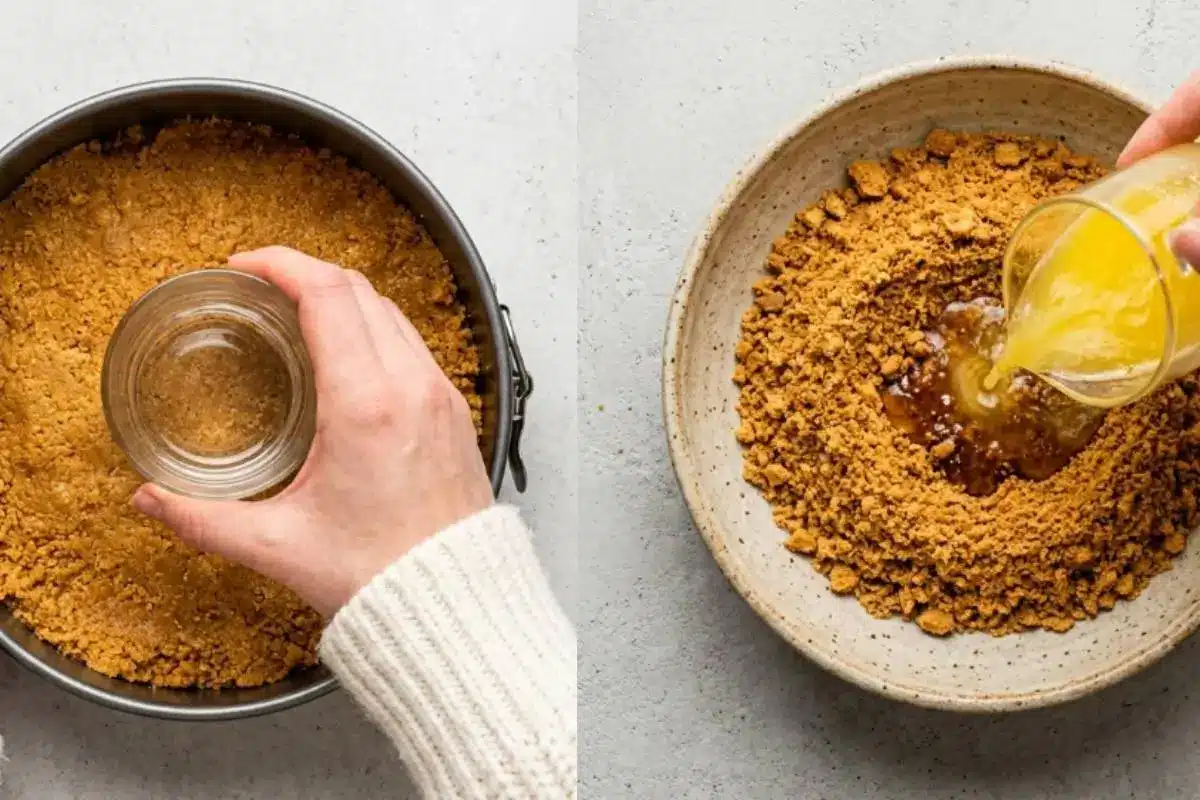
Combine your crushed spiced biscuits with the melted butter. If your crumb mixture looks a bit loose at first, that's completely normal. Press it firmly into the base of an 18cm (7") springform pan.
You will know it is right when it looks like damp sand and holds its shape when pressed with the back of a spoon. Pop it in the fridge to set.
The Filling
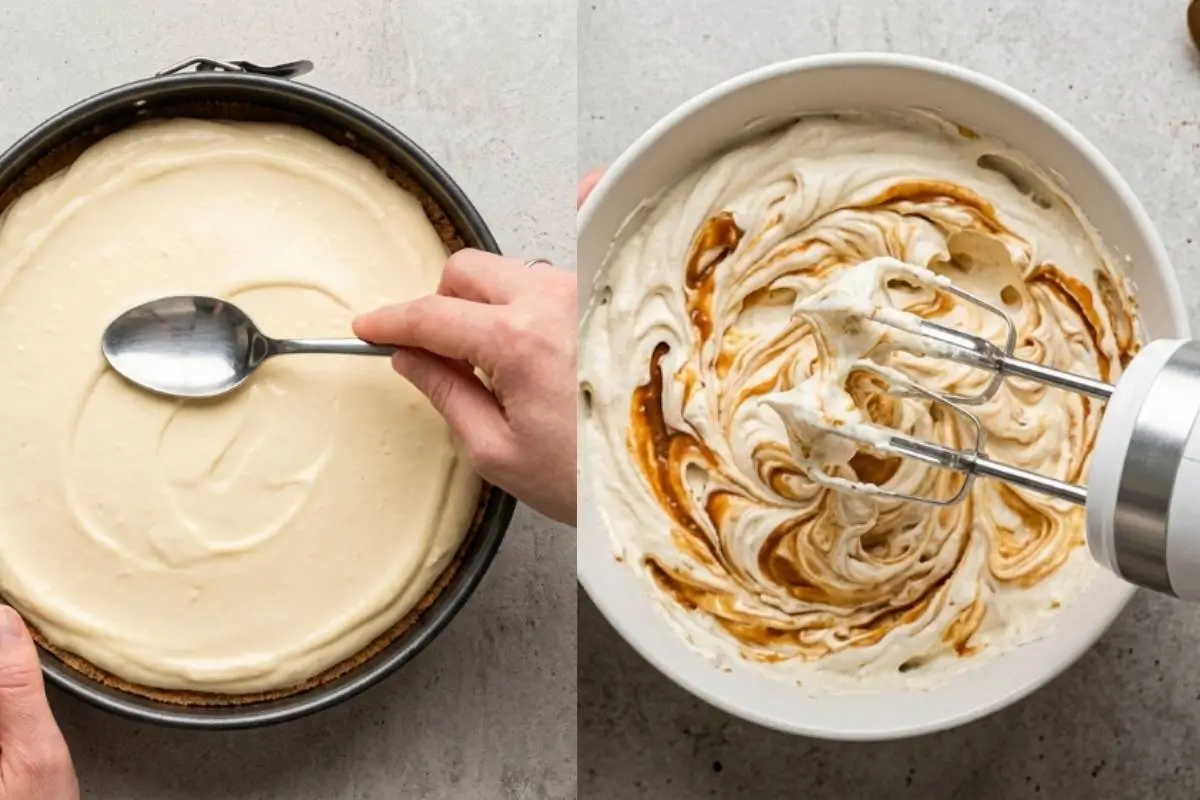
Pour your cold heavy cream into a large bowl, then add the room-temperature cream cheese and the Biscoff spread.
Here is the trick I learned the hard way: whisking this mixture requires patience. As the whisk taps rhythmically against the bowl, watch the texture.
Texture Check: You want to whisk until the mixture is very thick, almost like the consistency of a dense ice cream. You will know it is right when the batter holds itself completely in stiff peaks.
If it seems too thick to pour and needs to be spooned out, you’re exactly on the right track!
Remove your crust from the fridge, gently spoon the rich, cloud-like filling over the base, and smooth the top. Let it chill in the fridge for at least 3 hours, though overnight is magic.
The Topping
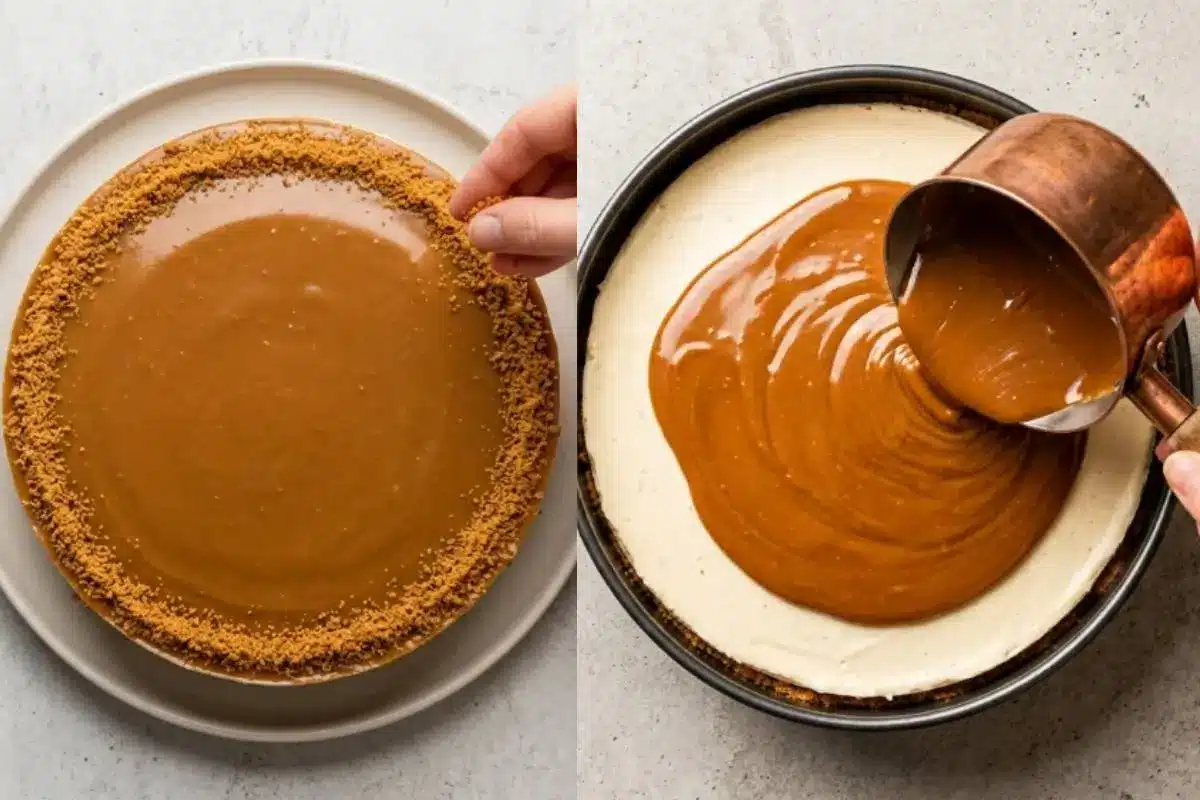
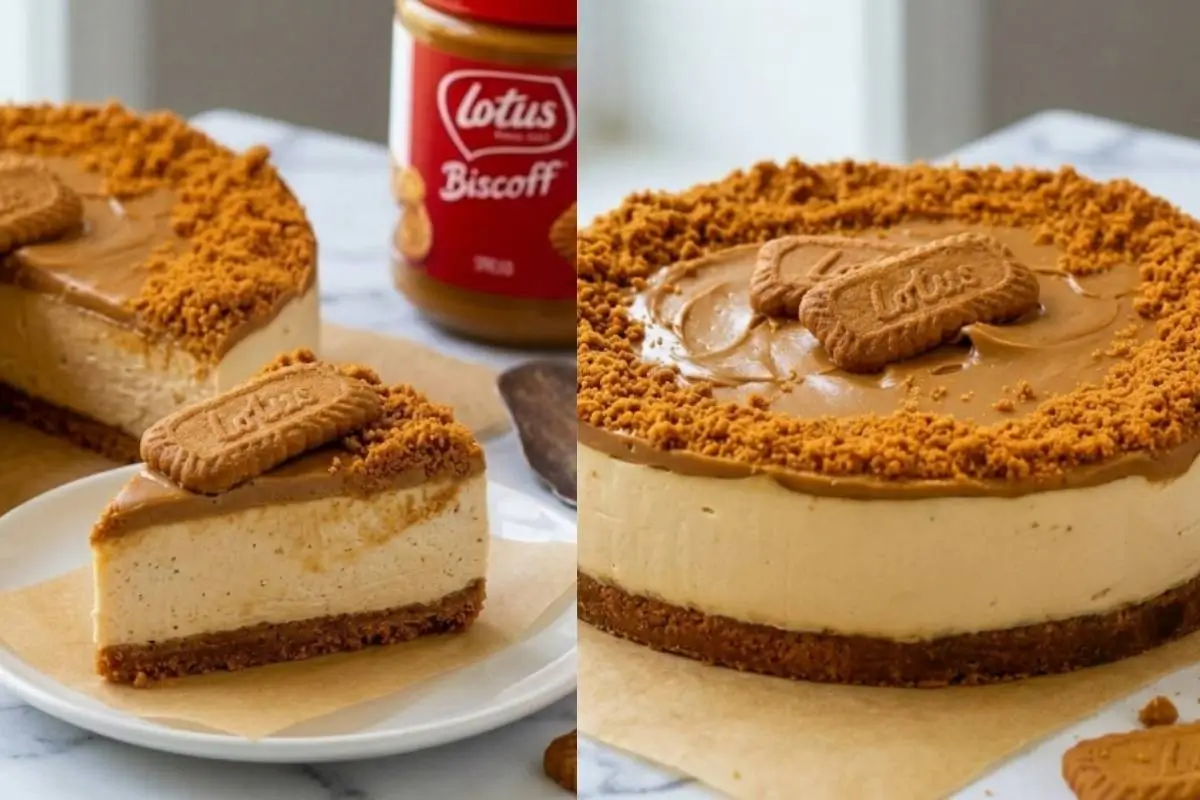
When you are ready to serve, gently melt the remaining Biscoff spread. Do not let it get hot—just warm enough to pour. While the cheesecake is still in the tin, pour the melted spread over the top.
Smooth it out with a spoon, being careful not to touch the cream mixture underneath. Sprinkle the remaining crushed biscuits around the edge like a rustic halo. Chill for one more hour.
To release the springform pan, run a warmed dinner knife around the edge. Sit the tin on a tall glass and press down gently so the sides slip away. You’re closer than you think—keep going, the magic is happening!
Why This Biscoff Cheesecake Recipe Works
Here’s the part everyone overthinks—but you won’t. The number one fear with no-bake cheesecakes is a runny filling. But now you know the why behind the what: using full-fat dairy and properly whipping your cold cream creates an airy, mousse-like stability without any risk of collapse. And if you are worried about your top not being perfectly smooth?
Please, let that go! Any unevenness or cracks are just happy accidents that will be effortlessly and beautifully concealed by our warm, caramel-colored Biscoff glaze.
No Water Bath Needed: We are skipping the leak-prone foil water baths that cause so much baking anxiety. This no-bake method is pure joy.
The Sensory Crunch: The rustic, spiced speculoos cookie base provides the perfect textural crunch to balance the rich, velvety center.
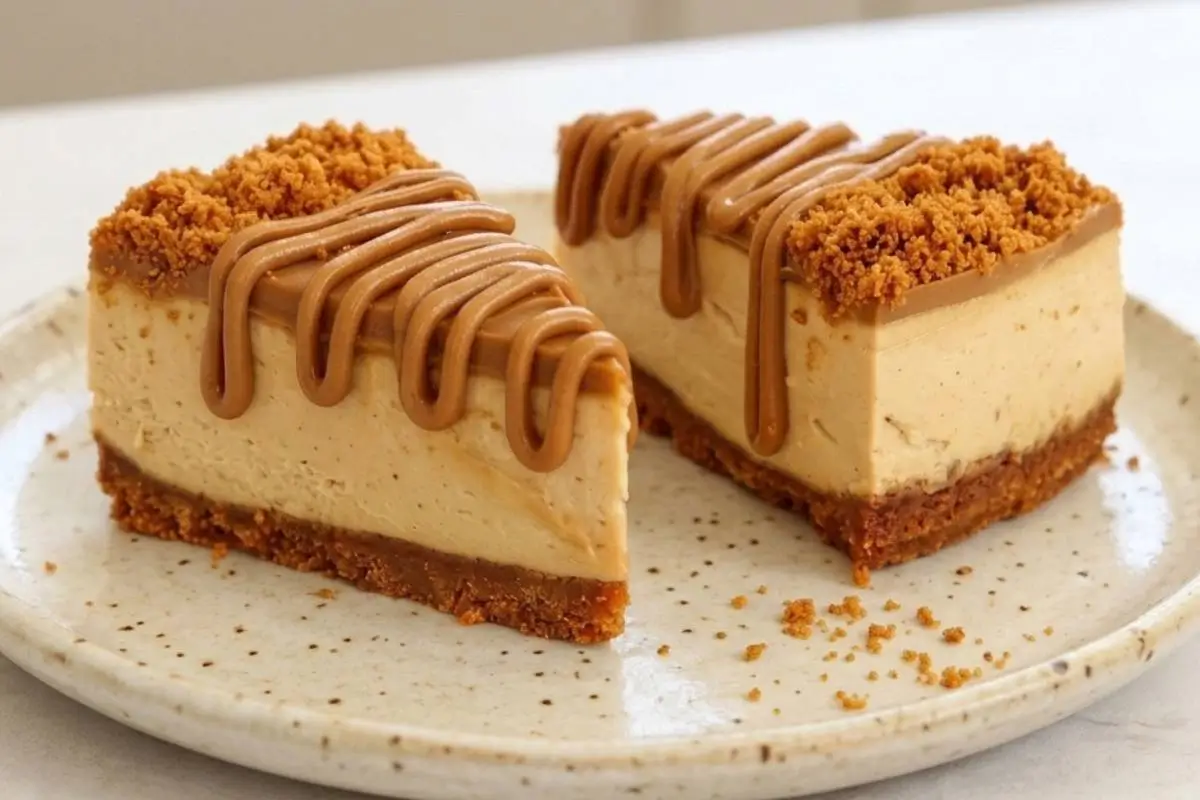
The Signature Drip: The melted Biscoff topping cascades slightly down the sides, providing that professional decadence we all strive to replicate at home.
Elena’s No-Fail Tips For Your Biscoff Cheesecake
If you are feeling unsure, don't worry—I have anticipated every little bump in the road for you.
Why did my filling turn out runny or soupy?
Usually, this comes down to two culprits: accidentally using tub cream cheese instead of the block, or under-whipping the heavy cream. Remember our golden rule—whisk until it holds its shape like a soft winter cloud!
How do I safely melt the Biscoff spread for the perfect drip?
Melt it very slowly in a pan over low heat (or in the microwave in 10-second bursts). You want it just warm enough to turn liquid. If it gets too hot, it can seize or melt the cream cheese layer beneath it. Slow and steady is the secret.
Do I need to pre-bake the crust?
Not at all! There is a great debate about this, but I assure you, simply chilling the butter-soaked crust in the fridge is perfectly sufficient and entirely foolproof.
Can I make a coffee-flavored Tiramisu version?
Yes! This is a wonderful grown-up upgrade. Briefly dip your base cookies in strong, cooled espresso before crushing them, or mix a tablespoon of espresso powder into the melted butter.
Saving a Little Joy for Tomorrow: Storage Tips, Freezing & Make-Ahead Notes
Do not stress about leftovers; storing this is as easy as making it. If you want to freeze this cheesecake to have a cherished dessert ready for unexpected guests, you absolutely can! Simply freeze the cheesecake without the final melted topping.
Wrap the perfectly chilled, set cheesecake tightly in a layer of plastic wrap, followed by a layer of aluminum foil to prevent freezer burn. It will keep beautifully for up to a month.
When you need it, let it thaw in the fridge overnight, then add the melted Biscoff topping an hour before serving.
The Dreamiest Biscoff Cheesecake
Ingredients
Method
- Combine the crushed biscuits with the melted butter and press into an 18cm (7 inch) springform pan. Chill in the fridge while you make the filling.
- Pour the cream into a bowl, add the cream cheese and the spread. Whisk until it is very thick, almost like the consistency of ice cream. Use an electric whisk if you have one to make this quick and easy.
- Remove the base from the fridge and add the cheesecake mixture, smoothing the top.
- Pop into the fridge for at least 3 hours, though leaving it overnight is much better if you can wait.
- When ready to serve, melt the spread very gently in a pan. Do not let it get hot. Crush the remaining biscuits finely.
- Remove the cheesecake from the fridge and, while still in the tin, pour the melted spread over the top. Smooth it out very gently with the back of a spoon.
- Sprinkle the crushed biscuits around the edge.
- Return to the fridge for at least an hour to set the topping.
- To remove from the tin, run a warmed dinner knife around the edge. Sit the tin on a tall glass and press down so the sides slip away.
Notes
Making Sweet Memories
When the house finally goes quiet at the end of the day, sitting down with a beautifully clean slice of this dessert reminds me that we do not need a grand occasion to make something worth celebrating.
Pulling this out of the fridge is a quiet ritual, a little nod of pride in sharing something entirely homemade with the people sitting around your table. Food is about joy, not perfection, and it is about the memories we create.
What is a quiet ritual you have for yourself when the house finally goes quiet at the end of the day? I would love to hear your stories below!