
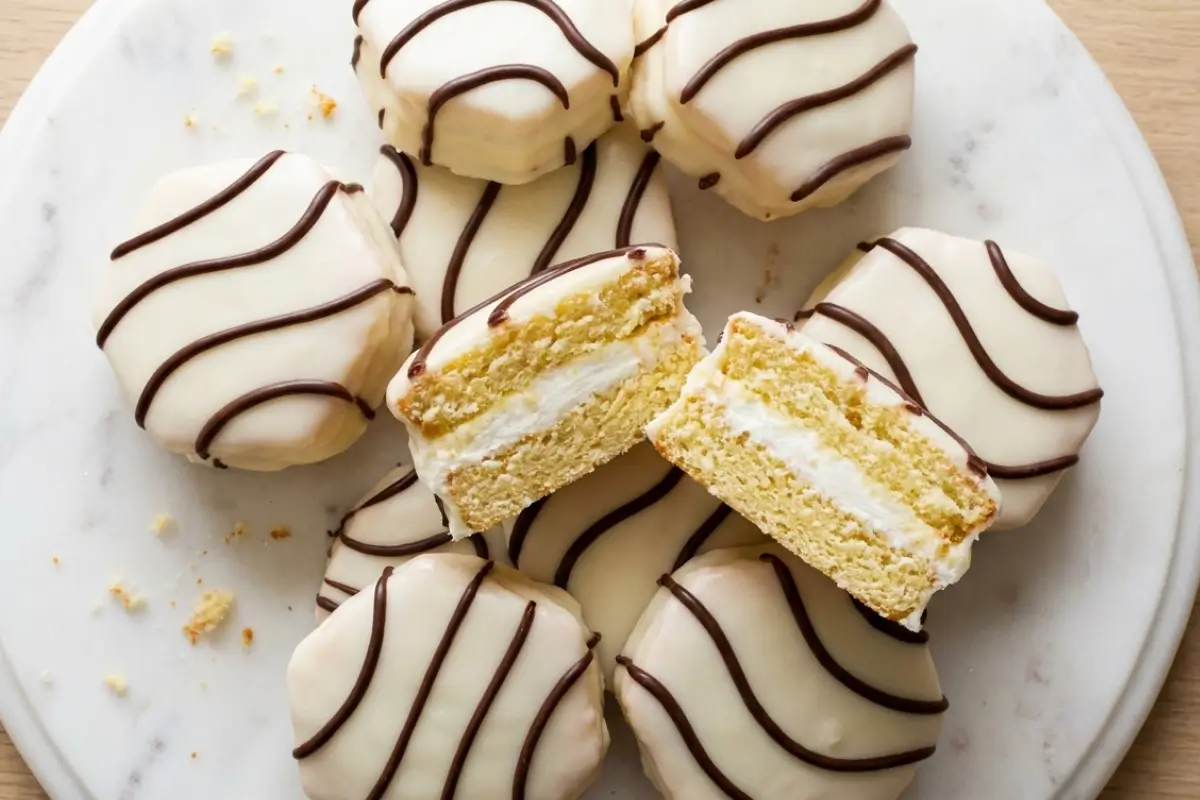
Zebra Cake was the unofficial currency of my school lunchroom, and I can still hear that cellophane crinkle. My cousin Marco would slide one across the table in exchange for a slice of Nonna's ricotta cake, and I was always certain I'd gotten the better end of the deal.
The white coating gave a tiny snap, the cake underneath was soft as a pillow, and that cream in the middle was the best part.
Nonna caught us once. She took the package from my hand, turned it over, squinted at the label, and said, "Who bakes a cake that can sit in a drawer for months?" Then she broke it in half and ate her share very slowly, with an extremely serious face.
Zebra cakes were never in Nonna's recipe box, but they earned their place at our table anyway.
If you've ever wished you could make that exact bite at home, I'm right there with you. Maybe you've tried a copycat before, and the coating turned thick and clumpy, or the filling squished out the sides, or it just didn't taste like the memory.
I've been there, and I've fixed all three. This version bakes one soft vanilla cake, fills it with a fluffy marshmallow cream that holds its shape, and finishes with a white coating that really sets. You can make them in stages, freeze them, and tuck one into a lunchbox.
Makes: 12 cakes | Total time: about 2½ hours, mostly cooling and chilling
The Key Ingredients For Homemade Zebra Cakes And Why They Matter
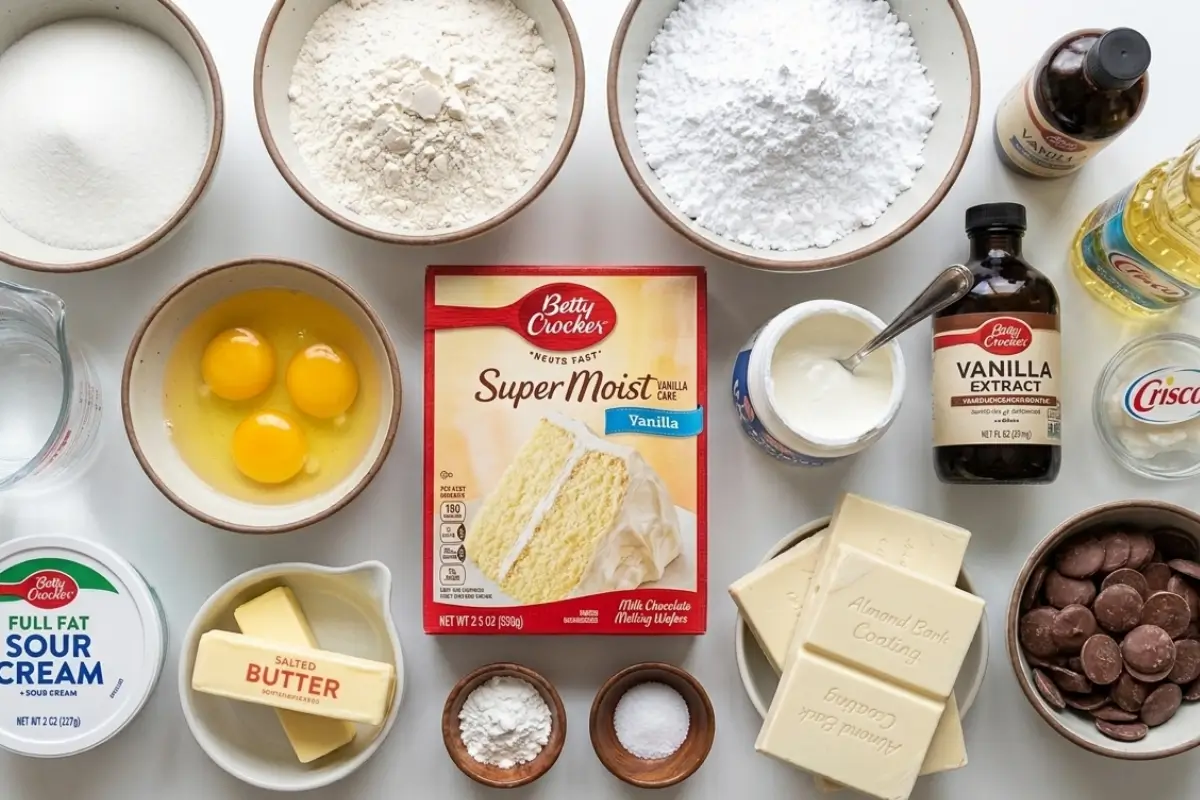
Take a breath; this list is short, and you probably already have most of it in your pantry.
For the cake:
Butter and eggs at room temperature: They blend into a smooth, fluffy batter. If it looks slightly curdled after you add the eggs, that's normal. It smooths out once you add the flour.
All-purpose flour and fresh baking powder: A quick test: stir a spoonful into hot water. If it fizzes right away, it's good to go.
Whole milk: Room temperature, so it blends in smoothly.
For the filling: softened butter, marshmallow creme (the jarred kind, not marshmallows), powdered sugar, vanilla, and a splash of cream. Marshmallow creme is the secret to a filling that stays fluffy and holds its shape in a lunchbox.
A plain whipped cream filling is lovely, but it needs to stay chilled and doesn't travel well.
For the coating: white chocolate chips, candy melts, or vanilla almond bark, plus a spoonful of vegetable shortening or refined coconut oil. Candy melts and almond bark melt most easily.
White chocolate chips work too but can be fussier. The shortening is the part everyone asks about: it thins the coating so it pours smoothly and sets with a clean finish.
For the zebra stripes: semi-sweet chocolate chips and a drop of oil.
Swaps worth knowing:
Boxed mix: one box of yellow cake mix baked in a 9×13 pan works if you're short on time.
Dairy-free: plant butter, plant milk, and a dairy-free white chocolate all work. Other bloggers have made vegan versions of zebra cakes too.
Egg-free or gluten-free: I haven't tested these yet, so I'd start with a small test batch.
You're already doing beautifully. This is the easy part.
The Golden Rule Step-by-Step Instructions
Here's the part everyone overthinks, but you won't. The Golden Rule: cold cakes, warm-not-hot coating, and drizzle while the coating is still wet. Keep that in mind, and the rest falls into place.
Make the cake
Heat the oven to 350°F (175°C). Line a 9×13-inch pan with parchment, leaving a little overhang, and lightly grease it.
Whisk 2 cups (250 g) flour, 2 teaspoons baking powder, and ½ teaspoon salt in a bowl.
Beat ½ cup (113 g) softened butter with 1 cup (200 g) sugar for 2 to 3 minutes. You'll know it's right when it looks pale and fluffy, and the sugar no longer feels gritty. Add 2 eggs, one at a time, then 2 teaspoons vanilla.
Add the flour in three parts, alternating with ¾ cup (180 ml) milk, starting and ending with flour. Stir only until no dry streaks remain. If the batter looks thick, you're still on the right track.
Spread it in the pan and tap it on the counter. Bake 20 to 24 minutes. The edges should look golden, and the center should spring back when you press it gently. A toothpick with a few moist crumbs is perfect.
Cool in the pan for 10 minutes, then lift out with the parchment and cool on a rack. Cool it fully. A warm cake melts the filling, and that's the beginning of every squished zebra cake story.
Make the filling
Beat ½ cup (113 g) softened butter for 1 minute. Add 1 cup marshmallow creme, 1½ cups (180 g) powdered sugar, 1 teaspoon vanilla, and a pinch of salt. Add 1 to 2 tablespoons cream and beat for about 2 minutes.
Look for a filling that holds a soft peak when you lift the spoon. If it's too soft, add 2 tablespoons more powdered sugar. If it's stiff, add cream a teaspoon at a time.
Cut, fill, and freeze
Trim the cake edges about ½ inch for a tidy shape. Cut into 12 rectangles, each about 2 × 4 inches. Chill the cake for 15 minutes first if it feels crumbly. Use a serrated knife to split each rectangle in half horizontally.
Spread about 2 tablespoons of filling on each bottom half, top with the other half, and press gently. Place on a parchment-lined tray and freeze 25 to 30 minutes, until firm to the touch.
Coat and Stripe
Melt 12 oz (340 g) white chocolate chips or candy melts with 1½ tablespoons shortening in the microwave at 50% power, 30 seconds at a time, stirring after each. Stop when just smooth.
Let it rest for 3 to 5 minutes. A quick test: it should fall from a spoon in a thick, slow ribbon. If yours looks too thick, stir in 1 teaspoon more shortening.
Set cakes on a rack over a sheet pan. Pour or spoon the coating over each, covering the top and sides. Work with 4 to 6 at a time and keep the rest in the freezer. Scrape up the drips and reuse them.
Melt ¼ cup semi-sweet chips with ½ teaspoon oil, spoon it into a zip bag, and snip a tiny corner.
Drizzle five or six lines across each cake right away, while the coating is still wet. Let set 15 to 20 minutes at room temperature, or 10 minutes in the fridge.
If yours looks messy at the drizzle stage, that's normal. Mine did the first time too. This is where the magic starts to happen.
Why This Zebra Cake Works
Here's the good news: every step in this recipe exists to solve a specific worry.
The coating is the 1 trouble spot, so it gets the most care. The shortening and low heat keep it smooth and pourable. That fixes the clumpy, won't-set problem.
The filling is built to hold. Marshmallow creme makes it stable, so it doesn't weep or squish out.
Everything is cold before coating. Cooling the cake fully and freezing the filled cakes keeps the cream firm while the warm coating sets. It's the same reason I'll never skip chilling a crumb coat.
The thin cake is sturdy. One 9×13 cake, trimmed and split, gives you clean layers without a delicate sponge.
The drizzle is timed on purpose. Drizzling while the coating is wet means the stripes fuse in and don't flake off.
In my family, the moment everyone waits for is the first bite through the white coating. If you love homemade treats like these, you'll also enjoy my buttercream guide for flavor ideas and my guide to leveling cake layers for even cakes. You're closer than you think.
Elena's No-Fail Tips
You won't need all of these, but it feels good to know they're here. Think of this as the part where I lean across the kitchen table and tell you what I learned the hard way.
Why is my white coating thick, clumpy, or grainy?
Almost always, it got too hot or met a drop of water. Melt it slowly at 50% power and stir often. Some bloggers stir hot water into white chocolate on purpose, and it works for them.
I choose fat instead, so there's one less thing to worry about. If it's already clumped, warm it gently for 30 seconds and stir in shortening, 1 teaspoon at a time, until it smooths out.
Why do my zebra stripes blur or look blotchy?
It's about timing and temperature. Drizzle while the coating is still wet so the stripes fuse in. Some bakers drizzle just before serving, and that works too, but those lines sit on top and can chip.
If the chocolate spreads into a blur, let it cool a minute so it's thicker. A quick test: it should fall from the spoon in a thin but steady line.
Can I use a boxed cake mix?
Yes. Bake one box of yellow cake mix in a 9×13 pan following the package, then cool it fully and continue from step 8. Boxed cakes sometimes bake taller, so trim any dome before splitting.
Why does my filling squish out when I coat the cakes?
Usually the cake was still warm, or the filled cakes skipped the freezer. A firm, cold cake can take a warm coating without budging. If you notice a little cream peeking out, scrape it away with a butter knife and coat again.
I ruined a batch twice before I figured out the freezer step. Now it's the first thing I tell anyone. You're doing beautifully.
Nostalgic Homemade Zebra Cakes
Ingredients
- 1/2 cup softened butter for the cake
- 1 cup sugar for the cake
- 2 room temperature eggs for the cake
- 2 teaspoons vanilla for the cake
- 2 cups all-purpose flour for the cake
- 2 teaspoons baking powder for the cake
- 1/2 teaspoon salt for the cake
- 3/4 cup room temperature whole milk for the cake
- 1/2 cup softened butter for the filling
- 1 cup marshmallow creme for the filling
- 1 1/2 cups powdered sugar for the filling
- 1 teaspoon vanilla for the filling
- 1 pinch salt for the filling
- 1 to 2 tablespoons cream for the filling
- 12 ounces white chocolate chips, candy melts, or vanilla almond bark for the coating
- 1 1/2 tablespoons vegetable shortening or refined coconut oil for the coating
- 1/4 cup semi-sweet chocolate chips for the stripes
- 1/2 teaspoon oil for the stripes
Instructions
- Heat your oven to 350 degrees. Line a 9 by 13 inch pan with parchment paper, leaving a little overhang, and lightly grease it.
- Whisk your flour, baking powder, and salt together in a bowl.
- Beat your softened butter with the sugar for 2 to 3 minutes. You will know it is right when it looks pale and fluffy and the sugar no longer feels gritty. Add the eggs, one at a time, and then stir in the vanilla.
- Add the flour in three parts, alternating with the milk, starting and ending with the flour. Stir only until no dry streaks remain.
- Spread the batter in the pan, give it a gentle tap on the counter, and bake for 20 to 24 minutes. The edges should look golden, and the center should spring back when you press it gently.
- Let the cake cool in the pan for 10 minutes, then lift it out using the parchment paper to cool completely on a wire rack. Let it cool fully, because a warm cake will melt our lovely filling.
- Make the filling by beating the softened butter for 1 minute. Add the marshmallow creme, powdered sugar, vanilla, and salt. Add a tablespoon of cream and beat for about 2 minutes until it holds a soft peak.
- Trim the cake edges about half an inch for a tidy shape, then cut the cake into 12 rectangles. Carefully use a serrated knife to split each rectangle in half horizontally.
- Spread about 2 tablespoons of your filling on each bottom half, place the top half on, and press gently. Place these on a parchment-lined tray and freeze for 25 to 30 minutes until they feel firm to the touch.
- Melt your white chocolate or candy melts with the shortening in the microwave at half power, 30 seconds at a time, stirring after each until smooth. Let it rest for a few minutes.
- Set your cold cakes on a rack over a baking sheet. Pour the warm coating over each cake, covering the top and sides.
- Melt your semi-sweet chocolate chips with a drop of oil, spoon it into a zip bag, and snip a tiny corner. Drizzle five or six lines across each cake right away, while the white coating is still wet. Let them set at room temperature.
Video
Notes
Saving a Little Joy for Tomorrow
Busy week ahead? This recipe loves to be made in stages.
Room temperature: store in an airtight container for up to 2 days.
Fridge: up to 5 days. Let the container come to room temperature before opening so the coating doesn't sweat.
Freezer: once the coating has fully hardened, freeze on a tray for 1 hour, then layer in an airtight container with parchment between. They keep up to 3 months. Thaw 30 to 45 minutes in the sealed container.
Lunchbox trick: tuck one in frozen. By lunchtime it's soft and ready.
Make-ahead plan: bake the cake the day before, fill and freeze the next morning, coat that afternoon. Homemade versions don't have the preservatives of store-bought ones, so they're best enjoyed within the windows above.
This is what I make for slow Sunday afternoons. You're well on your way.
Making Sweet Memories
I think about that lunchroom trade often: Marco, the crinkling cellophane, and Nonna's very serious face as she shared the cake she'd just scolded.
Zebra cakes were never in her recipe box, but they were part of how we loved each other, one trade at a time.
I hope these bring a smile to your kitchen and someone's lunchbox. If the first batch is a little messy, that's part of the joy.
At Add Cakes, we believe in memories, not masterpieces.