
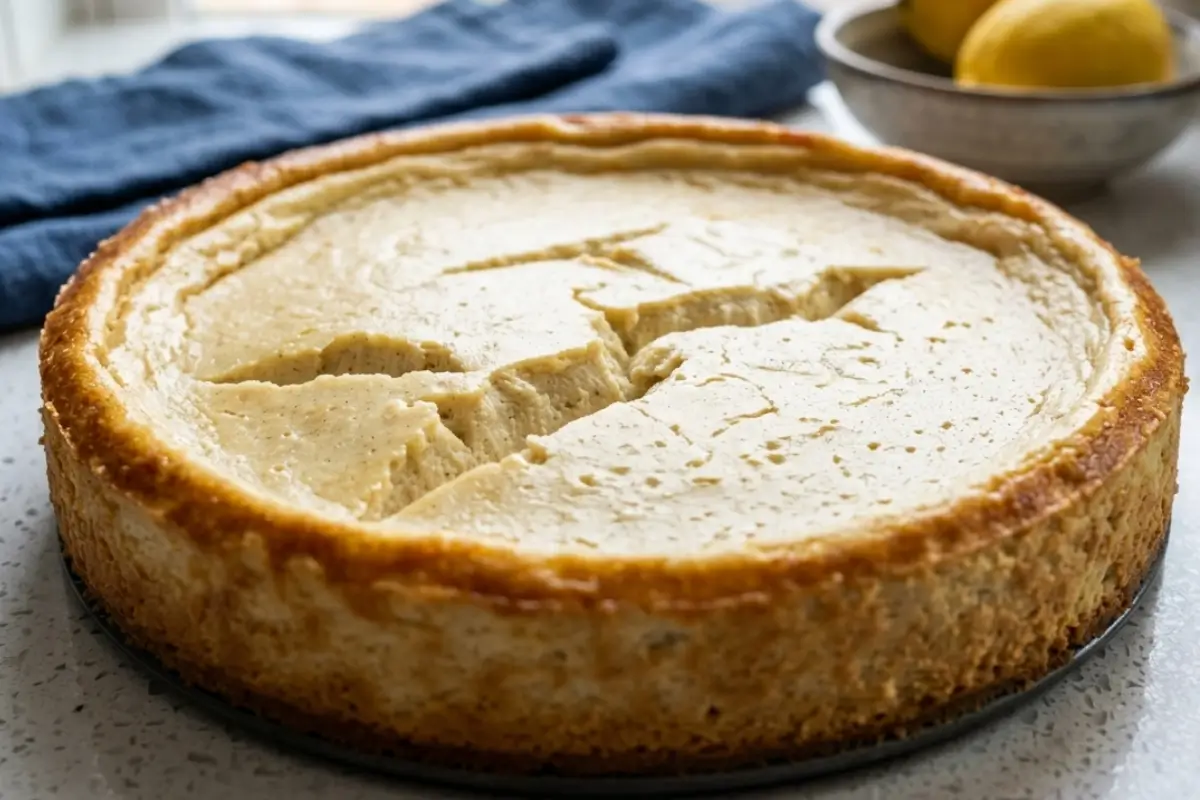
How to Prevent Cheesecake Cracks is something I learned the hard way, and I still remember that morning like it was yesterday.
I had spent the entire evening before making a baked New York cheesecake for my mother's birthday. The kitchen smelled of warm vanilla and melted butter.
The top came out of the oven looking like something you'd see in a bakery window smooth, golden-edged, and perfect. I was so proud of myself I almost didn't want to cover it. I wrapped it carefully and set it in the fridge to chill overnight.
Then I opened the refrigerator door the next morning.
There it was. A crack running straight down the center, deep enough to make my heart sink to the floor. I had done everything right, or so I thought. And yet, there it sat, broken.
If you've ever whispered "no, no, no" at a fridge the morning after a bake, this guide is for you. I know that feeling. The effort, the anticipation, and then that quiet little devastation.
What I've learned since that morning is that cheesecake cracks for very specific, very fixable reasons, and once you understand what they are, you'll never feel helpless again.
I'm going to walk you through the five reasons cheesecake cracks, then show you exactly how to stop each one. And if the crack has already happened? We'll fix that too. You're not starting from zero. You're just one guide away from never having this problem again.
Why Does Cheesecake Crack? Meet the Five Villains
This part is actually good news because once you can name what went wrong, you can stop it from happening. There are five specific culprits behind a cracked cheesecake. Let's meet each one.
Villain Overbaking
This is the number one cause of cheesecake cracks, across every recipe, every oven, and every home kitchen. And it makes sense once you understand what's happening inside the batter.
Cheesecake sets through eggs. As the cheesecake bakes, the protein in those eggs creates a gentle, soft network that holds everything together creamy, silky, and tender.
But push that baking a minute or two too long, and those proteins tighten. They become stiff. The soft network turns rigid, and as the cheesecake cools and naturally contracts, that stiff surface cracks under the pressure.
How to stop it: Pull your cheesecake before it looks done. That sounds terrifying, I know, but here's the cue you're looking for. Gently nudge the oven rack. The outer two inches of your cheesecake should be set and barely move. The center three inches should have a gentle, slow wobble like Jell-O, not soup. That's your done cheesecake.
If you have an instant-read thermometer (and I highly recommend one), the center of the cheesecake should read between 150°F and 155°F. The edge can be slightly higher, up to 165°F, but the moment anything reaches 185°F, you are in crack territory.
You'll know it's right when the center still looks a little underdone, and the edges look just set. Trust the wobble. It will firm up beautifully as it cools.
Here's the trick I learned the hard way: I always thought "done" meant "set." It doesn't. A cheesecake's center should still tremble when it leaves the oven that gentle shimmer is not undercooked- it's exactly right.
Villain Overmixing
Here's one that surprises most people. Your electric mixer, the very tool you trusted, can be the villain.
When you beat cheesecake batter too quickly or for too long, you fold air into the filling. That air causes the cheesecake to puff and rise in the oven. And then, as it cools, that air escapes. The surface drops. And where it drops unevenly, it cracks.
How to stop it: Use a low or medium-low speed on your mixer. Stop the moment the batter looks smooth. This is not a cake batter you are not trying to make it light and fluffy.
Dense and smooth is the goal. When you add your eggs, add them one at a time, and mix only until the yellow disappears. The moment your batter looks silky and combined, step away from the mixer.
You'll know you're there when the batter pours slowly off the spatula in a thick, even ribbon no bubbles, no foam.
If you've already mixed and you're worried you went too long, breathe. Let the batter rest for 10 minutes before pouring it into the pan. Some of those air bubbles will naturally rise and release on their own.
Villain: Your Oven Runs Hotter Than You Think
Your oven is lying to you. This is not dramatic it is extremely common, and it's one of the most overlooked reasons cheesecakes crack.
Built-in oven thermostats are often inaccurate. They can run 25°F to 50°F hotter than the dial says. For most baking, this is a minor inconvenience. For cheesecake, where the difference between creamy and cracked is a narrow 10-degree window, it can ruin the whole thing.
How to stop it: Buy an inexpensive oven thermometer and hang it on the center rack. Set your oven to 325°F and verify what it actually reads. Bake your cheesecake in the lower third of the oven, not the center rack.
This gives the top a little breathing room and prevents it from browning or drying before the rest of the cake is done. If you're using a dark-colored springform pan, consider swapping to a light-colored one dark pans absorb heat faster and can overbake the edges before you realize it.
Most people miss this step, but it makes all the difference.
Villain: The Sticky Edge
This one is sneaky. Your cheesecake can survive the bake perfectly and still crack on the way out of the oven because of what happens during cooling.
As a cheesecake cools, it naturally contracts and pulls inward. If any part of the filling is still stuck to the side of the pan, that contraction has nowhere to go, and it tears the surface instead. A crack appears not because of overbaking, but because of sticking.
How to stop it: Grease the inside wall of your springform pan well before you add the filling, even if the recipe doesn't say to. The moment your cheesecake comes out of the oven, run a thin knife or a small offset spatula slowly around the edge of the pan. You'll feel and hear a soft release as you go. That small action gives the cheesecake room to breathe as it shrinks.
You'll hear a soft "give" as the knife moves, and that sound is genuinely satisfying.
Villain Cooling Shock
You've baked it beautifully. You've released the edges. And then you open the fridge after thirty minutes and crack. This is thermal shock.
A cheesecake that goes from a warm oven to a cold refrigerator too quickly experiences a sudden, dramatic temperature change. The surface contracts fast while the interior is still warm. It splits.
How to stop it: Follow this three-stage cooling protocol:
Stage 1 Oven rest: When your cheesecake is done, turn off the oven. Prop the door open about two inches with a wooden spoon. Leave the cheesecake inside for one hour. The oven cools slowly around it. No shock.
Stage 2 Counter rest: Move it to the counter and let it come to room temperature for roughly another hour. It should be barely warm to the touch before the fridge.
Stage 3 Refrigerator: Then, and only then, cover it loosely and refrigerate. A minimum of four hours. Overnight is better, and the texture will thank you.
This cooling sequence is also the reason my water bath guide includes a separate section on cooling the two together, and if you're doing both, your cheesecake top has every advantage.
The One Tool That Changes Everything: The Water Bath
Take a breath; this part is simpler than it looks.
A water bath (sometimes called a bain-marie) is the single most effective thing you can do to prevent cheesecake cracks. It surrounds your cheesecake with gentle, moist, even heat.
In a dry oven, the edges of your cheesecake cook faster than the center, and uneven baking is a direct line to cracking. The water bath slows everything down and keeps the air around your cheesecake humid and forgiving.
Think of it as wrapping your cheesecake in a warm hug while it bakes.
The setup:
Wrap the outside of your springform pan in a double layer of heavy-duty aluminum foil up the sides and over the rim. This keeps water out.
Place the wrapped pan inside a large roasting pan (or any high-sided baking dish).
Pour boiling water into the roasting pan until it reaches about one inch up the side of the springform.
Carefully transfer to the oven and bake as usual.
Here's the one extra step I always add: I double-wrap the foil and then place the whole wrapped pan inside a large oven roasting bag before putting it in the water bath. It's the belt-and-suspenders approach, and it has never let me down.
The most common water bath fears answered:
"What if water leaks in?" → Double foil prevents this. If you're genuinely worried, the roasting bag method is completely leak-proof.
"I don't have a roasting pan." → Any large baking dish works. The goal is just to have water around the outside.
"Can I just put a pan of water on the rack below instead?" → Yes, and it helps. But the full bath is more effective—the water directly touching the pan distributes heat far more gently.
The steam rising from the water is doing something almost magical, keeping the air around your cheesecake soft and tender, the way Nonna's kitchen always felt when something slow was baking on a winter afternoon.
The Golden Rules Your Step-by-Step Crack Prevention Protocol
Here's the part everyone overthinks, but you won't. Here is the complete sequence, start to finish, built from everything we've covered:
Bring all ingredients to room temperature: Cream cheese, eggs, sour cream all of it. Cold cream cheese creates lumps that require more mixing, which creates more air. Give yourself at least an hour on the counter.
Mix at low speed: Start your cream cheese and sugar on low. Stay on low when you add eggs one at a time and sour cream. Stop the moment everything is smooth.
Set up your water bath: Double-wrap your pan in foil, place it in a roasting pan, and have boiling water ready.
Position on the lower third rack: Not the center lower third. This protects the top.
Bake at 325°F: Confirm this with your oven thermometer before you start.
Watch for the wobble, not the timer: Start checking about 10 minutes before the recipe's suggested time. You're looking for set edges and a jiggly center.
Turn the oven off: Leave the cheesecake inside. Crack the door. Wait one hour.
Move to the counter: Rest for one hour.
Run the knife around the edge: Gently, slowly.
Cover and refrigerate: Four hours minimum. Overnight is beautiful.
If yours looks soft and wobbly in the center, right now, perfect. You are doing everything right.
Elena's No-Fail Tips
You're doing so well keep going. These are the questions I get most often, and they deserve real answers.
Can I make cheesecake without sour cream or heavy cream?
You can, but your crack risk goes up. Sour cream and heavy cream do two things: they add fat that makes the batter richer and more forgiving, and they add moisture that buffers the egg proteins from seizing up during baking.
A cheesecake made from cream cheese and eggs alone is drier and more prone to cracking as it cools. If you need a dairy-free option, full-fat coconut cream works well. Plain, full-fat Greek yogurt is also a wonderful substitute for sour cream same tang, same moisture benefit.
Does a water bath really make that much of a difference?
Honestly? Yes. King Arthur Baking tested multiple methods side by side no bath, steam pan only, and full water bath and rated the full bath a clear winner. The steam pan helps, and it's worth doing if a full bath isn't possible.
But if you want the smoothest top and the creamiest texture, the full water bath is the answer.
What if my cheesecake cracked even though I did everything right?
It happens. Ovens vary. Humidity varies. Pan materials vary. A small crack on an otherwise perfect cheesecake does not mean you failed it means you're baking something genuinely sensitive, and you were brave enough to try.
Check your oven thermometer next time, and consider whether the cooling was fast enough. But mostly? See the next section. We've got you.
My cheesecake looked perfect when it came out will it crack in the fridge?
It can, if it goes in too warm. This is the thermal shock villain from our Five Villains section. Follow the three-stage cooling protocol, and you're protected.
How to Prevent Cheesecake Cracks
This section exists because sometimes, despite everything, the crack finds you anyway. And when it does, I want you to know before anything else that a cracked cheesecake still tastes magnificent. The crack is on the surface. The joy is in the whole thing.
Here are four genuine fixes, not cover-ups:
1. The Sour Cream Glaze
Mix ¾ cup of sour cream with 1-2 tablespoons of powdered sugar and a half teaspoon of vanilla. Spread it gently over the top of the chilled cheesecake using an offset spatula, as if you're frosting it.
Refrigerate for 30 minutes. The glaze sets beautifully and completely hides any crack, and here's the secret: New York cheesecakes traditionally have exactly this topping. You haven't hidden the crack; you've added the finishing touch.
2. Berry Compote or Fresh Fruit:
A warm berry compote spooned over the top turns any crack into a rustic, abundant dessert moment. Nobody looks for a crack under a pile of glistening strawberries.
3. Whipped Cream Dollops:
Pipe or spoon whipped cream along the crack in a casual, generous swirl. Charming. Effortless.
4. The Warm Finger Press (for small cracks, just out of the oven).
If the cheesecake is still warm and you notice a hairline crack beginning to form, gently press along the crack with a clean fingertip. The warmth of the batter can seal very small cracks before they set.
This is not a fix for deep fractures, but for a tiny line forming at the surface, it works beautifully. Nonna would have looked at a cracked cheesecake, added a spoonful of jam, and called it character. She was not wrong.
A cracked cheesecake at the table is still the most loved thing in the room. I promise.
Saving a Little Joy for Tomorrow
The good news? Cheesecake is one of the best make-ahead desserts there is.
Refrigerating: Once fully chilled (at least four hours, ideally overnight), cover your cheesecake with a dome lid or loosely tent with plastic wrap so you can protect it without pressing anything against the surface. It keeps beautifully in the fridge for up to five days.
Serving from the fridge: Pull your cheesecake out of the refrigerator 10-15 minutes before serving. Room temperature brings out the creaminess and softens that dense, cold texture into something more luxurious.
Freezing: Yes, cheesecake freezes wonderfully. Chill it completely first, then wrap the whole cheesecake (or individual slices) tightly in plastic wrap, then a layer of foil.
Freeze for up to two months. To thaw, transfer to the fridge overnight, never on the counter, which can cause the surface to sweat and crack.
You'll know it's ready to serve when the edges are just slightly giving to the touch and the very center feels cool but not stone-cold.
This is what I make when I want something that feels truly special but comes together with patience rather than fuss. It's perfect for slow Sundays when you want tomorrow's dessert to be ready before you go to sleep.
Making Sweet Memories
How to prevent cheesecake cracks brought me here to that cracked birthday cheesecake I made for my mother all those years ago.
I carried it to the table anyway. My mother didn't notice the crack, or if she did, she never said so. She just took a bite, closed her eyes, and said it was the best one I'd ever made. The crack was mine to carry. The joy belonged to everyone.
That's the thing about baking the imperfections are almost always invisible to the people you love most. They see the effort, the care, the warm kitchen, and the fact that you made something from scratch for them. A smooth top is wonderful. But it's a bonus, not the point.
Now that you know the five villains by name and you have the wobble test, the water bath, and the three-stage cooling protocol, you have everything you need for a perfect top.
But even if a crack sneaks through, you have the fixes. And you have the reminder that the table is what matters, not the surface.
At AddCakes, we believe in memories, not masterpieces. Simply add cake for joy.
Have you conquered the crack? Tell me in the comments I want to hear your story and celebrate with you.