
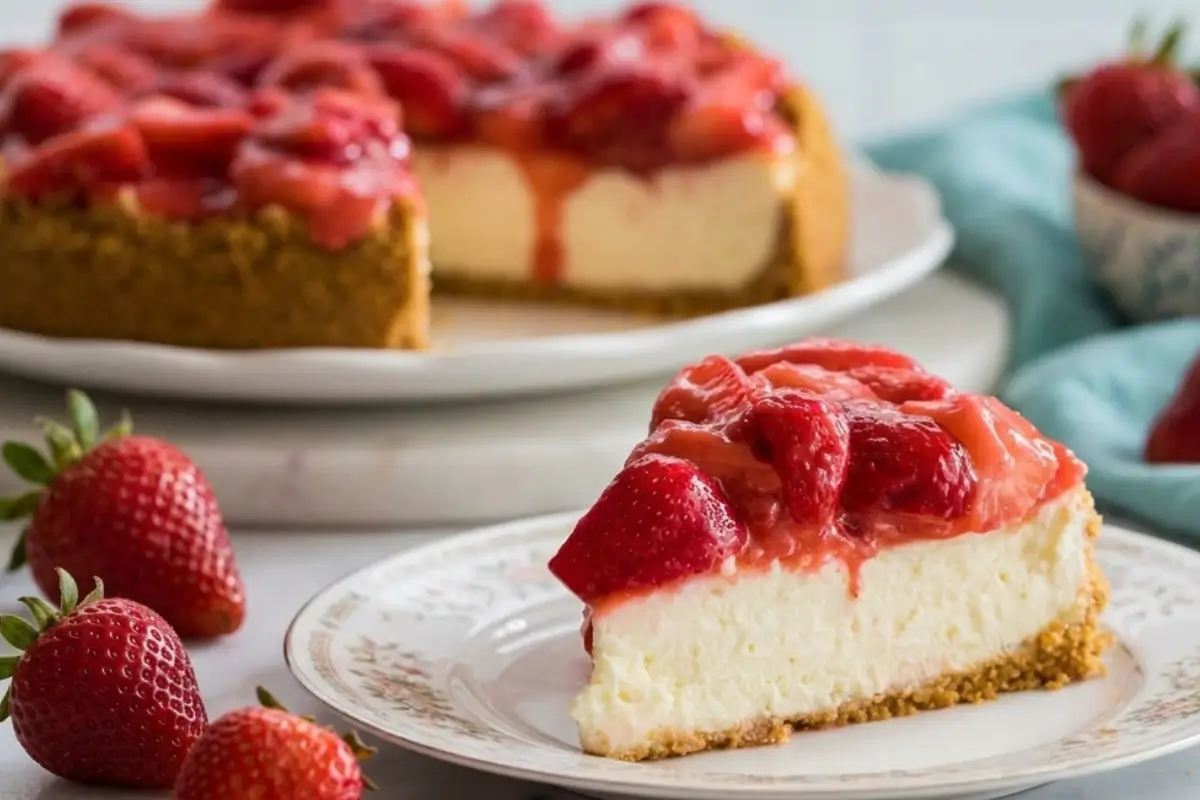
No-bake strawberry cheesecake recipe those five words have followed me into every summer for as long as I can remember.
I can see it so clearly: Nonna at the kitchen table, a colander of sun-warmed strawberries between us, her hands moving with that calm certainty that only decades in a kitchen can give you.
She never turned on the oven for this one. She said the strawberries were already doing the work. All the cream cheese needed was a good chill and a little patience.
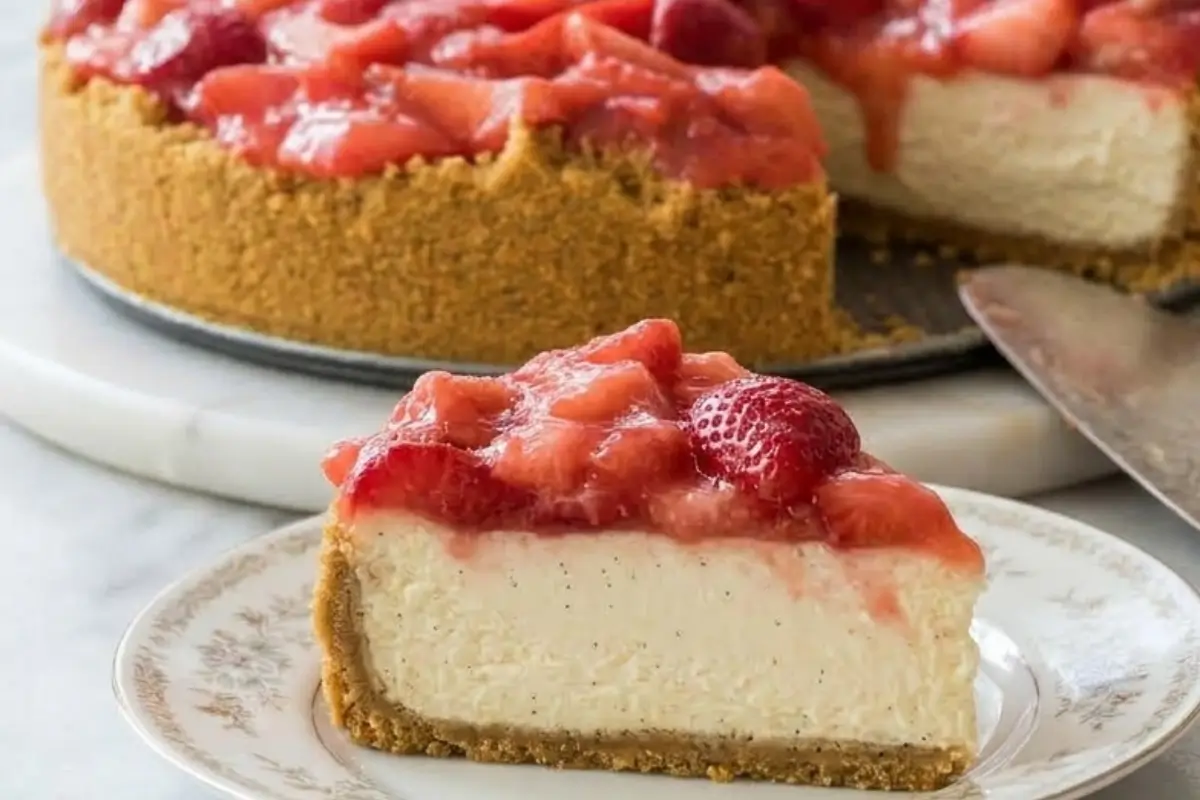
What she was making was simple cream cheese, whipped cream, and a buttery graham cracker crust, but the result was something cool and silky and just sweet enough, crowned with berries that gleamed like they'd been polished. I remember thinking, how can something this beautiful be this easy?
If you've ever asked yourself the same thing, you're in exactly the right place. And if you've ever made a no-bake cheesecake that refused to set, or turned out too soft to slice, or wept strawberry liquid all over the plate, that's also exactly why you're here, and I promise we're going to fix that together.
This guide isn't just a recipe. It's a lesson in reading your cheesecake: knowing what it looks like when it's ready, what it feels like when the crust is right, and what signs to watch for so you never pull a collapsed dessert out of the refrigerator again. Nonna didn't follow timers blindly. She watched and tasted and trusted what she saw.
By the end, you will too.
The Key Ingredients for a No-Bake Strawberry Cheesecake Recipe
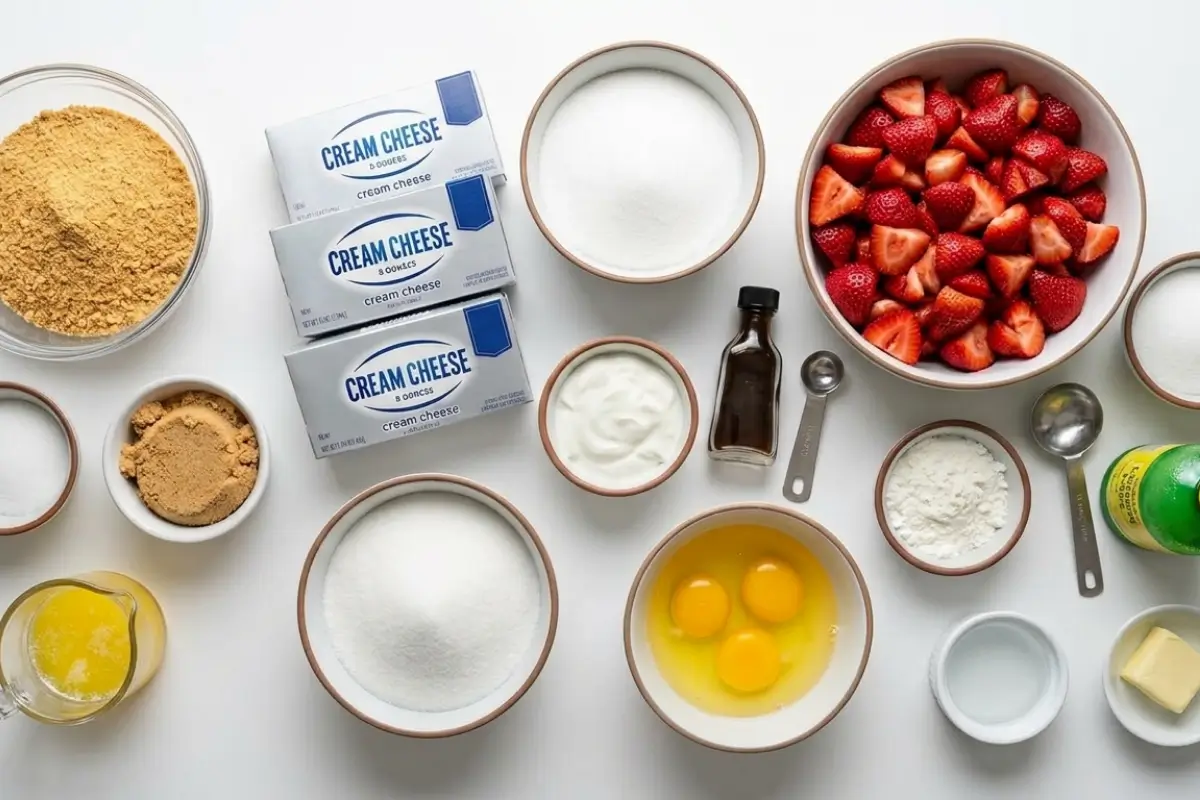
This part is simpler than it looks, but understanding why each ingredient is here will be what saves you from the most common mistakes.
Full-fat cream cheese (3 blocks, 8 oz each, room temperature)
This is the backbone of the entire cheesecake. Full-fat cream cheese gives you the right structure that lets the filling hold its shape without an oven.
Here's what trips most people up: temperature matters more than anything else. Cold cream cheese will never fully smooth out, no matter how long you beat it; it stays lumpy and dense, and then the whole cheesecake sets unevenly.
I learned this the embarrassing way at a family dinner. Take your cream cheese out of the refrigerator at least an hour before you begin.
Heavy whipping cream (1 cup, very cold)
The cold whipping cream is your structural partner, whipped to stiff peaks, it's the air-trapping element that gives the filling its cloud-like body.
Use it cold; warm cream won't whip into peaks, and without those peaks, the filling won't hold. Keep it in the refrigerator until the exact moment you need it.
Fresh strawberries (for filling and topping)
Let me clear something up, because I see conflicting advice everywhere: for the filling, fresh strawberries give you the cleanest flavor and the best texture.
Frozen strawberries release significantly more liquid when thawed, and that excess moisture is the leading reason no-bake cheesecakes turn out soft and won't set.
If fresh strawberries aren't available and you must use frozen, thaw them completely in a colander, then press them between paper towels until they are as dry as you can make them. The drier the berry, the better the set.
For the topping, a quick-cooked strawberry sauce with a little cornstarch handles the fruit's natural juiciness beautifully, and it's where you can use frozen with more confidence.
Graham crackers (about 2 cups crumbs) + unsalted butter (6 tablespoons, melted)
The crust is the foundation, and a crumbly crust is a heartbreak. The right ratio looks like wet sand, not dusty, not soggy. If you press a handful together and it holds its shape, you're there. If it crumbles apart, add a little more melted butter, one teaspoon at a time.
Powdered sugar (¾ cup for filling)
Powdered sugar dissolves into the cream cheese without any grittiness. Granulated sugar will leave a slightly sandy texture no matter how long you beat it. Powdered sugar is worth the small extra step of measuring.
Cornstarch (1 teaspoon + 1 tablespoon for topping)
A tiny amount tossed with the strawberry topping before cooking prevents the fruit from weeping into the cheesecake and creating that pooled liquid that so many people complain about.
It also gives the sauce that glossy, bakery-style finish that makes this dessert look like it came from somewhere impressive.
Vanilla extract (1 teaspoon)
Pure vanilla rounds out the tang of the cream cheese. Don't skip it.
Gluten-free? Swap the graham crackers for any certified gluten-free graham-style cracker, and the rest of the recipe is naturally gluten-free.
How to Make No-Bake Strawberry Cheesecake Recipe Step by Step
Take a breath. You're already doing great just by understanding your ingredients. Now here's where the magic starts to happen.
Step 1: Make the crust:
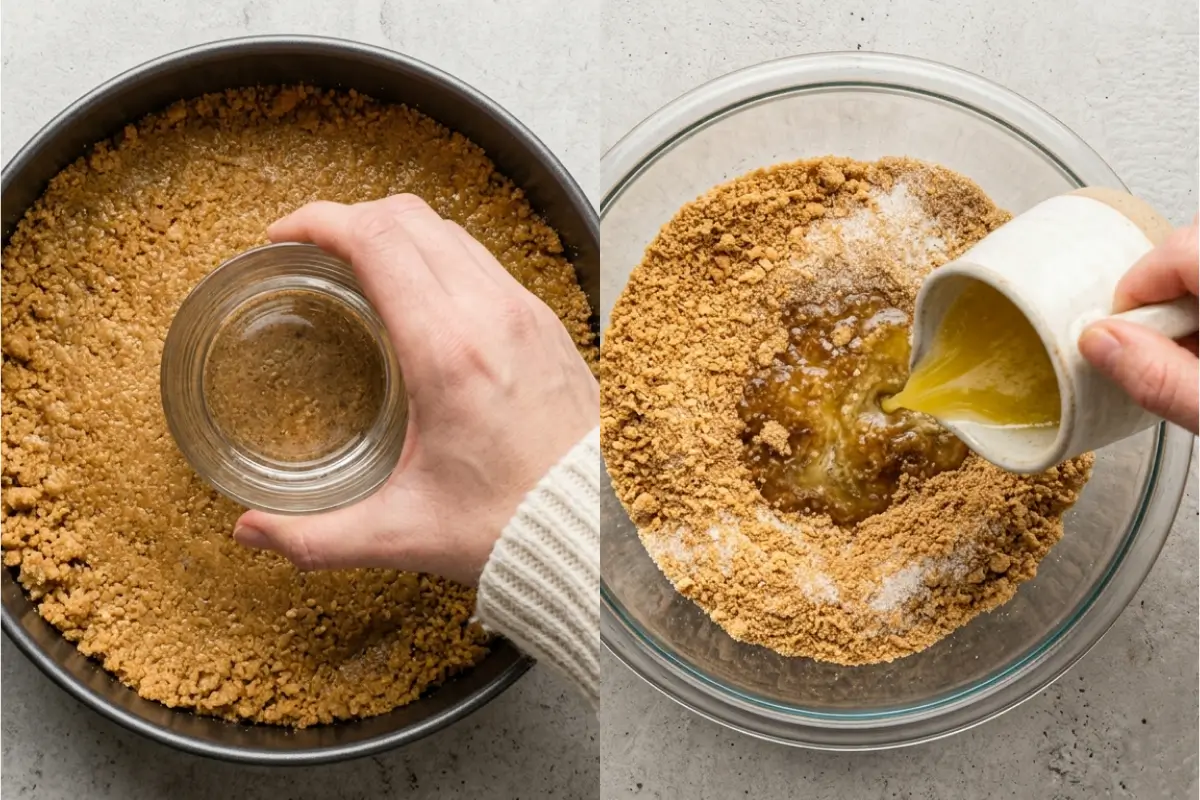
Crush your graham crackers to fine crumbs. A food processor gives the most even crumb, but a zip-lock bag and a rolling pin work beautifully there's something satisfying about the sound of it.
Mix the crumbs with melted butter until every crumb is coated and the mixture looks like wet sand. Press it firmly into the bottom of a 9-inch springform pan using the flat base of a measuring cup. Press it up about an inch on the sides too.
If yours looks too crumbly and won't press together, add melted butter one teaspoon at a time until it holds. Pop the crust into the refrigerator while you make the filling it needs that head start.
Step 2: Beat the cream cheese:
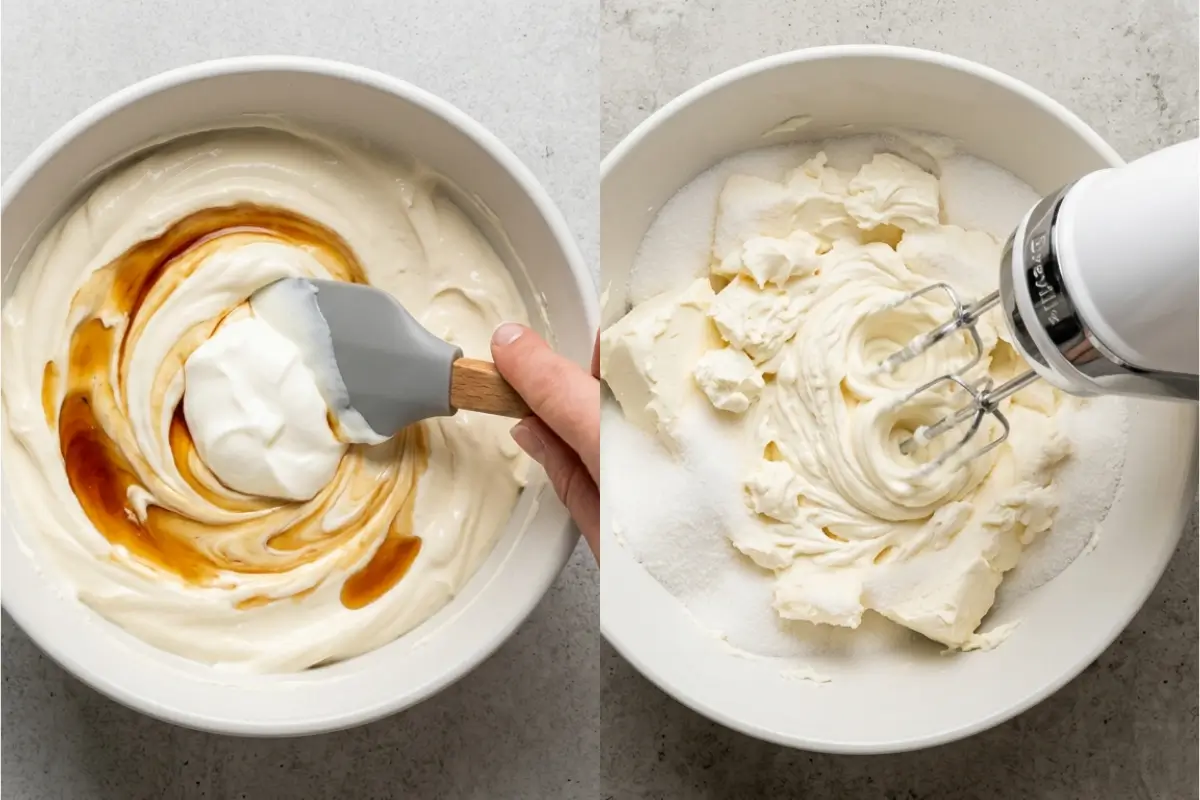
Add your room-temperature cream cheese to a large bowl and beat it on medium speed, alone, for about 2 minutes before adding anything else. You want it smooth and slightly fluffy before the sugar goes in. Add the powdered sugar and vanilla and beat until smooth and lump-free.
If you see lumps that won't beat out, stop. The cream cheese is still too cold. Leave it for 15 minutes and try again. Forcing cold cream cheese will never give you a silky filling.
Step 3: Make the strawberry sauce:
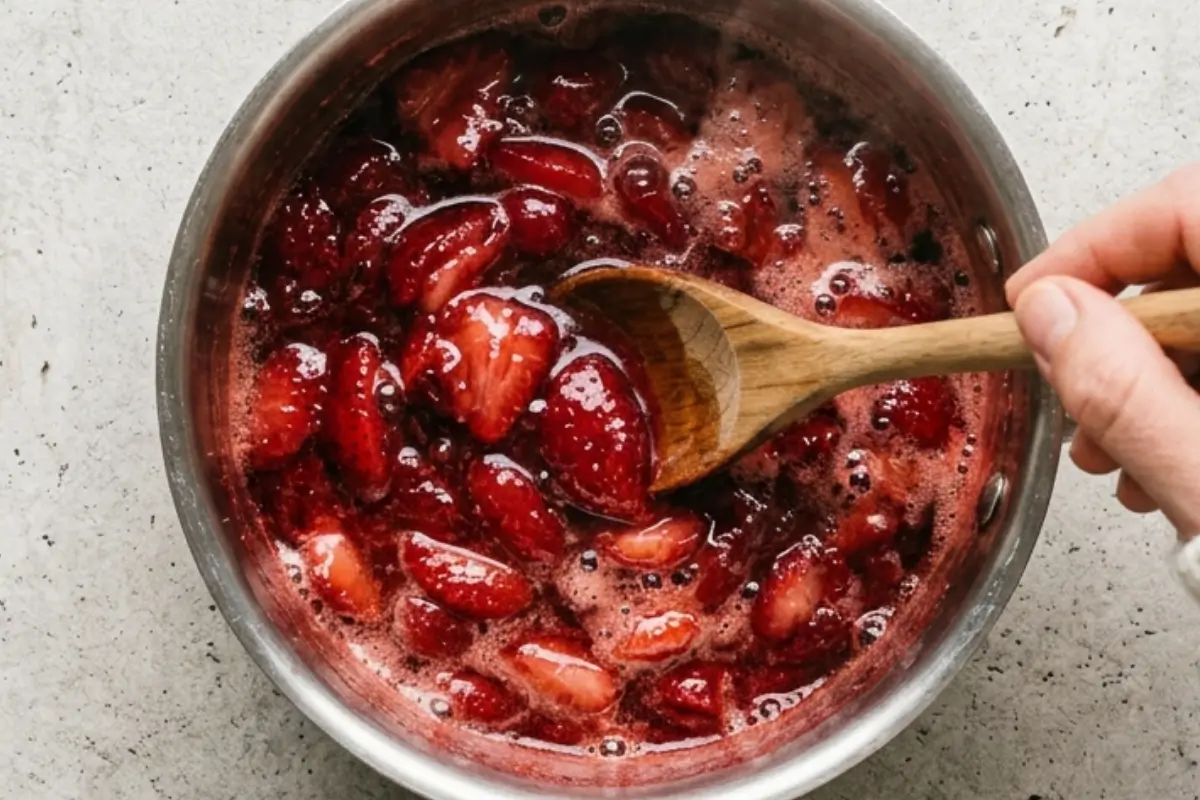
Hull and roughly chop about 1 cup of fresh strawberries. Add them to a small saucepan with 3 tablespoons of granulated sugar and 1 tablespoon of cornstarch.
Cook over medium heat, stirring gently, until the berries release their juices and the sauce thickens enough to coat the back of a spoon, about 8–10 minutes. It will smell like summer in a saucepan. Set aside to cool to room temperature before using.
This step is critical: the sauce must be fully cool, not warm, cool before you add it to the filling. Hot liquid poured into whipped cream breaks the structure, and you'll end up with soup. I speak from experience.
Step 4: Whip the cream:
Pour your cold heavy cream into a clean, chilled bowl. Whip on medium-high speed until you reach stiff peaks; the cream should hold its shape and not slump back when you lift the beater.
You'll know it's right when peaks stand up firmly, and the cream has that thick, cloud-like quality. If it starts to look grainy or butter-yellow, you've gone too far stop immediately.
Step 5: Fold the filling together:
Pour the cooled strawberry sauce into the cream cheese mixture and stir until combined. Then add the whipped cream.
Here's where patience matters: use a rubber spatula and fold gently, not a mixer. Sweeping movements from the bottom up, turning the bowl as you go. You want to keep as much air in the cream as possible.
This is the step most people rush, and it's the one that makes the difference between a fluffy, light filling and a dense, heavy one.
If it looks a little streaky as you fold, that's completely normal keep going until it's just combined and evenly pink.
Step 6: Pour, smooth, and chill:
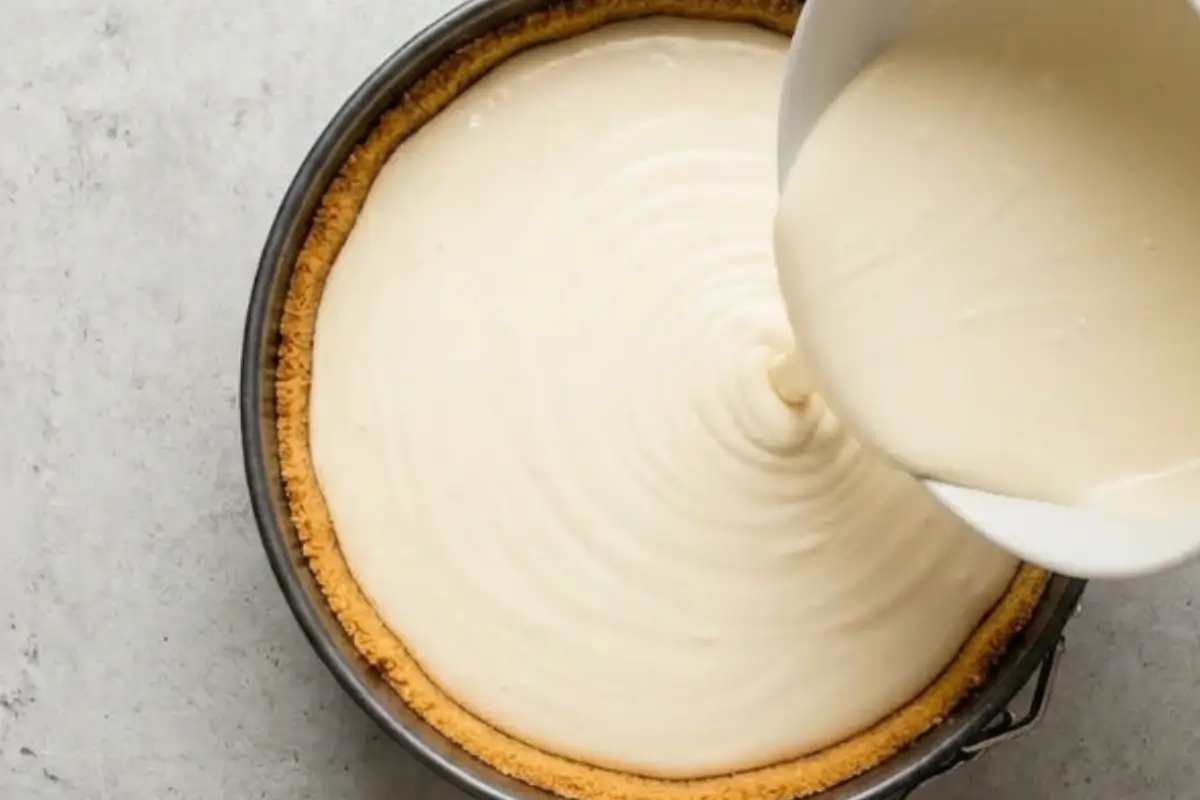
Spread the filling evenly over the chilled crust. Use an offset spatula to smooth the top. Cover the pan with plastic wrap, not pressed onto the surface, just draped loosely over the top, and refrigerate for at least 6 hours. Overnight is better.
Here's how to tell if your cheesecake is set: after 6 hours, take it out and give the pan a very gentle shake. The edges should be firm. Only the very center should have a faint, slow wobble like a barely set panna cotta.
If the whole surface moves like liquid, it needs more time. Back in the refrigerator for another 2 hours.
This wobble test is the most reliable signal for no-bake cheesecake doneness, more reliable than any timer.
Step 7: Add the fresh strawberry topping just before serving.
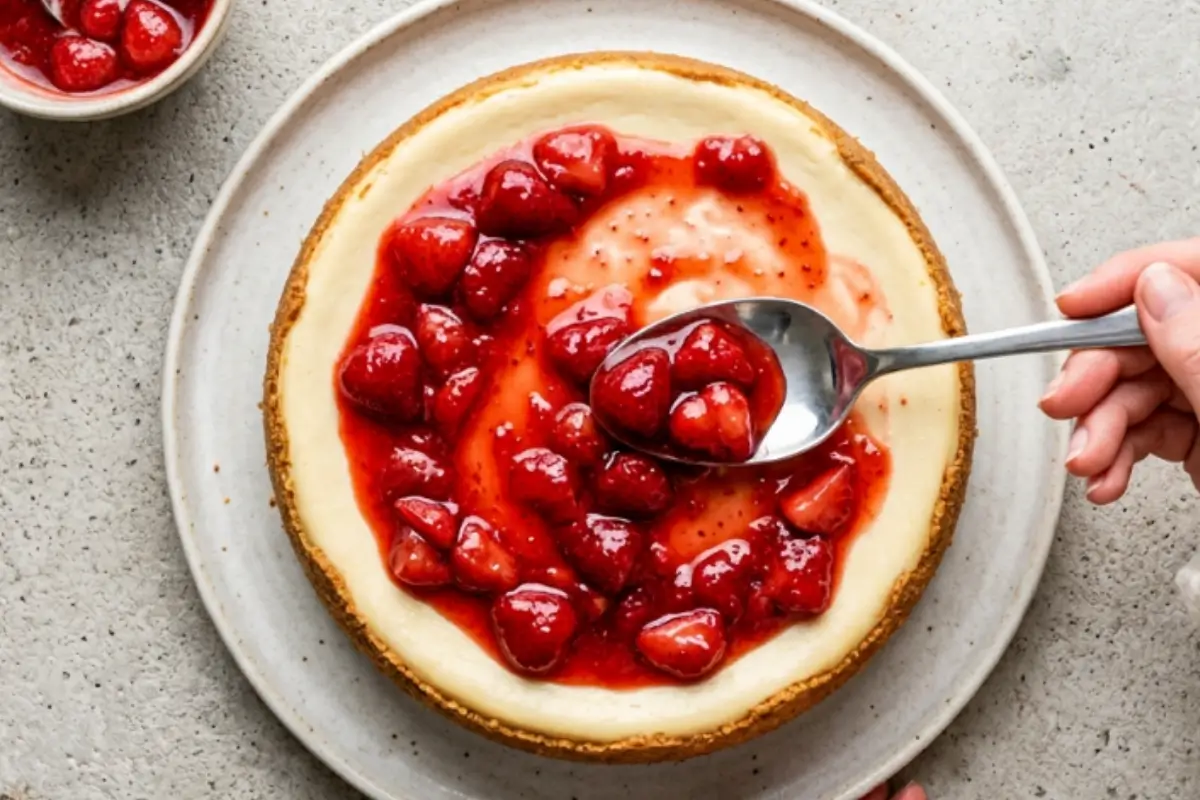
Slice the remaining fresh strawberries and toss them gently with 1 teaspoon of sugar and 1 teaspoon of cornstarch. Arrange them over the top of the set cheesecake. The cornstarch coat prevents weeping, so your topping holds its gloss and color right through dessert.
Release the springform pan sides gently, transfer to a serving plate, and serve.
Why This Recipe Works: Understanding Your Cheesecake
Here's the part everyone overthinks but you won't. Because now you understand why.
Room temperature cream cheese is the single most important technique note in this recipe. Temperature, not technique, is the reason most no-bake cheesecake fillings turn out lumpy or dense.
A fully softened block beats to a smooth, spreadable consistency that blends seamlessly with whipped cream. Cold cream cheese fights you every step.
Stiff-peak whipped cream is the structural framework of the entire filling. It introduces the air that makes no-bake cheesecake set without eggs or an oven. Under-whipped cream = no structure = a soft cheesecake that won't hold a slice.
Cooled strawberry sauce must be at room temperature before it enters the filling. Heat breaks down whipped cream almost instantly, deflating all that structure you worked to build.
Overnight chilling is not a suggestion it's the recipe. Four hours is the absolute minimum, and the results at four hours versus eight hours are genuinely different: firmer edges, cleaner slices, and a more set center. The cheesecake rewards patience.
A springform pan allows you to release the cheesecake cleanly from the sides without compressing or damaging the filling. You can use a regular pan, but you will not be able to lift the cheesecake out in one piece.
See? You're already doing this right.
Elena's No-Fail Tips for No-Bake Strawberry Cheesecake Recipe
This is where I want to answer the questions I see most the worries that show up in every comment section. You're not alone in having them.
Why won't my no-bake cheesecake set?
This is the most common no-bake cheesecake problem, and it almost always comes down to one of three things: the cream cheese was cold (not fully room temperature), the whipped cream wasn't beaten to stiff peaks, or it simply didn't chill long enough.
The fix: use the wobble test. After 6 hours, give the pan a gentle shake. Firm edges, barely wobbling center = ready. If the whole thing moves more time. Another 2 hours usually does it. If you need it to set faster for an event, freeze it for 45 minutes (without the topping), then move it back to the refrigerator.
Can I use frozen strawberries?
Yes, but with care. Frozen strawberries hold significantly more water than fresh, and that moisture is what causes fillings to turn soft and runny.
If you're using frozen, thaw them in a colander, then press them between layers of paper towels until they feel almost dry to the touch. The drier, the better.
For the cooked topping, frozen strawberries actually work beautifully because you're cooking out the excess liquid anyway with the cornstarch. Save your frozen berries for the sauce and use fresh for the filling when you can.
How do I get clean, bakery-style slices?
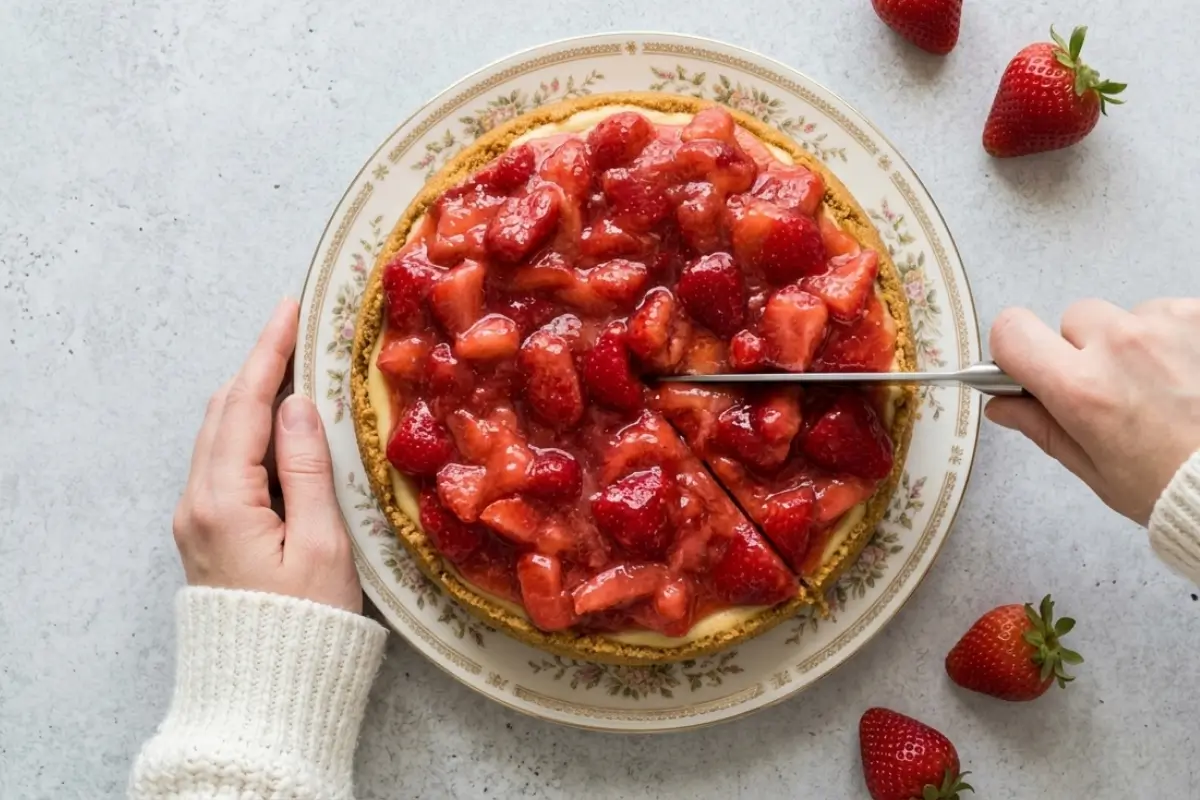
This is a trick worth knowing: run a sharp knife under very hot water, wipe it dry, then make your cut. Wipe the blade clean between every single slice.
The warmth helps the knife glide through the cold cream cheese filling without dragging or tearing.
Let the cheesecake sit at room temperature for about 10 minutes before slicing. A cheesecake straight from the refrigerator resists the knife less gracefully than one that's had a moment to breathe.
Can I make this ahead of time?
Not only can you you should. This cheesecake is genuinely better the morning after it's made. All the layers have settled, the filling has fully set, and the crust has had time to firm up.
Make it the evening before, keep it covered in the refrigerator, and add the fresh strawberry topping just before you serve it. That final step takes three minutes and makes all the visual difference.
Saving a Little Joy for Tomorrow
One of the things I love most about this cheesecake is how generous it is. It keeps well and travels well, which means there's almost always a reason to make it a day ahead.
In the refrigerator: Covered with plastic wrap, this cheesecake keeps for up to 5 days. The one thing to watch: if the strawberry topping sits on the surface for more than a day, it will begin to release liquid into the filling. Store the topping separately if you plan to keep it longer than overnight.
In the freezer: Prepare and chill the cheesecake fully in the springform pan without the topping. Wrap the whole pan in a layer of plastic wrap, then a layer of foil. Freeze for up to 2 months.
When you're ready to serve, transfer it to the refrigerator and thaw overnight. Add the fresh strawberry topping after it's thawed. The texture after freezing is a little denser than fresh but still wonderfully creamy.
For make-ahead entertaining: Make the whole cheesecake, minus the topping, the day before your event. Refrigerate overnight. The morning of, prepare your fresh strawberry topping and store it separately.
Assemble just before serving. You'll look wonderfully at ease, and your cheesecake will look like you spent the whole morning on it.
There's something warm about knowing dessert is already waiting in the refrigerator. Nonna always said a good host never makes guests wait while the cook panics. This cheesecake was made for that kind of calm.
The Most Heavenly Classic Strawberry Cheesecake
Ingredients
Method
- Preheat your oven to 325°F (160°C).
- In a medium bowl, stir together the graham cracker crumbs, granulated sugar, and brown sugar. Pour in the melted butter and stir until the crumbs are completely moistened.
- Press the crumb mixture evenly into the bottom and slightly up the sides of a 9-inch springform pan using the flat bottom of a drinking glass. Set aside.
- In a large mixing bowl, beat the softened cream cheese and 1 cup of sugar together on medium-low speed until creamy and smooth, scraping down the sides as needed.
- Gently stir in the sour cream and vanilla extract until just blended.
- Add the beaten eggs, one at a time, mixing on low speed only until each egg disappears into the batter.
- Pour the batter into your prepared crust and bake for 45 to 50 minutes until the edges are set and the center has a gentle wobble.
- Let the cheesecake cool completely at room temperature, then chill in the refrigerator for at least 6 hours or overnight before releasing the springform ring.
- Whisk 1/4 cup sugar and cornstarch together in a small saucepan, then stir in half of the strawberries, water, and lemon juice.
- Cook over medium-low heat, stirring constantly, until the berries soften and the sauce becomes thick and glossy.
- Remove from the heat and stir in the remaining strawberries and 1 tablespoon of butter. Let cool completely before spooning over the chilled cheesecake.
- Slice neatly and serve chilled.
Notes
Making Sweet Memories
I hope this recipe does for you what Nonna's strawberry cheesecake has always done for me it signals that summer is here, that something cool and sweet is waiting, and that the best desserts don't need to be complicated to be extraordinary.
You started today, maybe unsure if yours would set, unsure which strawberries to use, and unsure of what "right" looked like.
And now you know: you're looking for wet-sand crust, silky lump-free filling, stiff cream peaks, a cooled strawberry sauce, and a gentle center wobble after six hours in the refrigerator. That's it. That's the whole secret.
At AddCakes, we believe in memories, not masterpieces. This cheesecake isn't about impressing anyone it's about the moment it appears on the table, and someone smiles before they've even tasted it. That moment is yours. You made it happen.
Leave me a comment and tell me how it went. How long did you chill it? Did it slice perfectly? I read every single one, and I genuinely want to know.