
Classic New York baked cheesecake was not something Nonna grew up making. She was a woman of candied citrus peel and almond paste, of pastries so delicate they shattered at a touch.
But I remember the afternoon she tasted a proper New York slice for the first time: dense, ivory, cool, with nothing on top except its own quiet confidence. She set down her fork.
She looked at me. And she said, in that way she had of making a verdict sound like a love letter: seria. Serious.
She meant it as the highest possible compliment.
That was the moment New York cheesecake earned its place at our table, not because it was Italian, but because it was worthy. And every time I make it now, I think of her holding that plate, reconsidering everything she thought she knew about dessert.
I know what you might be thinking. Cheesecake feels demanding. It has a reputation for cracking, for sinking, for that heartbreaking moment when you open the oven and find a fault line running straight down the center.
I've been there. I've ruined cheesecakes. I've held my breath through the wobble test, not knowing what I was actually looking for.
But here is what I want you to know before you scroll to the recipe: this is one of those recipes that rewards patience, not skill.
Once you understand what you're looking for, what the wobble should feel like, why the cheesecake needs to cool slowly, and why you must, absolutely must, resist the toothpick, you will never second-guess yourself again.
This guide will teach you to read your cheesecake. And that changes everything.
The Key Ingredients for Classic New York Baked Cheesecake and Why Every One Matters
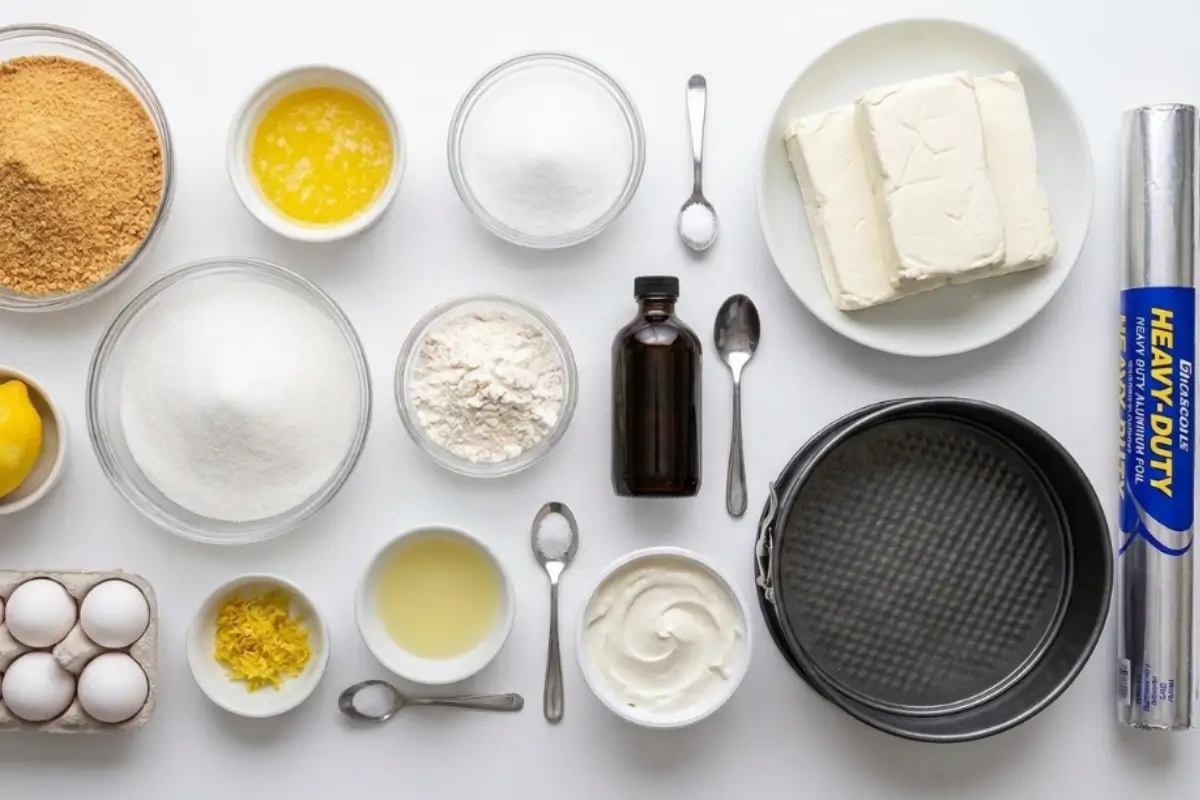
Take a breath. The ingredient list is shorter than you think, and every single item is doing something essential. Let me walk you through it.
Full-Fat Block Cream Cheese.
This is the one rule I won't bend, and I say that gently but firmly. You want the brick-style, full-fat cream cheese, not the tub, not the spreadable kind, and not the reduced-fat version.
The tub contains stabilizers and extra water that will make your filling loose and grainy instead of dense and silky. Four 8-ounce bricks. Room temperature.
This is where most cheesecake failures actually begin: cold cream cheese refuses to blend smoothly, and you end up overworking the batter just to chase out the lumps.
Set your cream cheese out at least two hours before you bake. You'll thank yourself.
Sour Cream
This is the defining ingredient of New York-style cheesecake and what separates it from lighter, airier versions that use heavy cream.
Sour cream gives the filling its characteristic density and that barely-there tang that makes each bite feel rich without being cloying. Full-fat here, too.
Eggs Added One at a Time
Three large eggs, room temperature. And this is important: you'll add them one at a time, mixing gently on low after each one. This is the moment in the recipe where the risk is highest.
Once the eggs go in, work quickly and carefully. Every extra minute of beating whips air into the batter, and air in cheesecake batter becomes cracks on the surface. More on this shortly.
Lemon Zest
I know it sounds optional, and technically you can skip it. But please don't. The zest doesn't make the cheesecake taste like lemon it just brightens the richness and lifts the whole flavor.
Without it, the cake can taste slightly flat. Just one teaspoon, freshly zested, makes a difference you'll notice.
Graham Cracker Crust
Classic for a reason. The slight sweetness and crunch are the perfect counterpoint to that creamy filling. If you're gluten-sensitive, crush gluten-free graham-style crackers or digestive biscuits instead they work beautifully.
Biscoff cookies are a gorgeous alternative if you want a warm, spiced note. The ratio stays the same.
Pure Vanilla Extract: Use real vanilla extract; imitation has a sharpness that doesn't belong in something this carefully made.
Step-By-Step Instructions: Your Confidence Roadmap
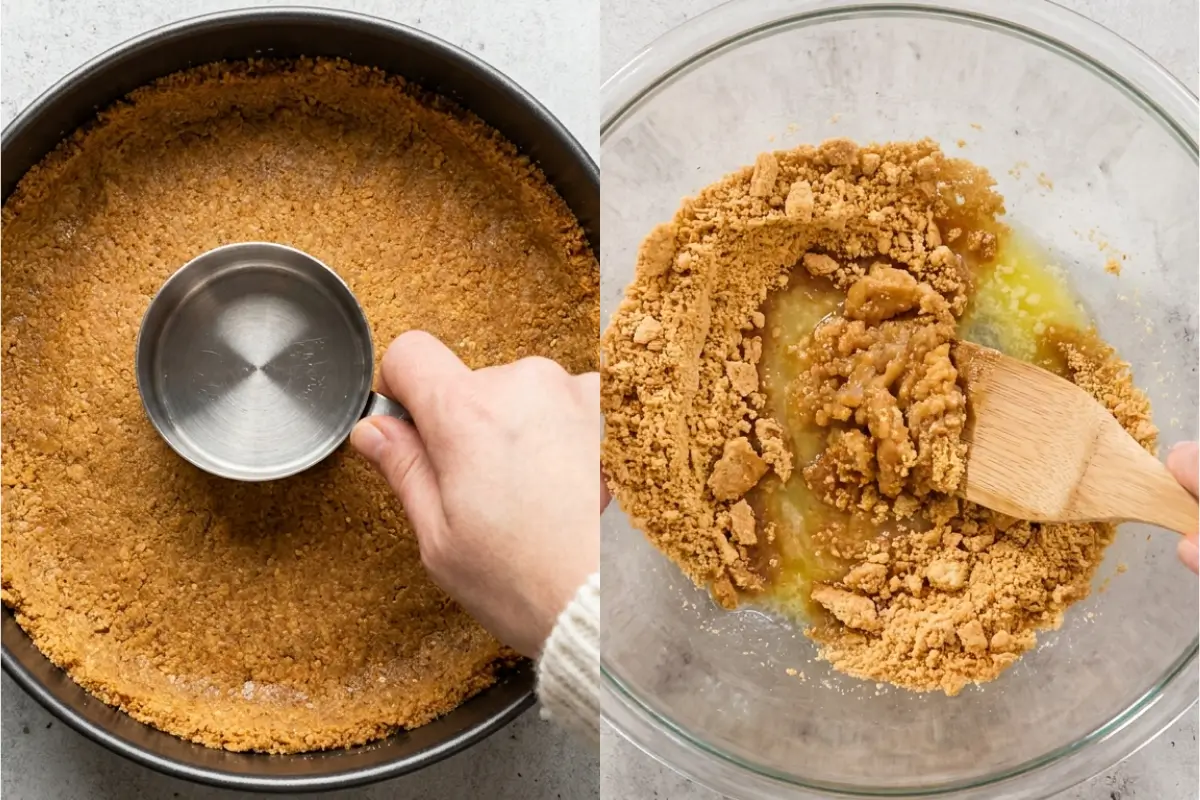
This is the part everyone overthinks, but you won't. Just follow the steps in order, and let me be your guide through each one.
Step 1: Prepare Your Springform Pan
Preheat your oven to 325°F (165°C). Wrap the outside of a 9-inch springform pan tightly in two layers of heavy-duty aluminum foil all the way up the sides.
This creates a waterproof seal for the water bath and prevents any leaks from ruining your crust. Lightly grease the inside of the pan.
Step 2: Make and Bake the Crust
Combine 1½ cups (about 12 full graham crackers, crushed) with 3 tablespoons of sugar and 6 tablespoons of melted butter. Mix until it looks like damp sand, then press firmly into the bottom of the prepared pan.
I use the flat bottom of a measuring cup to really pack it in. Bake for 10 minutes until it smells buttery and looks just set. Remove and let it cool while you make the filling.
Step 3: Make the Filling and Mix Gently
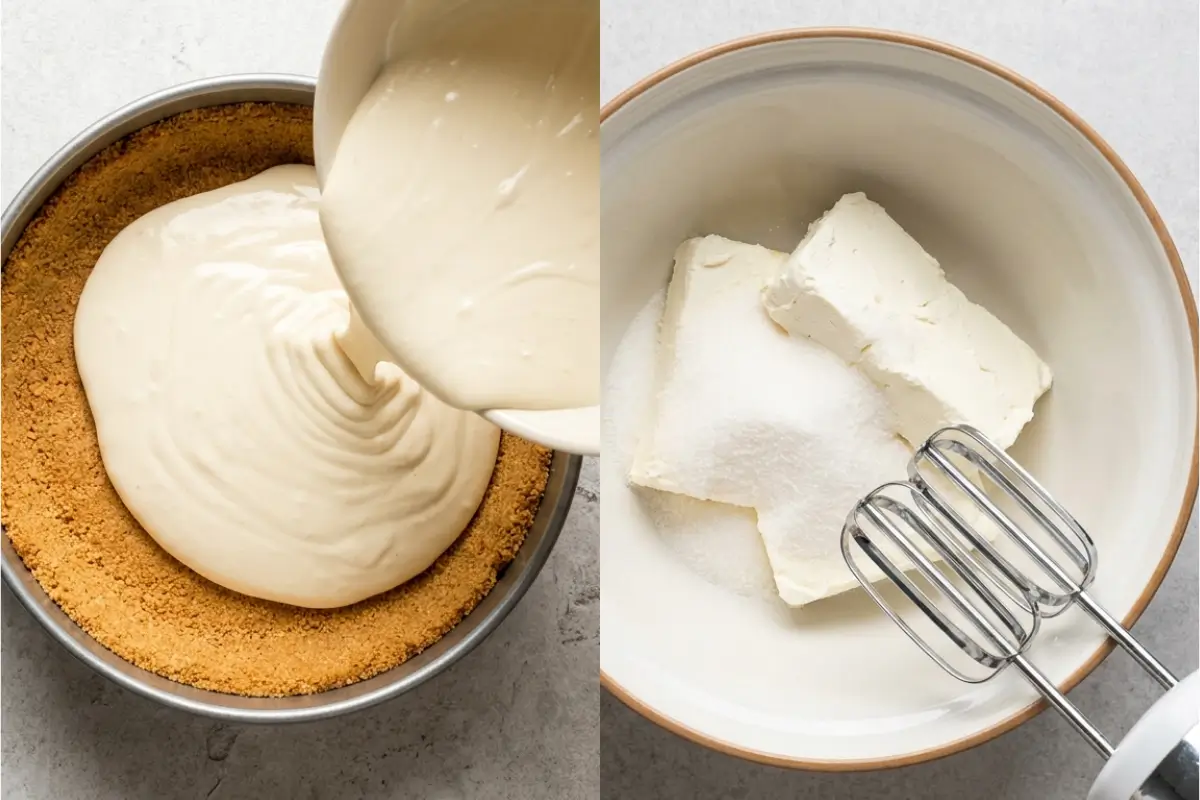
In a large bowl or stand mixer, beat the room-temperature cream cheese on medium-low speed until smooth, about 1 minute. Add the sugar and beat again just until combined. Scrape the bowl.
Now add the sour cream, vanilla, and lemon zest, mixing on low until just incorporated.
Here comes the moment that matters most: the eggs. Add them one at a time, on the lowest speed setting, mixing only until each egg disappears into the batter. No more. Stop.
Scrape down the sides and bottom of the bowl after each addition. Once all three eggs are in, give the batter one final gentle stir by hand with a spatula to make sure nothing is hiding at the bottom.
If your batter looks slightly lumpy after the cream cheese step, your cream cheese was too cold. This is the most common reason cheesecake batter fights back. Room temperature is not a suggestion.
Step 4: Prepare the Water Bath (Simpler Than You Think)
I hear the collective intake of breath every time I mention the water bath.
But I want to reshape the way you think about it: it's not a complication. It's wisdom. It's what generations of bakers figured out when they realized that cheesecake, like all things that matter, needs gentleness steady, even heat rather than the harsh blast of a dry oven.
Here's the simplest version: Fill a large roasting pan with about an inch of very hot tap water. Place it on the bottom rack of your oven. That's it. You don't have to submerge anything. The steam that rises creates a humid, gentle baking environment that dramatically reduces cracking.
If you want the classic method, place the springform directly in the water your foil wrap will protect the crust. Set the foil-wrapped pan in the roasting pan so the water comes halfway up its sides.
Either approach works. What doesn't work is a completely dry oven. The dry heat cooks the edges too quickly, the proteins in the eggs tighten and pull, and a crack forms as the center tries to catch up.
Step 5: Pour and Bake
Pour the filling over the cooled crust and smooth the top with a spatula. Tap the pan gently on the counter once or twice to release any air bubbles.
Bake at 325°F for 55–65 minutes.
Step 6: The Wobble Test: This Is How You Know
Here's the moment everyone asks me about. How do you know when it's done?
You wobble it. Gently shake the pan. Here's what you're looking for: the outer ring, roughly an inch from the edge, should look set and barely move.
The center, a circle about 2 to 3 inches across, should wobble like a bowl of chilled jello. A gentle, unified jiggle. Not a slosh. Not a liquid wave rippling from side to side. A slow, cohesive shimmy.
If the whole surface moves like water, it needs more time. If nothing moves at all, you've overbaked it.
And please, please do not insert a toothpick into the center of a cheesecake. That hole will crack the surface as the cheesecake shrinks during cooling. The wobble test is everything you need.
Step 7: Cool Slowly. This Is Where Patience Pays Off
Turn off the oven. Leave the cheesecake inside with the door cracked open (use a wooden spoon to prop it) for one full hour. Do not open the oven fully. Do not move the pan. Do not let a cold draft from an open window reach it.
The cheesecake will sink slightly as it cools this is completely normal and exactly what it's supposed to do. A sudden drop in temperature is what causes sinking and cracking. The gradual cool protects it.
Step 8: Room-Temperature Rest
After the oven rests, transfer the pan to a wire rack and let it come fully to room temperature for about another hour. Only now, once it's completely cool to the touch, should you cover it.
Step 9: The Overnight Chill
This is where the real magic happens. Cover the cheesecake loosely with plastic wrap and refrigerate for at least 6 hours.
Overnight is better. The texture transforms in the fridge it firms, it deepens, and it becomes the dense, cool, sliceable masterpiece you've been waiting for.
You're so close now. Keep going.
Why This Recipe Works: The Signs That Tell You You're Doing It Right
I love this section because this is where we talk about why, instead of just what. Understanding the reasoning is what transforms you from someone following instructions into someone who actually knows how to bake cheesecake.
Room-temperature ingredients create a smooth, unified batter: Cold cream cheese traps air pockets and resists blending, which means you beat it longer, which means more air, which means more cracks. Warm everything to room temperature, and the batter comes together in minutes, gently, exactly as it should.
Gentle mixing protects the structure: Cheesecake sets by the proteins in eggs coagulating slowly in the oven. Every extra minute of high-speed beating whips unnecessary air into the batter.
That air expands in the oven and then escapes, leaving cracks and craters in its wake. Mix on low. Stop when it's just combined. The batter should look smooth, not fluffy.
The wobble test is your most reliable doneness signal: The center will still look slightly underdone when the cheesecake is actually perfect that's not a bug- it's the point. Carryover heat will finish the cooking during the slow cool. If you wait until the center looks completely set in the oven, it's already overdone.
Slow cooling prevents collapse: The oven-rest and rack-rest aren't optional extras they're structural. A cheesecake that goes from 325°F to a cold countertop in five minutes will sink, crack, and separate from the crust edges.
Overnight refrigeration isn't patience for patience's sake: The proteins continue to set in the fridge. The flavors deepen. The texture tightens into that specific New York density that no shortcut can replicate. Serve it the same day, and it's good. Serve it the next day, and it's serious.
Elena's No-Fail Tips: Every Question You're Afraid to Ask
Here's where we sit down, refill our coffee, and I answer all the things you were too nervous to ask out loud.
Do I Really Need a Water Bath?
Honestly? Yes, but it doesn't have to be the complicated version. The water bath creates a humid oven environment that slows down the cooking at the edges, giving the center time to catch up. Without it, the edges set too fast, pull, and a crack forms.
The good news: you don't need to fully submerge the pan. Place a baking pan filled with hot water on the bottom rack of your oven. The steam that rises does most of the work.
Your springform sits on the rack above it, untouched. It takes thirty extra seconds of effort and can save your entire cheesecake.
If you want the full water bath, wrap your pan in two tight layers of foil, set it in a roasting pan, and add hot water until it reaches halfway up the sides. Either method works. Neither is as intimidating as you think.
Why Did My Cheesecake Crack?
This happens to everyone, including me, more than once. The three causes:
Overbaking. The most common. Waiting until the center looks fully set means it's already too firm. Cracks form as the cake cools and contracts. Use the wobble test, not your eyes.
Overmixing. Especially after adding the eggs. The extra air needs somewhere to go, and it goes through the surface. Mix on low, stop when combined.
A sudden temperature change. Opening the oven to a cold kitchen, then rushing the cheesecake to the fridge, causes the cake to contract rapidly and crack. The slow oven rest with a cracked door is your insurance.
And if a crack forms anyway? It happens. Top with fresh strawberries or a berry compote and call it rustic. It will taste the same.
How Do I Know When It's Done?
The wobble test (see Step 6 above). No thermometers necessary, no toothpicks permitted. The jiggle should be slow and unified in the center, about a 2- to 3-inch circle. Everything around it should look set.
You'll know it's right when the cheesecake moves as one piece rather than rippling like a liquid. Trust it. Trust yourself.
Can I Make This Cheesecake Ahead?
Not only can you I recommend it. Cheesecake is genuinely better the next day. Make it two or even three days before your gathering and store it tightly covered in the fridge. It only improves.
For longer storage, freeze individual slices wrapped tightly in plastic wrap and then foil. They'll keep for up to three months. Thaw overnight in the fridge and serve cold.
Can I Use Reduced-Fat Cream Cheese?
I love you, and because I love you, I'm going to be honest: no. Reduced-fat cream cheese has a different water content and protein structure.
The filling will be looser, the texture grainy, and the flavor won't have that rich, clean depth that makes New York cheesecake what it is. This is one recipe where the full-fat version is the only version.
Saving a Little Joy for Tomorrow
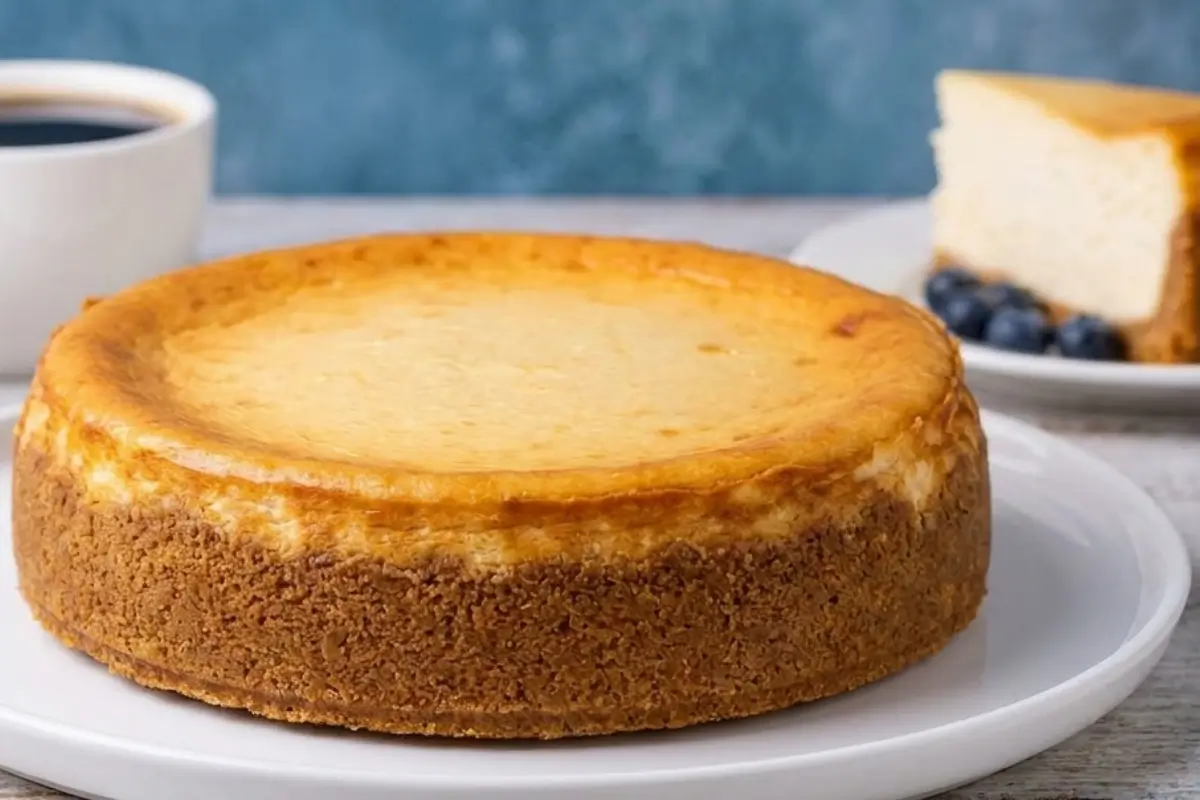
One of my favorite things about this cheesecake is how well it travels through time. Make it today, serve it three days from now, and it will be perfect or very close to it.
In the fridge: Store the whole cheesecake (or leftover slices) tightly wrapped for up to 5 days. Press a piece of plastic wrap directly onto any cut surface to prevent it from drying out.
In the freezer: Slice the cheesecake first, and wrap each piece individually in plastic wrap, then in foil. Freeze for up to 3 months. To serve, transfer a slice to the fridge the night before and let it thaw slowly. The texture holds beautifully.
For the holidays: Make this the day before, refrigerate overnight, and unmold the morning of your gathering. Add a fresh berry topping right before serving. You'll be entirely calm in the kitchen because the work is already done and nobody needs to know.
And if there happens to be a slice left over the next morning, that one's yours.
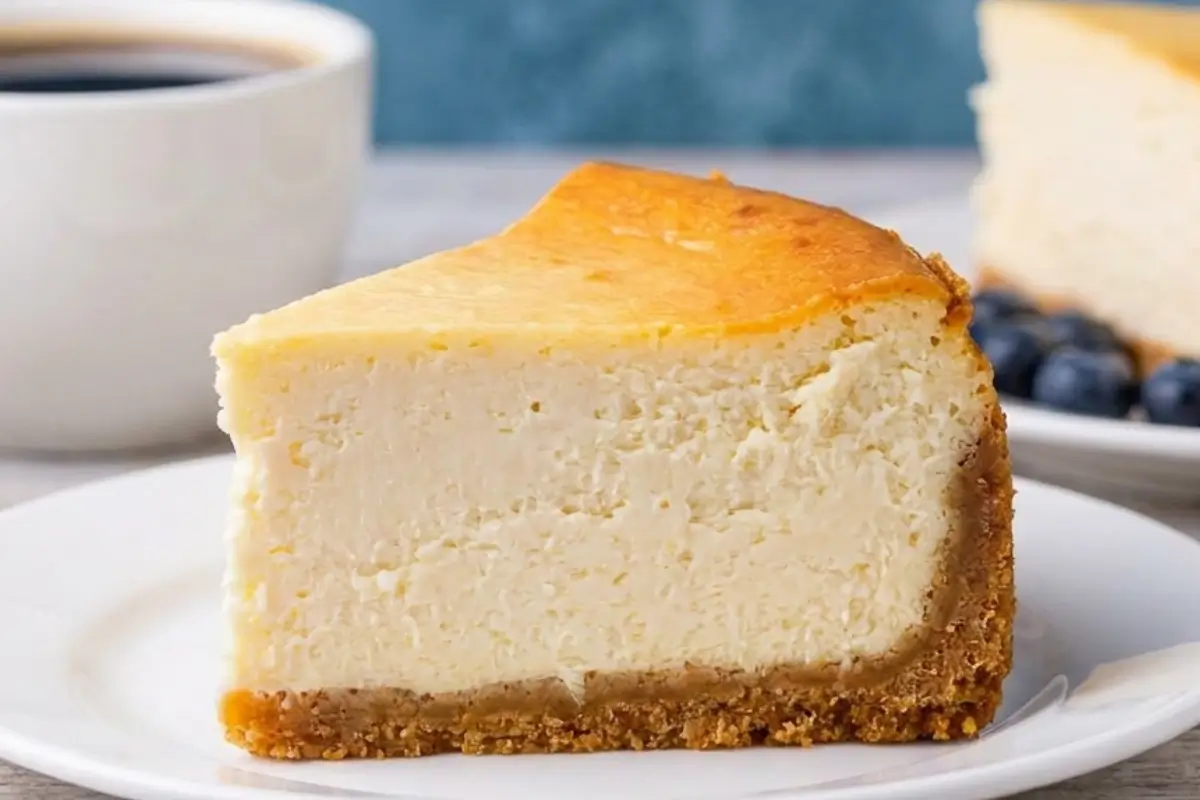
The Most Heavenly Classic New York Cheesecake
Ingredients
Method
- Preheat your oven to 375°F (190°C) and position your oven rack in the lower middle spot. Wrap the bottom and sides of a 9 or 10-inch springform pan with wide, heavy-duty foil, bringing it up to the rim so there are no open seams. Add a second layer of foil for peace of mind. Lightly mist the inside of the pan with nonstick spray.
- In a mixing bowl, stir together the graham cracker crumbs, melted butter, sugar, and salt until the texture feels like damp sand. Press the mixture firmly into an even layer along the bottom of the pan. Bake for 10 minutes until set, then remove and set aside.
- Lower the oven temperature to 325°F (165°C) and bring a kettle of water to a gentle boil on the stove.
- In a large bowl, beat the cream cheese, sugar, and flour on medium speed for about 1 minute until completely smooth, scraping down the sides so no lumps hide at the bottom. Mix in the vanilla, lemon zest, lemon juice, and salt on low speed just until blended.
- Add the eggs one at a time, mixing gently on low speed after each addition until incorporated. Gently fold in the sour cream until the batter is creamy and uniform.
- Place the wrapped pan inside a large roasting pan and pour the batter over your crust. Carefully pour the boiling water into the roasting pan until it reaches about 1 inch up the sides of the cake pan.
- Bake at 325°F (165°C) for 1 hour and 30 minutes to 1 hour and 45 minutes. The edges will be set, but the center should have a soft, gentle wobble when you nudge the pan.
- Turn off the oven, place the roasting pan on a wire cooling rack, and let the cheesecake rest in the warm water bath for 45 minutes. Remove the cake pan from the water, take off the foil, and run a thin knife gently around the top edge to release it from the sides.
- Cover loosely and chill in the refrigerator for at least 8 hours, or overnight, to let the texture become silky and firm. Unlatch the collar, slice with a warm, clean knife, and serve.
Notes
Making Sweet Memories
I go back to Nonna sometimes, and that plate, and the word seria. Serious. There was such tenderness in it.
A Southern Italian woman who had spent her whole life making food that spoke of her own land, recognizing that something from somewhere else entirely could still carry weight. Could still be real.
That's what I hope this cheesecake gives you not perfection, but that feeling. The cool, smooth slice. The clean edge. The way a table goes quiet when something truly good arrives at it.
You made this. With your hands, your patience, and your willingness to trust, wobble, and walk away.
At AddCakes, we believe in memories, not masterpieces. This cheesecake is both.
Tell me in the comments did yours come out crack-free? I can't wait to hear about it.
[…] 30 minutes. The glaze sets beautifully and completely hides any crack, and here's the secret: New York cheesecakes traditionally have exactly this topping. You haven't hidden the crack; you've added the finishing […]