
When I bake these chocolate chip cupcakes, I am instantly transported back in time. I still remember standing on a wobbly wooden stool in Nonna's sun-drenched kitchen, waiting for the exact moment she would hand me the mixing spoon.
The air always smelled like warm vanilla, and half the chocolate pieces would mysteriously disappear before they ever made it into the bowl. We all carry that deep longing to recreate those cozy, cherished memories for our own families, but I know how stressful modern baking can feel.
The last thing you want is the anxiety of pulling sad, dry muffins out of the oven when you just wanted to create a moment of joy.
I want to promise you right now: this recipe requires absolutely zero skill. Baking with your little ones is never about creating a flawless bakery display; it is about kid-approved joy and laughter in the kitchen.
We are leaving behind the fear of bringing collapsed, dense cupcakes to the Sunday family gathering. This tender, comforting recipe beautifully bridges the gap between generations, combining Nonna’s soulful traditions with battle-tested baking wisdom.
You are guaranteed moist, crumbly, perfectly suspended chips every single time, so take a deep breath and grab your mixing bowl—we are going to do this together.
The Key Ingredients For Chocolate Chip Cupcakes And Why They Matter
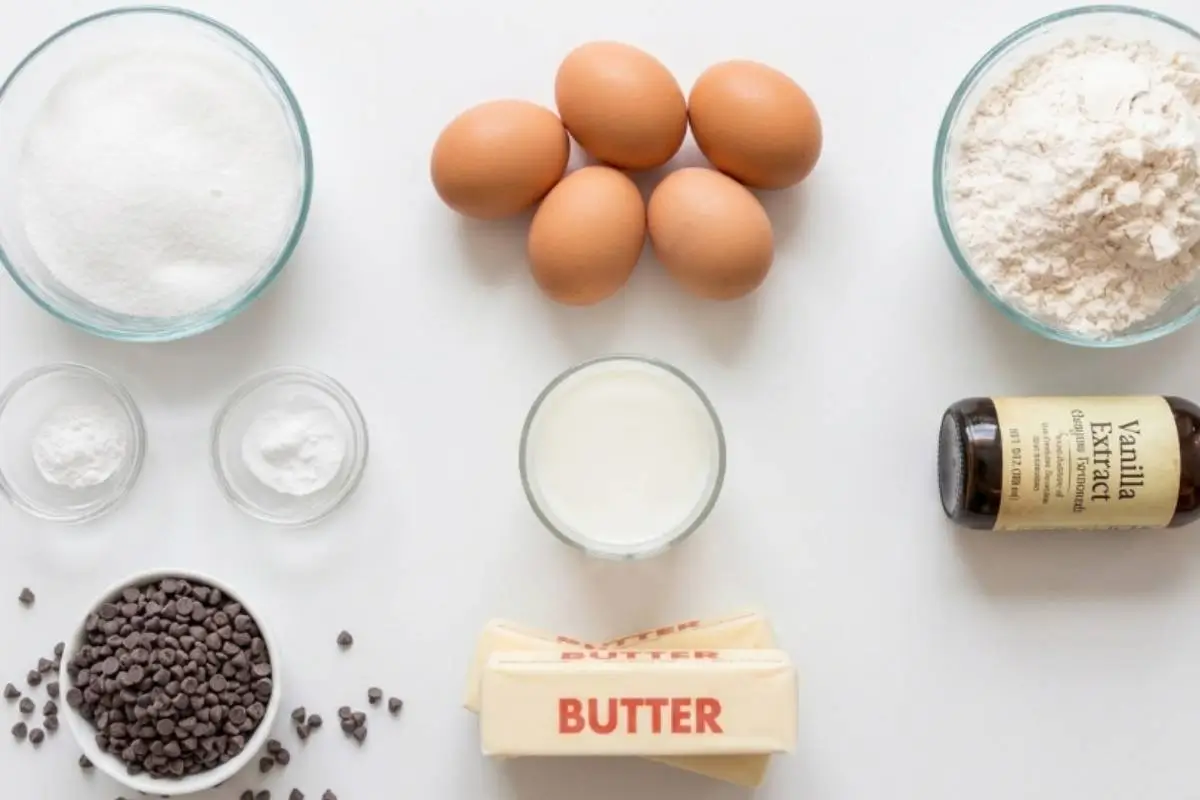
Gather your ingredients; this part is simpler than it looks. The secret to a beautiful bake is understanding why we use what we use. Let's look at what makes these little cakes so special:
The Room Temperature Rule: Your eggs and full-fat milk must be at room temperature. Most people miss this step, but it makes all the difference! It ensures proper emulsification, preventing a dense, heavy crumb and giving you that bakery-light lift.
The Great Butter vs. Oil Debate: You will see a lot of debate online about oil making a softer crumb. While that is sometimes true, this nostalgic recipe relies strictly on softened butter.
That is how we achieve that authentic, rich, sweet, nutty “just like Nonna's” flavor, perfectly balanced by the milk for lasting moisture.
Dietary Substitutions: Need this to be dairy-free or gluten-free? You can easily use a 1-to-1 gluten-free flour blend. Pair it with a soy milk-and-vinegar mixture to mimic the required acidity for a tender lift.
A Tiny Flavor Secret: Try adding just a tiny pinch of instant espresso powder to your dry ingredients. It won’t taste like coffee, but it will beautifully bring out the rich chocolate flavor!
The Golden Rule Step-by-Step Instructions
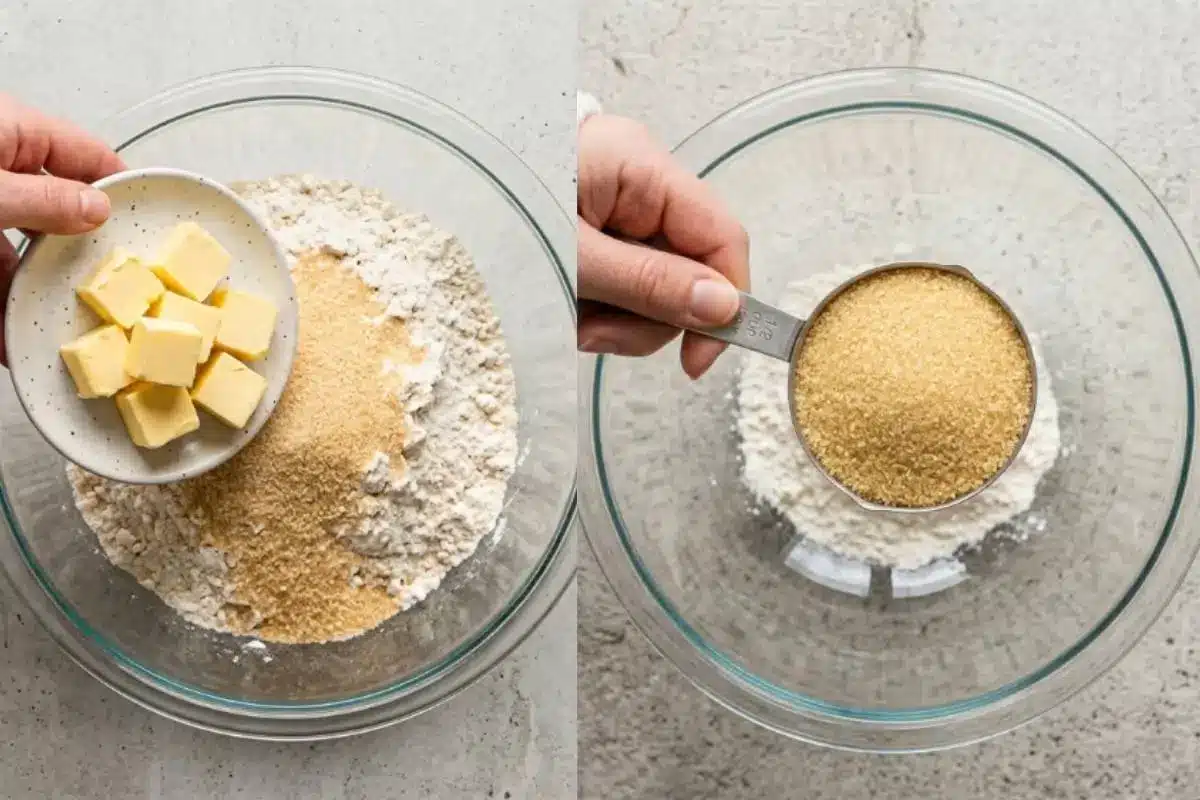
Here’s the part everyone overthinks. In my family, this is the moment everyone waits for—when the kitchen comes alive with the sound of the whisk tapping and the wooden spoon scraping the sides of the bowl.
We are going to use a brilliant "one-bowl" approach so you spend less time washing dishes and more time making memories.
Preheat the oven to 180°C (350°F/Gas Mark 4). Line a 12-hole muffin tin with paper cases.
Here’s the trick I learned the hard way: place a tiny pinch of uncooked rice beneath the paper liners before adding your batter! This viral trick absorbs excess grease and stops the liners from peeling away from the cake.
Beat the softened butter, golden caster sugar, two eggs, self-raising flour, baking powder, and vanilla extract in a large mixing bowl on medium speed for two minutes. If yours looks messy here, that’s completely normal! Just keep mixing until pale.
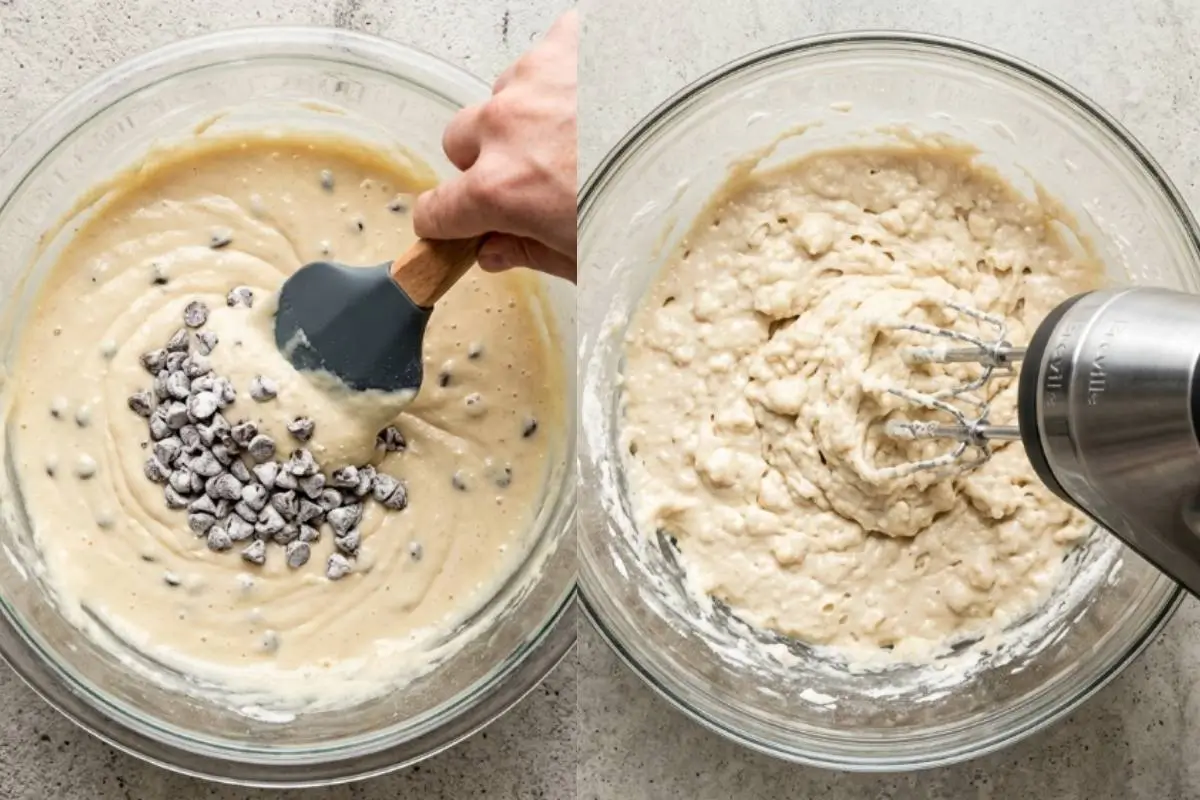
Pour in the milk and beat for ten more seconds. If it seems too thick, you’re still on the right track; it always looks like this at first. You want a soft, dropping consistency.
Fold the chocolate chips in very gently with a spatula. We want to stop as soon as they are spread out so we don't develop gluten, which can cause a tough texture.
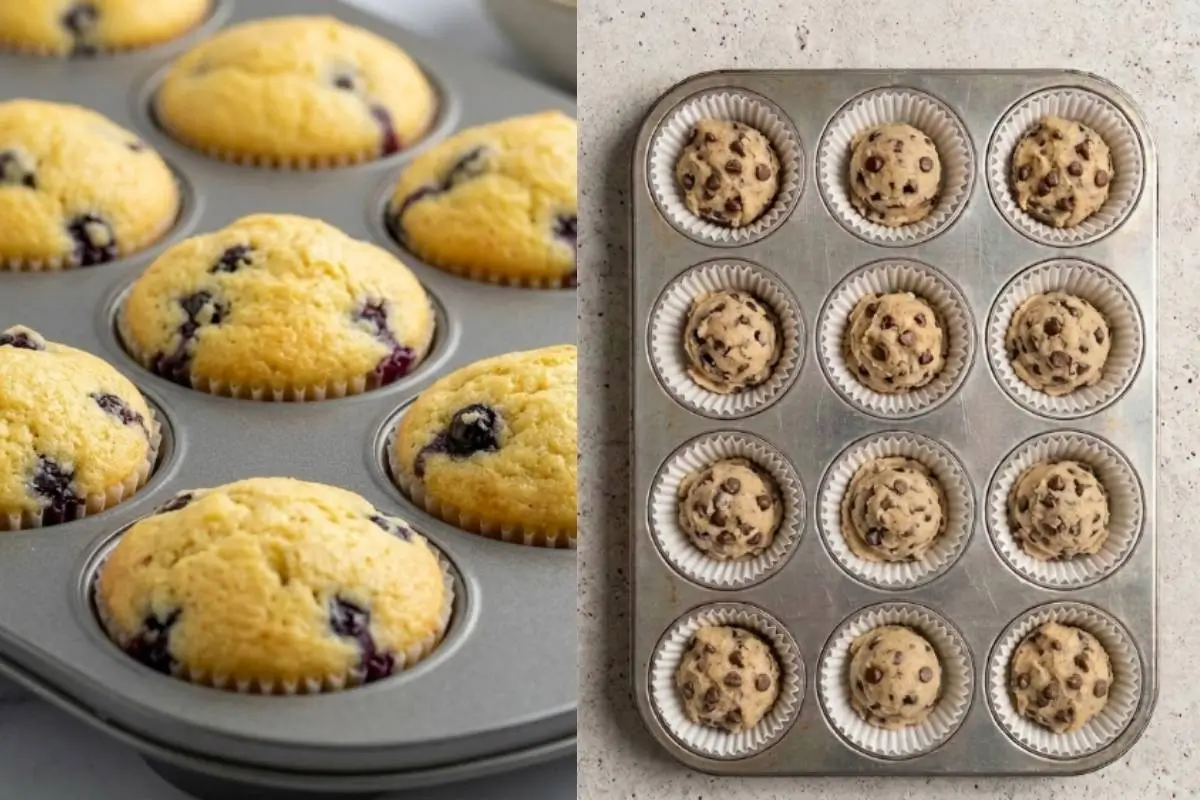
Divide the batter evenly, filling cases three-quarters full.
Bake in the centre of the oven for 15-20 minutes. Look for this cue: a tall, rustic dome with gorgeous golden edges. A quick test is the "spring-back" method—gently press the top of the cake with your finger. You'll know it's right when the sponge immediately springs back up!
Why These Chocolate Chip Cupcakes Work Every Time
Don't let the baking steps worry you. If you have ever felt defeated by sinking chips or a gummy base, leave those worries at the door. Here is the foolproof foundation behind this comforting recipe:
The Perfect Lift: The specific, tested ratio of self-raising flour to baking powder is what forces that ultimate, high-domed bakery aesthetic.
The Texture Saver: Scrape down the bowl halfway through your mixing! This ensures absolutely no dry flour bits are left behind, eliminating any risk of a gummy crumb structure.
The Secret to a Tender Crumb: Cooling them correctly is vital. Let them sit for exactly 5 minutes in the tin, then move them immediately to a wire rack. This prevents damp, sweaty bottoms!
Elena’s No-Fail Tips For Your Chocolate Chip Cupcakes
Take a deep breath—these gentle tweaks make everything foolproof.
How do I stop chocolate chips from sinking to the bottom?
I ruined this recipe twice before I figured this out! While my traditional recipe card mentions tossing the chips in flour (which is a wonderful classic trick), the modern, definitive guarantee is the "Top-Drop" method.
Simply hold back a handful of your chocolate chips. Pour your batter into the liners, and then gently place the reserved chips right on top before baking. Perfect suspension, every time!
Why do my cupcakes have "tunnels" or large air pockets inside?
This is such a common frustration! Tunnels happen when we overmix the batter or beat it too vigorously. Remember to mix just until the lumps disappear and the batter is smooth. Gentle hands make a tender cake.
How do I get that perfect "pull-apart" bakery texture?
Patience is your best friend here. Letting the cupcakes cool completely before applying that silky, cloud-like vanilla buttercream locks in the moisture.
This allows for that deeply satisfying, photogenic gooey center split. (By the way, if you love creamy textures, you’ll also love my ricotta-based desserts for your next weekend bake!).
Saving a Little Joy for Tomorrow: Storage Tips, Freezing & Make-Ahead Notes
Planning ahead is easier than you think, so rest easy. This recipe is absolutely perfect for slow Sunday afternoons, but we all know how chaotic the weekdays can get. Here is how you can easily save a little joy for later:
Make-Ahead: You can whip up the buttercream a full day in advance! Just store it in an airtight container in the fridge, and let it come to room temperature before giving it a quick re-whip. It makes family baking completely stress-free.
Freezing: These cupcakes freeze beautifully. You can freeze them unfrosted in an airtight container for up to 3 months.
Thawing: When you are ready for a treat, simply let them safely thaw at room temperature on the counter for a few hours. Because of our moisture-lock method, they won't become soggy, and that soft, delicate crumb will still yield perfectly to the bite.
The Most Nostalgic Chocolate Chip Cupcakes
Ingredients
Method
- Set the rack in the middle and preheat the oven to 180C (350F/Gas Mark 4). Line a 12-hole muffin tin with paper cases so they are ready as soon as the batter is mixed.
- Place the softened butter, golden caster sugar, two eggs, self-raising flour, baking powder, and vanilla extract into a large mixing bowl.
- Beat the ingredients on a medium speed for about two minutes until pale and the lumps of flour have disappeared. Scrape down the sides of the bowl halfway through to catch any dry bits at the bottom.
- Pour the milk into the bowl and beat for ten seconds until the batter reaches a soft, dropping consistency.
- Gently fold the chocolate chips into the mixture with a spatula, stopping once they are spread out so you do not break the air bubbles.
- Divide the batter evenly among the 12 paper cases, filling each about three-quarters full.
- Bake in the centre of the oven for 15-20 minutes until perfectly cooked. Check that the cakes are done by pressing the top with your finger to see if they spring back.
- Let the cupcakes sit in the tin for five minutes to firm up, then move them to a wire rack until cold to the touch. Do not leave them in the tin for too long or the bottoms will become damp and peel away from the paper.
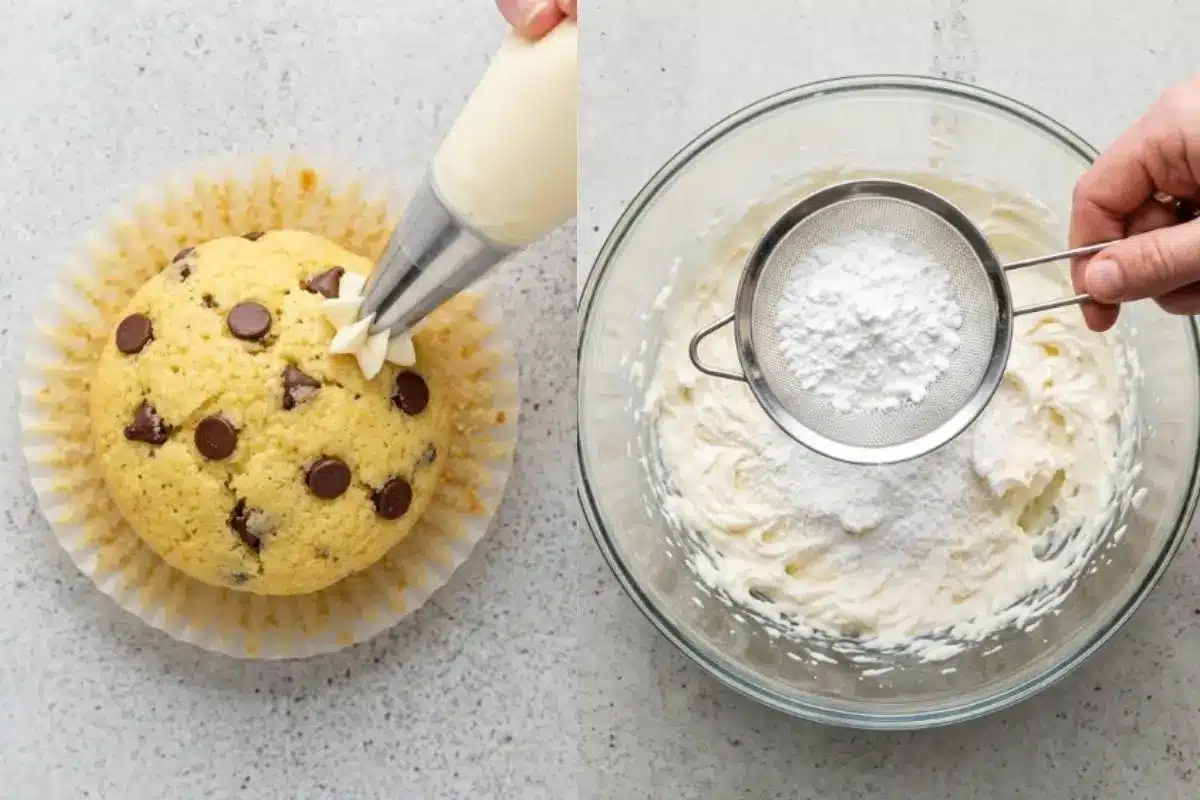
- For the buttercream, whisk the softened butter on high speed until it looks nearly white.
- Sift in half of the icing sugar and beat slowly at first. Add the remaining sifted icing sugar along with the milk and vanilla extract, continuing to beat for five minutes until the frosting is stiff enough to hold a peak but feels light.
- Once the cupcakes are cold, fit a star nozzle into a piping bag and fill it with the buttercream.
- Squeeze a generous swirl of frosting starting from the outside edge of each cake and moving into the centre, lifting quickly to create a point.
Notes
Making Sweet Memories
I still think about standing on that wobbly stool in Nonna's kitchen, covered in a smudge of flour, waiting for the bowl to be scraped. My frosting was never perfectly piped, and my hands were always sticky, but the kitchen was filled with so much love and laughter.
Baking with your little ones is never about creating a flawless bakery display. It is about building those sweet, tangible memories they will carry with them long after the treats are gone.
Save this foolproof, one-bowl recipe to ensure your next family Sunday is filled with sweet memories, not baking stress. Drop a comment below: Are you team semi-sweet, or do you prefer the rich depth of dark chocolate chips?
[…] Non-Negotiables: Mini chocolate chips are absolutely required. Not just for that classic crunch, but because regular-sized chips will […]