
Gluten-Free Cheesecake is one of those desserts that has a quiet, almost magical power to make everyone at the table feel remembered. I still remember the heavy click of Nonna's oven door and the way the smell of warm cinnamon would drift through our small kitchen on Sunday afternoons, soft and sweet, like a promise.
She never fussed over whether the top was perfectly smooth. She never worried out loud about cracks or wobbles. She just pulled that golden cheesecake from the oven, set it on the worn wooden table, and smiled at whoever happened to be sitting closest. That was the whole point not perfection, but the people.
I know how fast your week moves. I know there are afternoons when a slow baking project feels like a luxury you cannot afford. But this recipe this one was built for exactly that feeling.
It is gentle, it is forgiving, and it asks very little of you in return for something truly beautiful. Whether someone at your table is avoiding gluten by necessity or by choice, this cheesecake will make them feel anything but left out. It will make them feel like the guest of honor.
If the center wobbles a little when it comes out of the oven, that is not a mistake. That is the cheesecake doing exactly what it should. And if a small crack appears on top, a handful of fresh summer berries will cover it so beautifully that no one will ever know or care.
The Key Ingredients for This Gluten-Free Cheesecake and Why They Matter
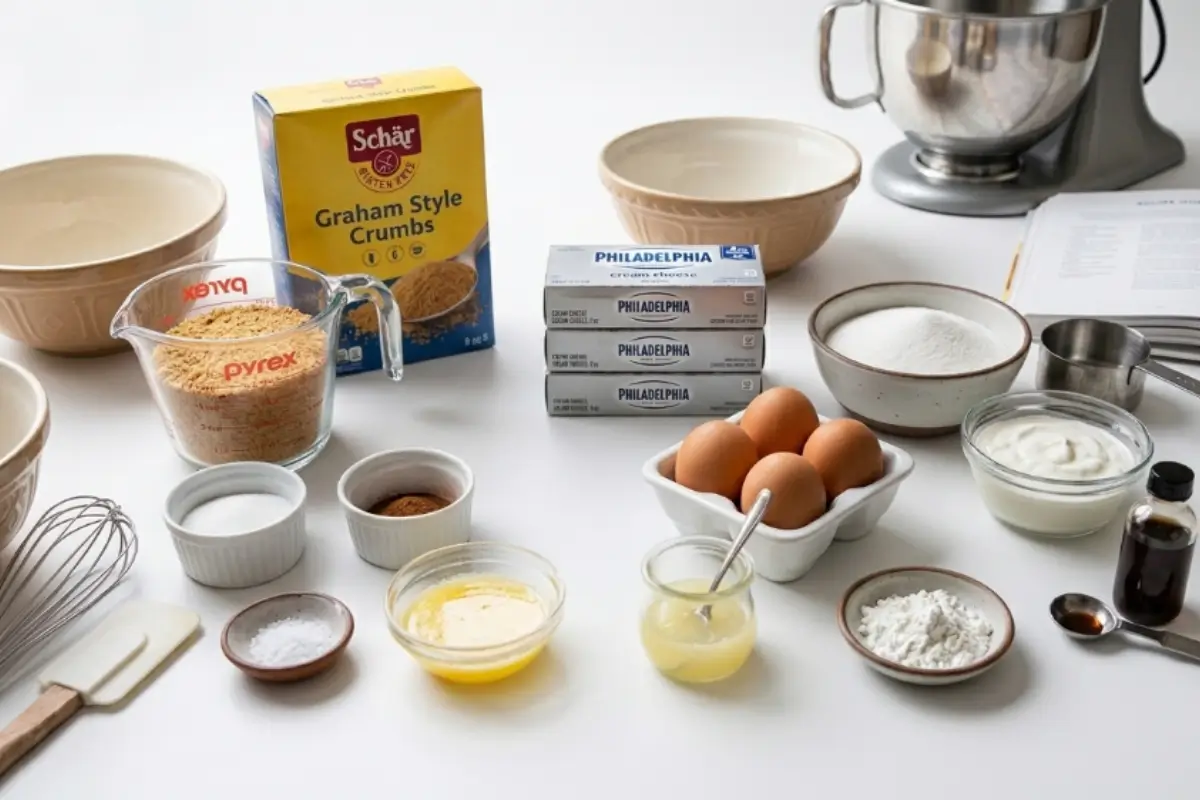
This part is simpler than it looks, I promise you.
Every ingredient in this cheesecake earns its place.
Understanding what each one does will give you the quiet confidence to move through this recipe without second-guessing yourself at every step, and that confidence is exactly what Nonna always said made the difference between a dessert that was merely eaten and one that was remembered.
Gluten-free graham crackers are the heart of the crust.
Standard graham crackers contain wheat flour, so swapping them out is the one essential change that makes this cheesecake safe for gluten-sensitive guests.
Most major grocery stores now carry at least one brand; look near the regular graham crackers or in the gluten-free aisle. The texture of the finished crust is indistinguishable from a traditional one buttery, faintly sweet, with that warm whisper of cinnamon.
Full-fat cream cheese is non-negotiable here.
Low-fat versions contain more water and stabilizers, which can lead to a filling that never quite sets the way it should. Use the block kind, not the spreadable tub the density is different, and it matters.
Let it sit on the counter for at least an hour before you begin. Cold cream cheese fights the mixer and creates lumps that no amount of beating can fully smooth out.
Cornstarch is the quiet hero of this recipe.
Just one tablespoon helps the filling set without becoming stiff or rubbery, and it gives the eggs a little protection against overcooking, which means a creamier, more forgiving result. Do not skip it.
Room-temperature eggs are just as important as the cream cheese temperature.
Cold eggs can cause the filling to seize slightly as they're incorporated, leading to tiny air pockets that expand and crack during baking. Set them on the counter alongside the cream cheese while you get everything else ready.
Sour cream adds a gentle tang that keeps the filling from feeling too heavy, and it softens the texture beautifully. If your household is dairy-sensitive, a full-fat plain coconut yogurt can stand in without dramatically changing the flavor the filling will be a touch lighter, but still very lovely.
Lemon juice is not there to make this taste like lemon cheesecake.
It brightens the filling, balancing the richness of the cream cheese the way a pinch of salt balances something sweet. Two teaspoons is just enough.
A note for those baking dairy-free: A high-quality dairy-free cream cheese (the block variety, not the spread) and a coconut-based sour cream alternative can work in this recipe. The texture may be slightly softer, so plan to chill overnight rather than just four hours. The result is still deeply satisfying.
You are already further along than you think. Keep going.
The Golden Rule Step-by-Step Instructions
Here is the part everyone overthinks but you absolutely will not.
This cheesecake method is built around two simple principles: keep things gentle, and let time do the work. You do not need a water bath. You do not need special equipment beyond a 9-inch springform pan and a hand or stand mixer. What you need is a little patience, and this recipe will reward every minute of it.
This cheesecake method is built around two simple principles: keep things gentle, and let time do the work. You do not need a water bath. You do not need special equipment beyond a 9-inch springform pan and a hand or stand mixer. What you need is a little patience, and this recipe will reward every minute of it.
Step 1: Build your crust
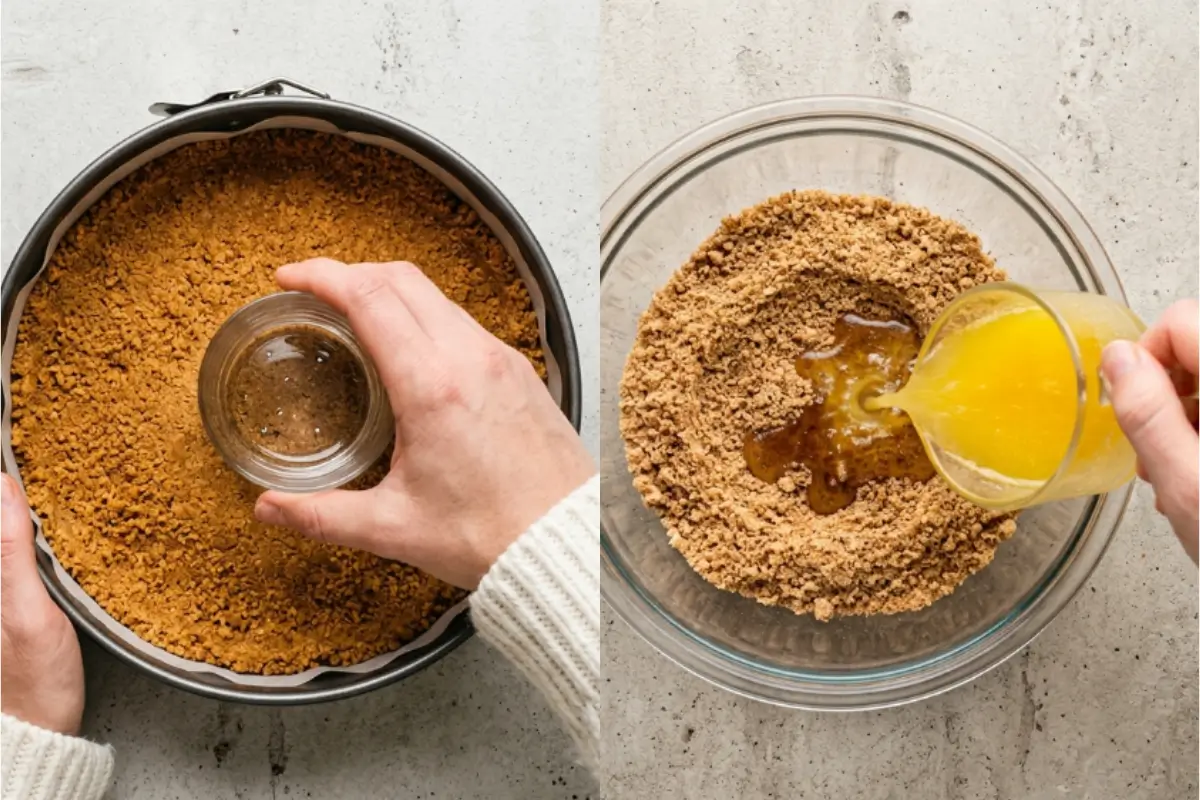
Preheat the oven to 350°F and butter your springform pan. Blitz the gluten-free graham crackers in a food processor until they are fine, even crumbs, with no large shards remaining.
The smell of this alone is deeply nostalgic, warm and slightly caramelized even before the butter goes in. Stir in the sugar, cinnamon, and salt, then pour in the melted butter and mix until the crumbs hold together when pressed between your fingers. It should feel like damp beach sand.
Press the mixture into the bottom of the pan firmly and evenly. I use the flat bottom of a measuring cup to pack it down this keeps the crust from crumbling when you slice. You will know it is right when the surface feels compact, and no loose crumbs shift around.
Step 2: Pre-bake the crust
Bake the crust for 10 to 12 minutes, just until the edges turn a shade deeper gold and the whole kitchen smells of toasted butter and cinnamon. Pull it out and let it cool for a full 10 minutes before you add the filling. This matters: pouring warm filling onto a warm crust can make the crust soggy. Leave the oven on you will need it again shortly.
Step 3: Make the filling
Here is the trick I learned the hard way: after more than one cheesecake came out with a grainy texture I could not quite explain, everything must be at room temperature before a single mixer blade touches it. The cream cheese and the eggs both.
When they are warm enough, the filling comes together in under two minutes and feels like silk. When they are cold, you have to beat longer, which beats in air, which causes cracks.
Beat the softened cream cheese and sugar on high speed for one to two minutes. The mixture will turn pale and fluffy, and you should see no lumps at all. If you spot a lump, keep going for another thirty seconds.
Add the eggs one at a time, and this is where you must be disciplined: mix each egg only until it just disappears into the batter. Most people miss this step.
Overbeating after the eggs go in is the single most common cause of cracking it traps air that expands in the hot oven and then collapses as it cools. Scrape down the sides of the bowl between each addition with a rubber spatula.If your filling looks very smooth and just slightly thick at this point, you are doing beautifully.
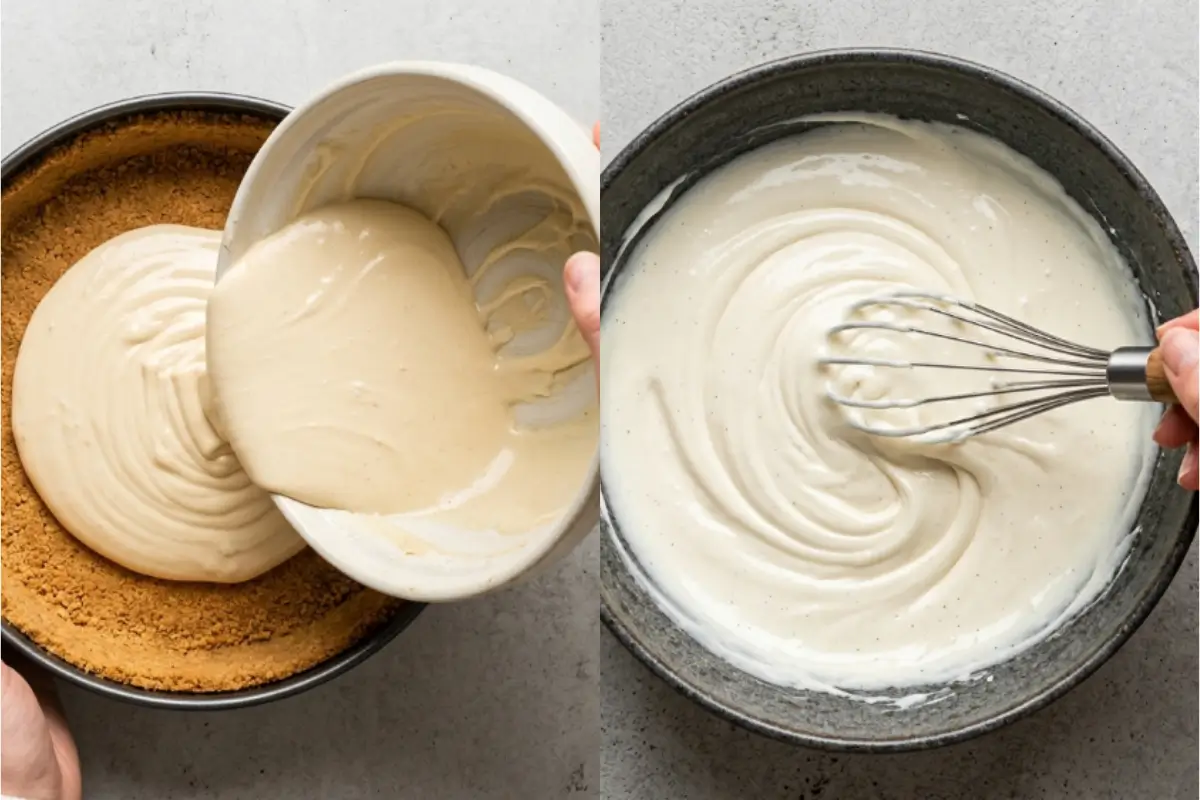
Add the sour cream, lemon juice, cornstarch, and vanilla, and fold them in gently not a vigorous stir, just enough to bring everything together into a unified, glossy batter.
Step 4: Bake with care
Pour the filling over the cooled crust and smooth the top with a light hand. Place the cheesecake in the oven and immediately turn the temperature down to 300°F.
This drop in temperature is intentional: the initial heat from the 350°F oven gives the crust a head start, and the lower temperature allows the filling to set slowly and evenly from the outside in.
Bake for 55 minutes to one hour. At the end of this time, open the oven door just long enough to check: the edges should be set and slightly puffed, and the center, about a two- to three-inch circle, should still have a gentle, almost liquid wobble when you nudge the pan.
This is not underbaking. This is the wobble test, and a gentle wobble means the cheesecake will be perfectly set after it rests and chills. An overset center looks like Jell-O when it comes out, and it will feel dense and dry after chilling.
Step 5: The slow cool
Turn off the oven. Do not open the door. Leave the cheesecake inside for a full hour. This is the step that replaces the need for a water bath the gradual, gentle cooling prevents the dramatic temperature shock that causes the surface to crack. Nonna never used a water bath in her life, and neither will you.
After the hour is up, remove the cheesecake from the oven. Run a thin knife around the inside edge of the pan to release the filling from the sides, then leave the cheesecake in the pan on the counter until it reaches room temperature.
Cover it and move it to the refrigerator for at least four hours. Overnight is always better: the flavors deepen, the texture firms just a little more, and by morning you will have something that slices cleanly and beautifully.
See? You are doing wonderfully. The hardest part is simply waiting.
Why This Gluten-Free Cheesecake Works
Take a breath this section will explain the why behind the what, and it will make you a more confident baker every time you return to this recipe.
The most common question people ask about cheesecake is some version of why did mine crack?
And the answer, almost without exception, is one of three things: the filling was overbeaten after the eggs were added, the oven temperature was too high, or the cheesecake cooled too quickly.
This recipe is designed to prevent all three: the low bake temperature, the minimum mixing after each egg, and the slow in-oven rest work together to protect the surface.
The cornstarch protects the eggs.
When eggs are heated quickly, their proteins can tighten and squeeze, which is why overcooked eggs turn rubbery. Cornstarch coats those proteins and slows that process, keeping the filling tender and creamy well past the point where it might otherwise overcook.
The temperature drop is not an accident.
Starting at 350°F gives the crust a proper bake, then dropping to 300°F allows the delicate filling to set gently rather than bake aggressively. Lower and slower is the whole philosophy here.
Room-temperature ingredients create an emulsified filling.
When cream cheese and eggs are both at the same temperature, they blend into each other rather than fighting, which means you need far less mixing, and less mixing means less air, and less air means fewer cracks.
The wobble test is more reliable than a toothpick.
A cheesecake is done when the outer ring is set and firm, and the center two to three inches still moves like softly set custard when you nudge the pan. If the entire surface is set and solid, the cheesecake is already slightly overdone and will feel dense after chilling. Trust the wobble.
The slow cool is the most important step in the whole recipe.
Cheesecakes crack because of thermal shock: a sudden temperature change causes the proteins in the filling to contract rapidly and pull apart. Leaving the cheesecake in the turned-off oven for an hour eliminates that shock entirely. The temperature drops so slowly that the filling has time to finish setting without ever being stressed.
This is where the magic lives. Right here, in the patience.
Elena's No-Fail Tips
Why does my cheesecake crack on top?
Cracks are the thing people worry about most, and almost every crack has the same cause: too much air in the batter from overbeating. The moment you add the eggs, treat the mixer like a friend you are asking to be gentle.
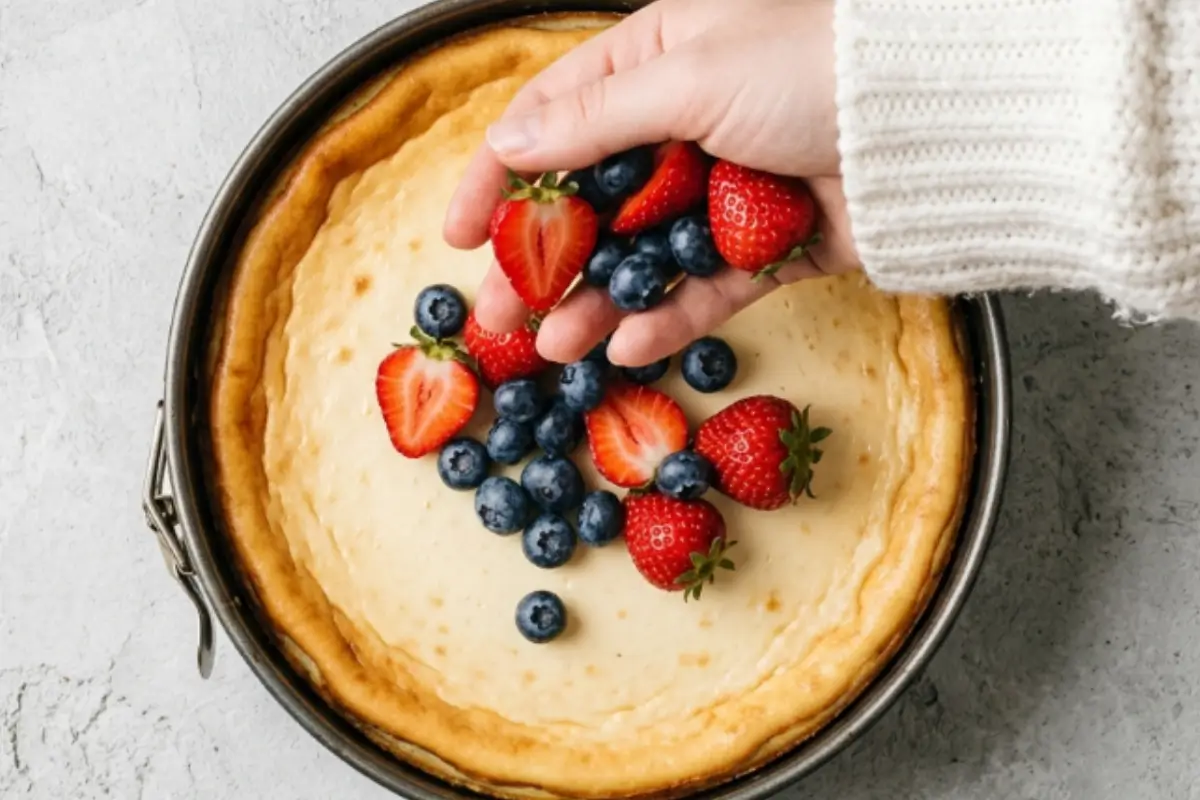
Mix each egg just until it is no longer visible, then stop. Scrape down the sides, add the next one, and repeat. If a crack does appear despite your best efforts, it is not a failure it is a cheesecake asking to be covered with something beautiful.
Fresh raspberries, sliced strawberries, a spoonful of blueberries still warm from a gentle simmer in a little honey. Nonna's cheesecake had a crack almost every single time, and no one ever once mentioned it.
Do I really need a water bath?
No. A water bath is a technique borrowed from professional baking that uses steam to keep the oven environment humid and prevent rapid cooling at the surface.
It works, but it is also fussy springform pans are notorious for letting water seep in, which can make your crust soggy and your afternoon very frustrating. The slow in-oven rest in this recipe accomplishes exactly the same thing without any of the risk. Trust the process.
Can I make this cheesecake ahead of time?
Yes, and in fact, you should. This cheesecake is genuinely better on day two. The filling has had time to firm and settle into itself, the flavors have deepened, and the crust has found its footing.
Make it the day before you plan to serve it, cover it well, and leave it in the refrigerator overnight. You will be grateful you did, especially if you are making it for a gathering and want the morning of to feel calm.
My filling has tiny lumps. What happened?
Almost certainly, the cream cheese was not fully at room temperature before you began mixing. Cold cream cheese creates lumps that are nearly impossible to beat out without overworking the batter.
If you notice lumps before the eggs go in, you can press them out against the side of the bowl with a spatula, or push the mixture through a fine mesh sieve. After the eggs are in, let any remaining small lumps be they will largely smooth out during baking and will not affect the flavor at all.
Saving a Little Joy for Tomorrow
This section is simpler than it looks and honestly, this is where things get even better.
In the refrigerator: Once the cheesecake has fully chilled and set, cover the pan or transfer slices to an airtight container. It will keep beautifully for up to five days. The texture on day two and day three is often even creamier than on day one, as the filling settles and the flavors knit together.
Freezing the whole cheesecake: Gluten-free cheesecake freezes remarkably well. Once it is fully set and chilled, remove it from the springform pan, wrap it tightly in a layer of plastic wrap and then a layer of foil, and freeze for up to two months.
When you are ready to serve, move it to the refrigerator the night before and allow it to thaw slowly overnight. Add your toppings only after it has thawed completely.
Freezing individual slices: If you like having a single slice ready on a quiet evening, and I think this is one of life's most overlooked pleasures, slice the cheesecake first, lay the slices on a parchment-lined tray, and freeze them uncovered until solid (about two hours).
Then wrap each slice individually and store them together in a freezer bag. They keep for up to six weeks and thaw on the counter in about thirty minutes, or in the refrigerator overnight.
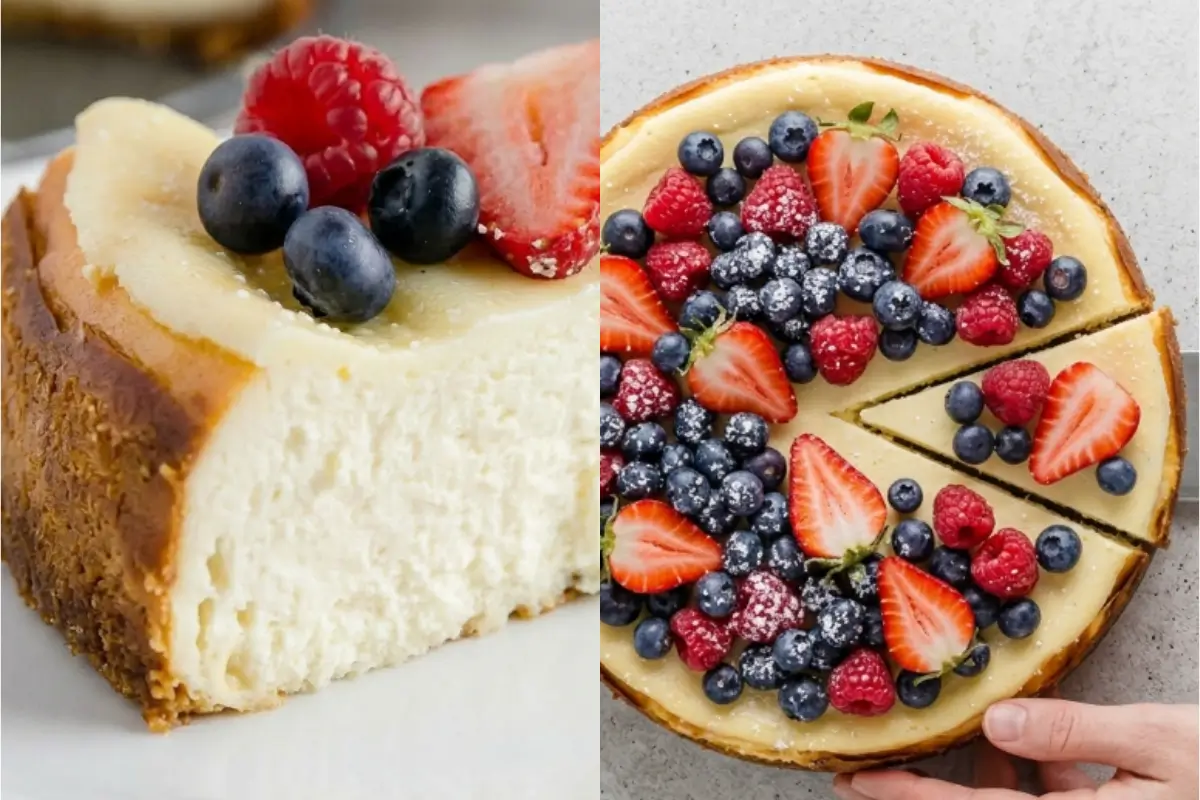
Make-ahead timing: The cheesecake can be made up to three days before you plan to serve it and kept covered in the refrigerator. Add the berry topping on the day of serving so the fruit stays vibrant and the powdered sugar does not dissolve into the surface.
A thought for anyone feeding a crowd: This cheesecake travels well straight from the refrigerator, springform ring still on, covered loosely with foil. Remove the ring at the destination, add the toppings, and set it at the center of the table. It will look and taste as if it came from somewhere very special.
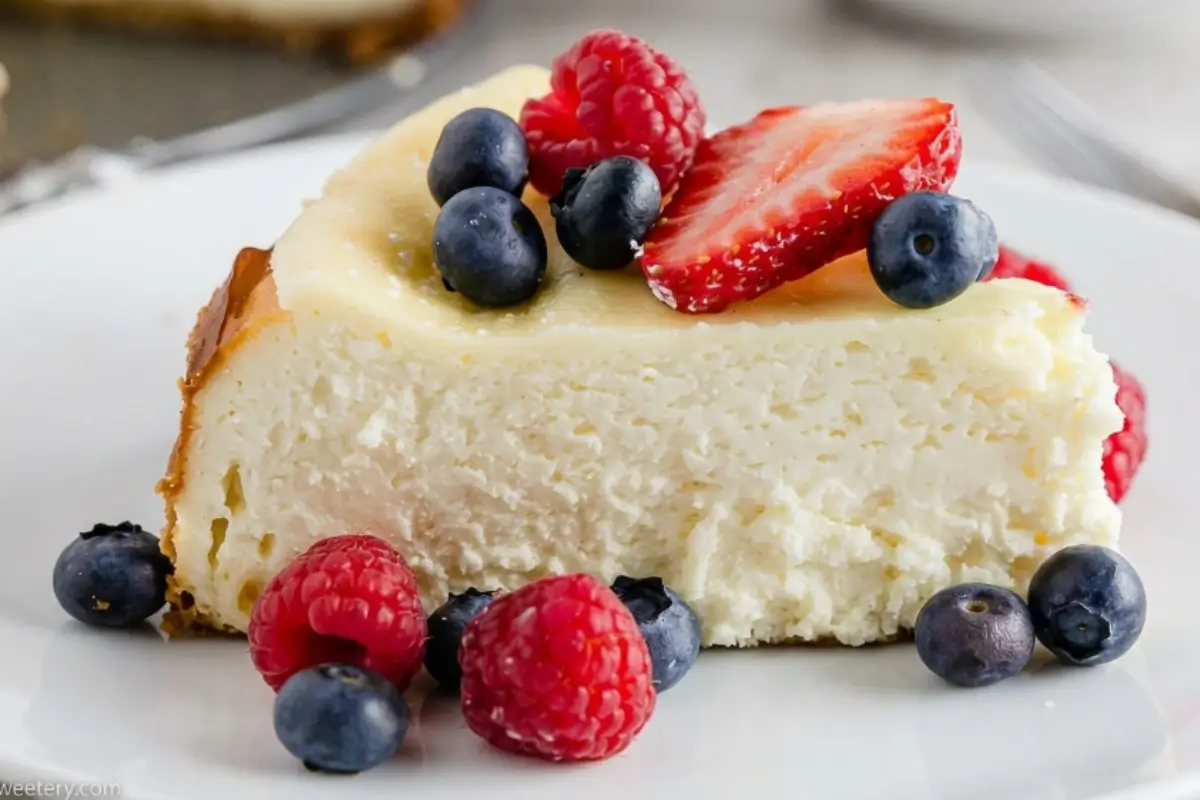
The Most Comforting gluten free cheesecake
Ingredients
Method
- Preheat your oven to 350 degrees F. Lightly butter the bottom and sides of a 9-inch springform pan and set it aside.
- Place your gluten-free graham crackers into a food processor and process them until they are finely ground. Pour these crumbs into a medium bowl and whisk them together with the sugar, cinnamon, and kosher salt.
- Pour the melted butter over the top of the crumb mixture and mix it all together until it feels like wet sand.
- Press this graham cracker mixture firmly and evenly into the bottom of your prepared springform pan.
- Bake the crust for 10 to 12 minutes, just until it is lightly browned and smells wonderful. Take it out of the oven and let it cool for at least 10 minutes while you get the filling ready. Leave the oven on.
- To make the beautiful filling, put your softened cream cheese and sugar in a large mixing bowl. Beat them on high for 1 to 2 minutes until the mixture is incredibly light and creamy.
- Add the room temperature eggs one at a time, making sure to scrape down the sides of the bowl between each one.
- Gently mix in the sour cream, lemon juice, cornstarch, and vanilla just until everything is combined and smooth.
- Pour this rich cheesecake filling right over your slightly cooled crust and smooth the top gently with a spatula.
- Place the cheesecake in your preheated oven and immediately turn the temperature down to 300 degrees F. Bake for 55 minutes to an hour. The edges should look set, but the center will still have a little wobble to it.
- Turn off the oven completely and let the cheesecake sit in there for one more hour. This gentle cooling process helps keep the top smooth.
- Take the cheesecake out of the oven. Carefully run a knife around the edges to loosen it from the pan, but leave it right in the pan to cool completely to room temperature.
- Cover the cheesecake and let it rest in the refrigerator for at least 4 hours, though overnight is always best. Remove the cheesecake from the pan and top with fresh berries and powdered sugar when you are ready to serve.
Notes
Making Sweet Memories
There is something about pulling a cheesecake from the oven that feels like a small act of love, not because it is difficult, but because you chose to spend that afternoon doing it for someone.
I think of Nonna every time I set a cheesecake on the table. Not because she was a perfect baker she was not, and she would have laughed at the suggestion.
But because she understood something essential: that the people sitting around the table do not remember whether the top was smooth. They remember that you made it.
They remember the smell of the kitchen, the weight of a good plate, the first bite that made them close their eyes for a second. That is what they carry with them.
At AddCakes, we believe in memories, not masterpieces. This gluten-free cheesecake is not about following rules it is about giving everyone at your table a slice of something made with an open heart.
The wobble in the center, the crack covered by berries, the imperfect dusting of powdered sugar: these are not mistakes. These are the fingerprints of someone who cares.
Simply add cake and let the joy take care of itself.
What is a dessert from your childhood that you still love to make for the people you love? I would be so happy to read your stories below.
[…] frosting is naturally gluten-free, so it works for everyone at the […]
[…] and crunch are the perfect counterpoint to that creamy filling. If you're gluten-sensitive, crush gluten-free graham-style crackers or digestive biscuits instead they work […]
[…] Gluten-free? Swap the graham crackers for any certified gluten-free graham-style cracker, and the rest of the recipe is naturally gluten-free. […]
[…] Here's my honest answer after baking this cake more times than I can count: flour gives very slightly more structure; cornflour gives a silkier, more tender interior and is naturally gluten-free. […]